Introduction
In this installation guide we have provided step by step instructions to remove the 27WON Intake MAF Assembly and install the 27WON Race MAF Upgrade.
Advisory:
- Working under the vehicle requires a safe and sturdy location for the vehicle to sit on jackstands.
- The engine bay will be hot after recent vehicle operation. Allow the vehicle to cool or use a fan to cool the engine bay before working on the vehicle.
-
-
First and foremost; THANK YOU for becoming a part of the 27WON Family. We hope to REDEFINE the Aftermarket with the highest level Parts, Customer Service, Packaging, & Support
-
A tune will be required after installing this part. The tune will involve rescaling the MAF tables to correct for the larger inner diameter of the Race MAF. The Car should not be driven until a tune is applied
-
-
-
This guide will assume that you have our intake installed. If you don't then here is the link to install our intake:https://tinyurl.com/ycwfnc7m
-
Press down on the tab and disconnect the wiring harness from the MAF Sensor
-
-
-
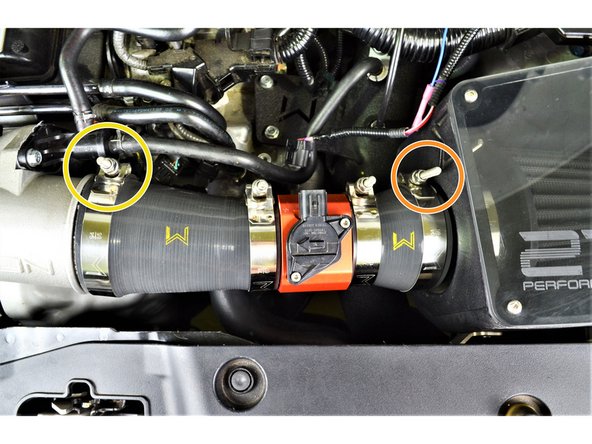
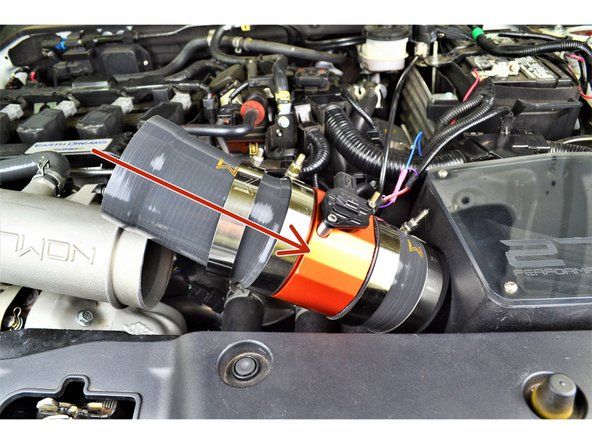
Use a 10mm wrench or socket and ratchet to loosen the clamp on the turbo inlet pipe
-
Clamp size will be 67-75mm for OEM Turbo inlet pipe and 86-94mm for 27WON Turbo inlet pipe
-
Use a 10mm wrench or socket and ratchet to loosen the 86-94mm clamp on the airbox
-
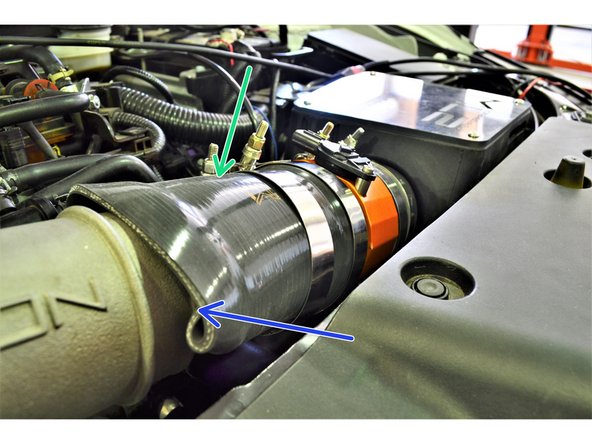
Slide the outer clamps in the direction of the blue arrows
-
Pivot the MAF & Silicone assembly up and off of the turbo inlet pipe
-
The silicone coupler is flexible enough to bend and distort as needed.
-
Set the outer clamps aside. You will use them later when installing the Race MAF
-
-
-
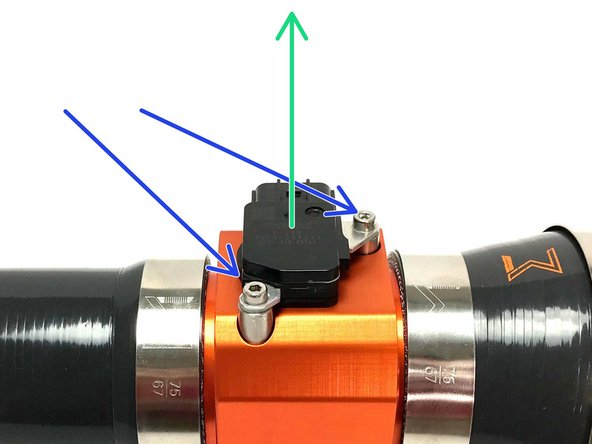
Use a 3mm Allen Key to remove the socket cap bolts from the MAF housing
-
Remove the MAF sensor from the housing
-
If you are having issues, try turning the sensor while pulling, this should help
-
Be careful to not pinch and damage the o-ring on the sensor
-
-
-
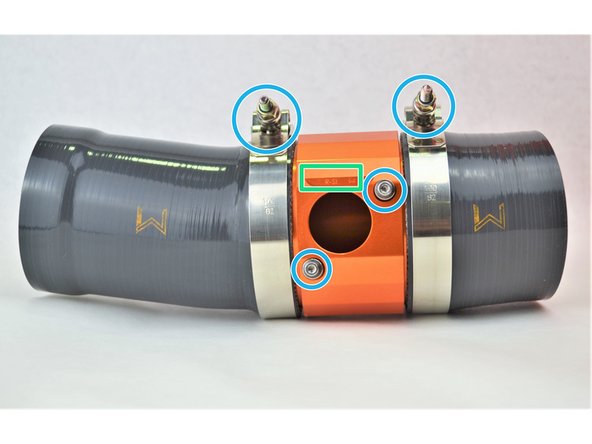
The Race MAF housing comes assembled with the necessary MAF sensor installation hardware and clamps
-
The Race MAF housing has a small cutout at the top for the wiring harness. This cutout will face the rear of the vehicle once installed
-
Silicone coupler between the Race MAF housing and the turbo inlet pipe
-
Silicone coupler between the Race MAF housing and the airbox
-
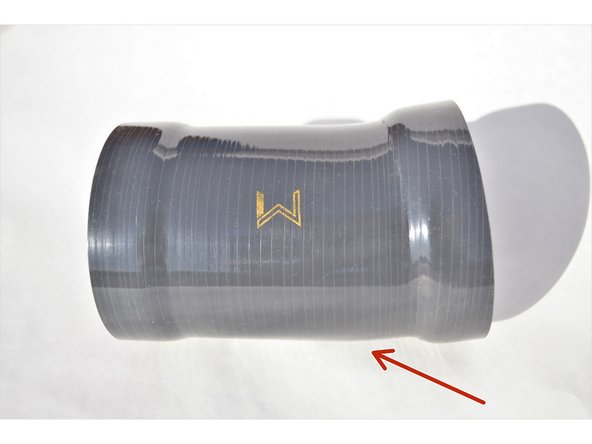
On both silicone couplers there is a "W" logo. The bottom of the "W" will face the front of the vehicle once installed
-
-
-
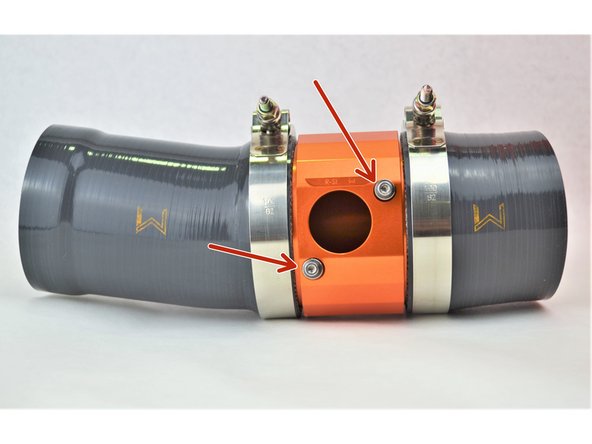
Use a 3mm Allen Key to remove the socket cap bolts from the Race MAF housing
-
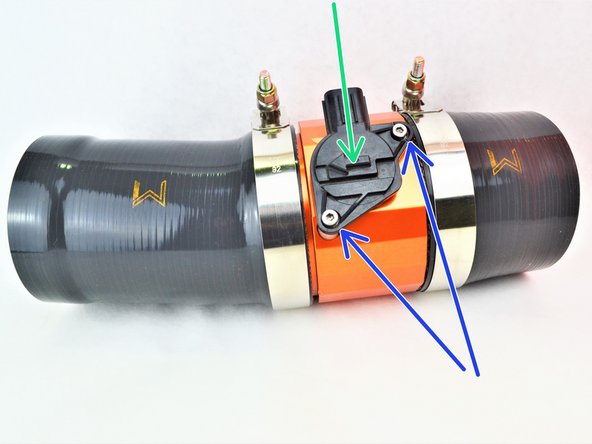
Install the MAF sensor into the Race MAF housing
-
If you are having issues, push the sensor into the housing while turning the sensor, this should help
-
Be careful to not pinch and damage the o-ring on the sensor
-
Align the sensor with the stainless steel standoff and install the socket cap bolts
-
Torque the socket cap bolts to 24-48 in-lbs
-
-
-
Transfer the outer clamp for the turbo inlet pipe side. Keep it loose
-
Clamp size will be 67-75mm for OEM Turbo inlet pipe and 86-94mm for 27WON Turbo inlet pipe
-
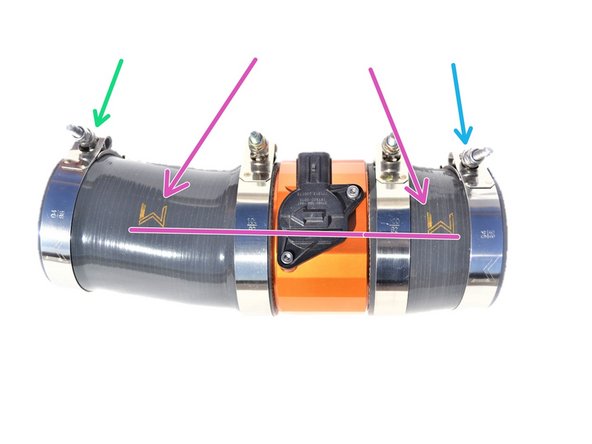
Align the "W"s to the top, inline with the MAF sensor then tighten the 92-100mm clamps with a 10mm wrench or socket and ratchet until snug (the silicone will start to bulge at the edge of the clamp slightly)
-
Transfer the 86-94mm clampfrom the airbox side. Keep it loose
-
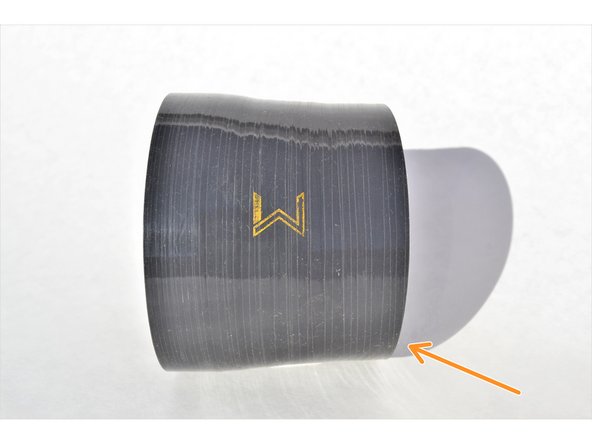
A small gap between the end of the silicone and the Race MAF housing is normal. This is required for proper connection of the internal step in the silicone
-
-
-
Angle the Race MAF & Silicone Assembly into the engine bay and onto the airbox as shown
-
Verify the silicone coupler connecting to the airbox is over the circumference of the airbox outlet
-
Pivot the Race MAF Assembly down and onto the turbo inlet pipe
-
The silicone coupler is flexible enough to bend and distort as needed to fit over the turbo inlet pipe
-
Adjust the silicone coupler to fit around the inlet of the turbo inlet pipe
-
-
-
If needed, rotate the Race MAF & Silicone assembly so the MAF sensor and "W" are facing upward as shown
-
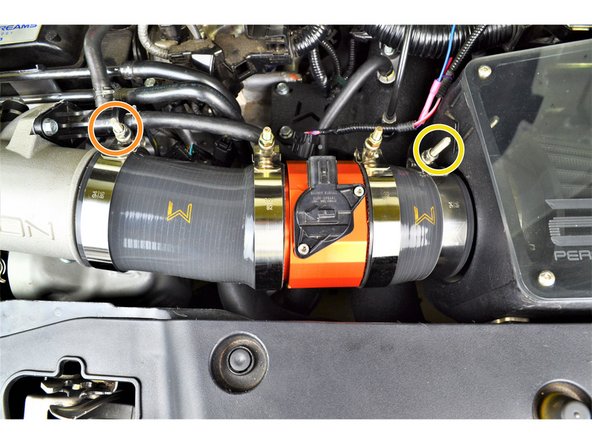
Before tightening all clamps down, check that the T-bolts are not orientated in a way that causes the threaded rods to contact the hood or core support. Adjust if necessary
-
Use a 10mm wrench or socket and ratchet to tighten the clamp on the turbo inlet pipe side
-
Clamp size will be 67-75mm for OEM Turbo inlet pipe and 86-94mm for 27WON Turbo inlet pipe
-
Use a 10mm wrench or socket and ratchet to tighten the 86-94mm clamp on the intake side
-
Tighten the clamps until snug (the silicone will start to bulge at the edge of the clamp slightly)
-
-
-
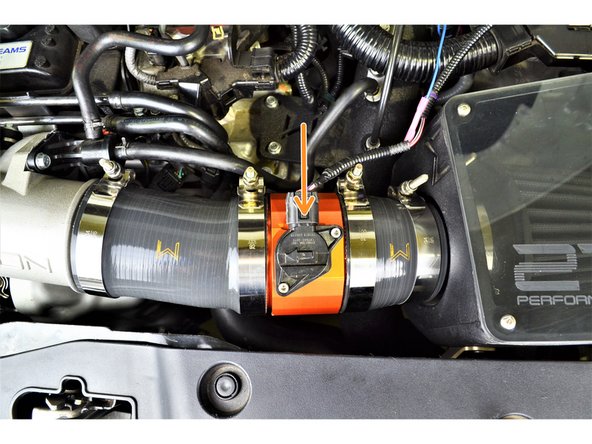
Connect the wiring harness to the MAF sensor as shown
-
-
-
Now that you have finished installing your new Race MAF a tune will be required to rescale the MAF tables
-
Do not drive the car until a new tune has been applied
-
-
-
This completes the installation of your 27WON Performance Race MAF
-
We hope you were impressed with your 27WON experience and love your new Race MAF for years to come. Email us at sales@27won.com or call us at 571-271-0271 with any questions or concerns
-
Please Leave a review here: https://store.27won.com/turbo-1.5l-civic...
-
Share your experience using #27WON on Instagram and Facebook
-