Introduction
In this installation guide we have provided step by step instructions to install the 27WON Performance FK8 Throttle Body Silicone.
Advisory:
- The engine bay will be hot after recent vehicle operation. Allow the vehicle to cool or use a fan to cool the engine bay before working on the vehicle.
-
-
First and foremost; THANK YOU for becoming a part of the 27WON Family. We hope to REDEFINE your experience of the aftermarket with the highest level Parts, Customer Service, Packaging, & Support
-
These instructions were written with a 2018 Honda Civic Type R.
-
-
-
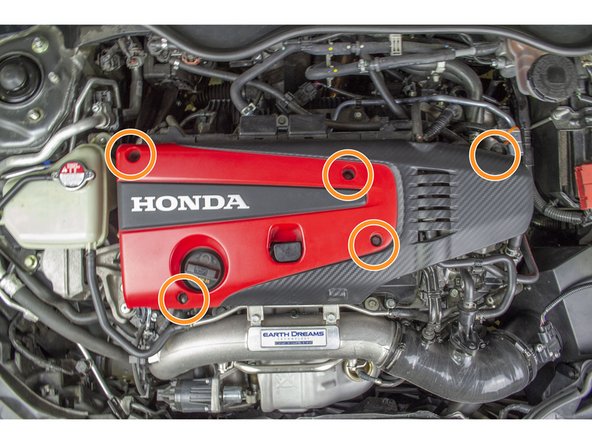
Remove the five (5) 10 mm bolts circled in orange with a 10 mm deep socket and ratchet and then remove the engine cover
-
-
-
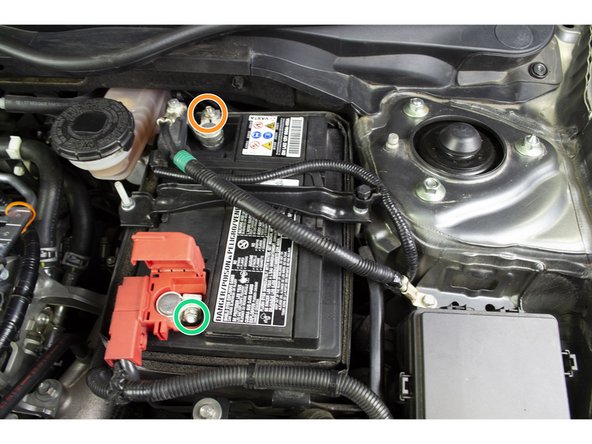
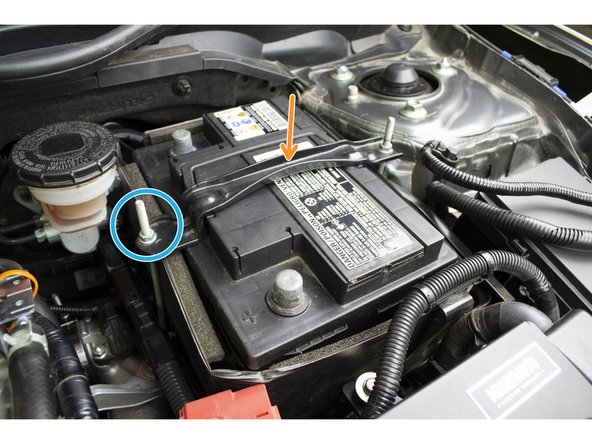
Loosen the nut with a 10mm deep socket and ratchet then remove the Negative cable from the battery. Tuck the cable out of the way
-
Loosen the nut with a 10mm deep socket and ratchet then remove the Positive cable from the battery. Tuck the cable out of the way
-
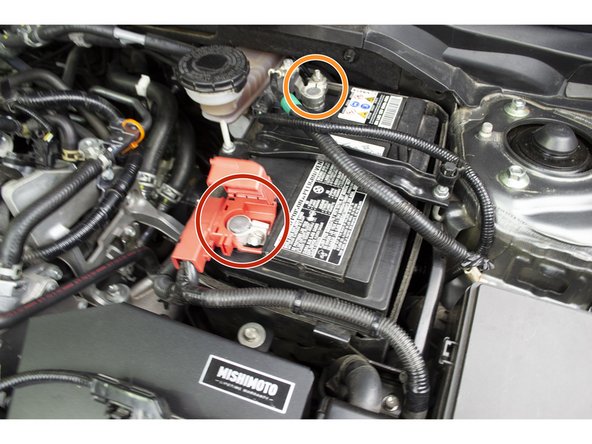
Loosen the nut (red circle) with a 10mm deep socket and ratchet then remove the hook and battery tiedown from the battery
-
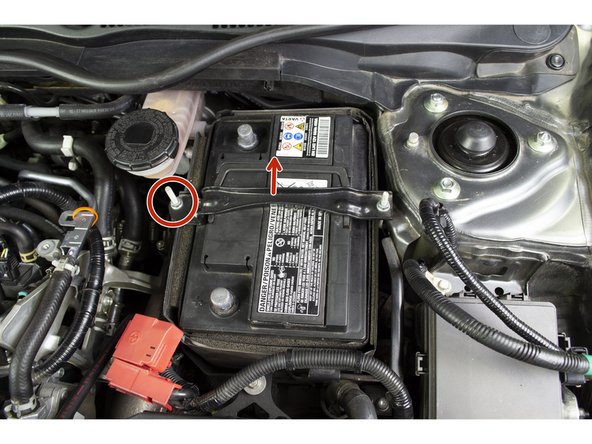
With the cables and tiedown out of the way lift the battery out of the engine bay and set it to the side
-
Note that there may be a handle on your battery that makes removal easier
-
-
-
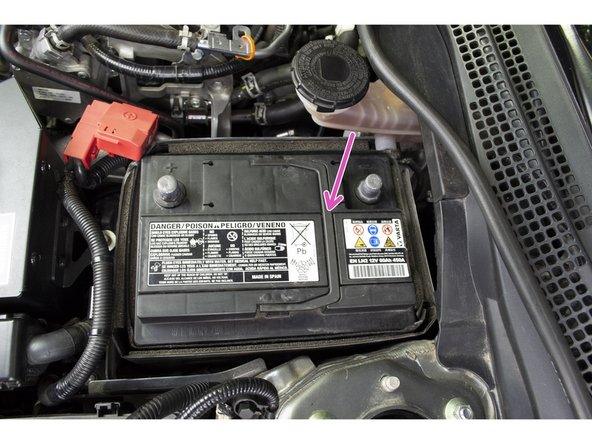
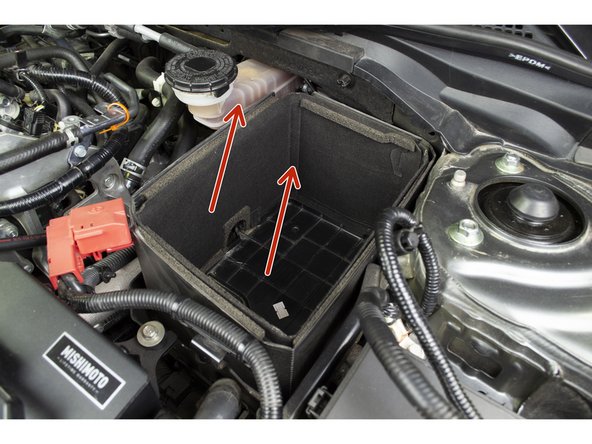
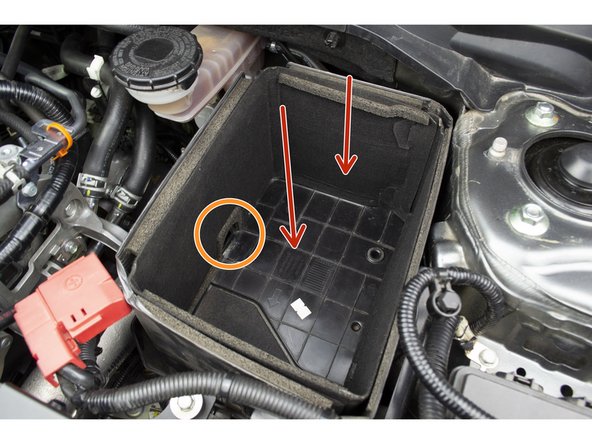
Remove the battery foam and tray case to reveal the battery bracket.
-
-
-
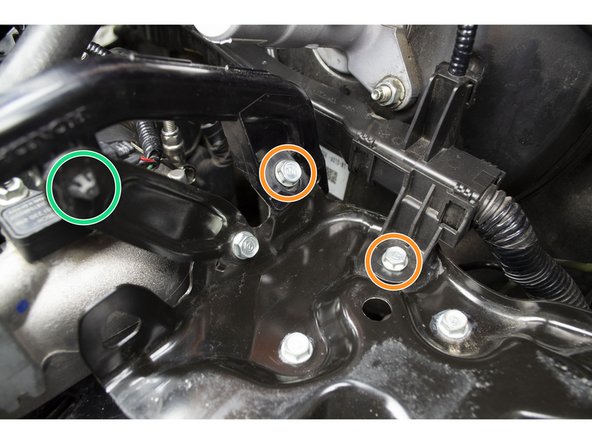
Remove the 2 bolts with a 10 mm deep socket and ratchet and set them aside.
-
With needle nose pliers pinch the clip and push it out of the bracket
-
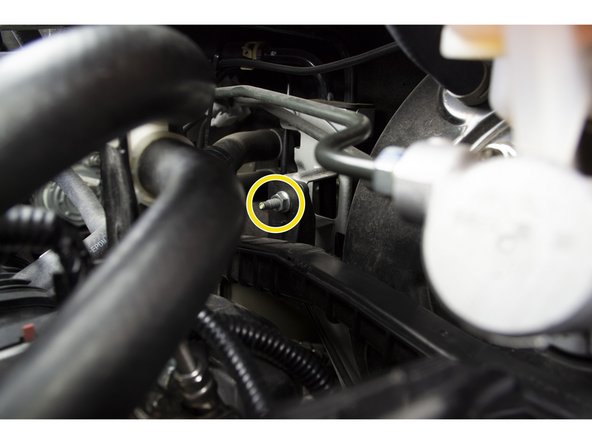
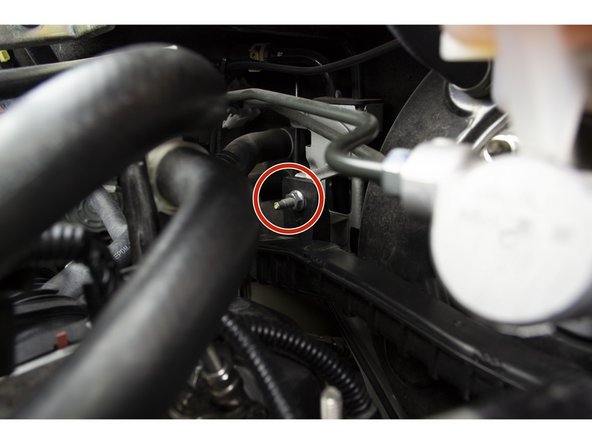
Remove the nut behind the engine that holds the plastic cable assembly in place with a 10 mm deep socket and ratchet and set it aside
-
The entire plastic cable assembly should now be loose. This should make removing the battery bracket easier in the next step
-
-
-
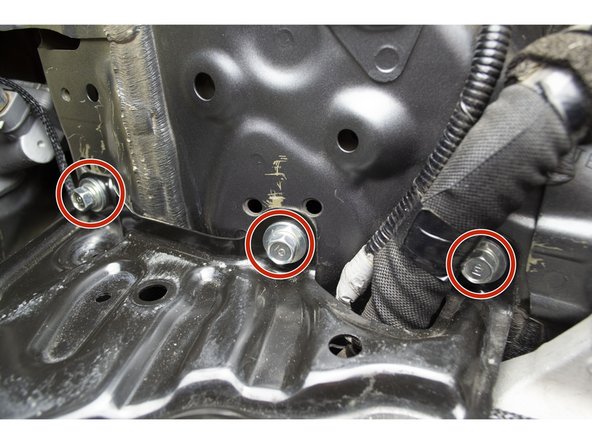
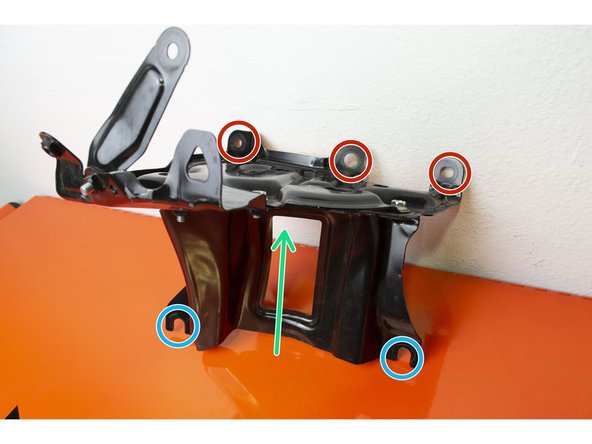
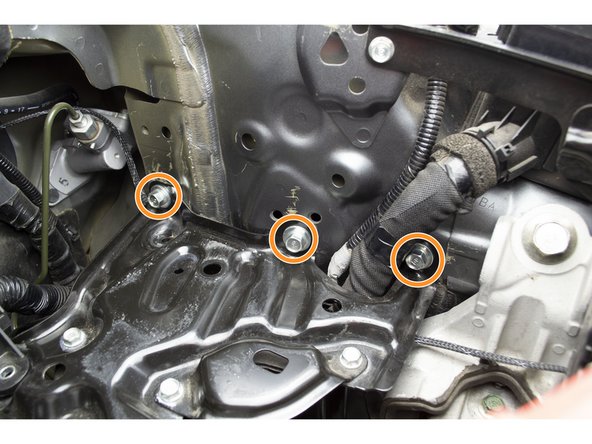
There are three (3) 12mm bolts that must be removed on the top
-
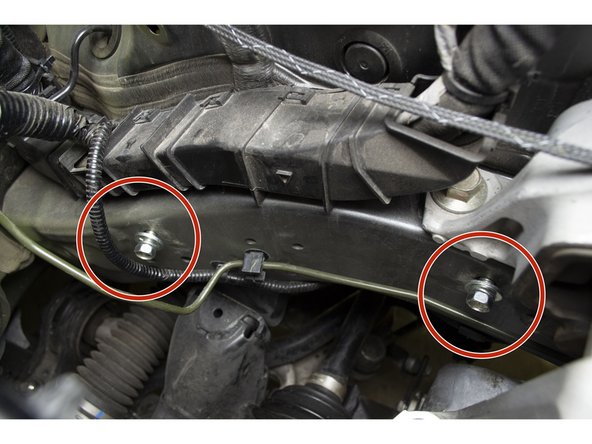
There are two (2) 12mm bolts underneath the bracket that must be loosened. The second picture shows the bracket out of the car to make finding the blind bolts easier
-
With the upper bolts removed, the lower bolts loosened, and the plastic cable assembly loose, the bracket can now slide up and out of the engine bay
-
-
-
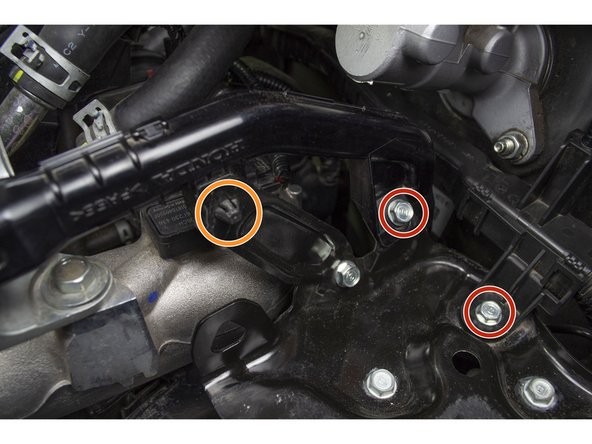
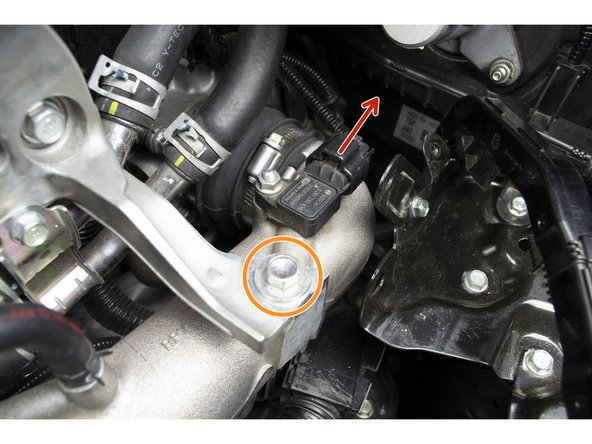
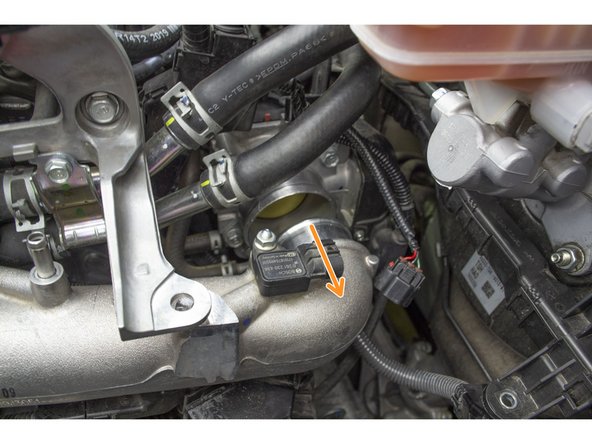
Unplug the Map Sensor and set the wire harness out of the way
-
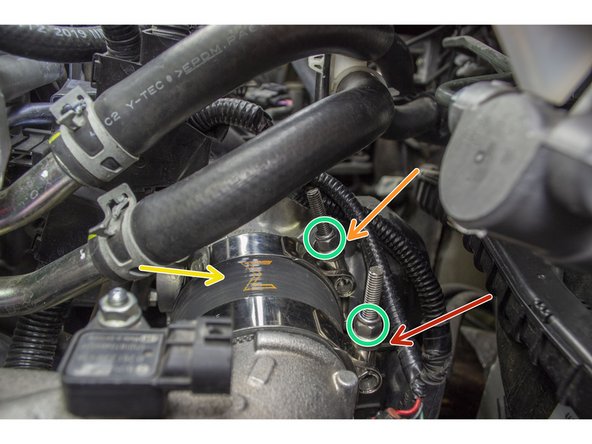
With a 12mm socket and ratchet remove the two (2) bolts, circled in orange, and set them aside
-
Pinch the hose clamp with needle nose pliers and remove the hose from the charge pipe
-
-
-
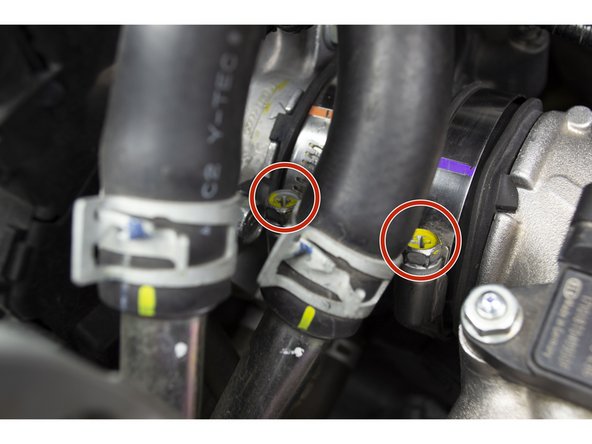
With a 10mm socket, extension and ratchet loosen the two (2) hose clamps
-
Alternatively if you don't have a long enough extension then you can use a long Philips head screw driver
-
With the clamps loosened you should now be able to pull the charge pipe toward the side of the car and remove the OEM throttle body tubing
-
-
-
Loosely place the 67-75 clamp on the smaller side of the silicone. Orientate the 67-75 clamp as shown
-
Loosely place the 76-84 clamp on the larger side of the silicone. Orientate the 76-84 clamp as shown
-
Orienting the clamps as shown is necessary to avoid any potential contact or rubbing during engine movement
-
Install the throttle body silicone so that the logo is facing up
-
The smaller side of the silicone is connected to the charge pipe and the larger side of the silicone is connected to the throttle body
-
With a 10mm deep socket and ratchet tight the two clamps
-
-
-
Plug the wire back into the sensor
-
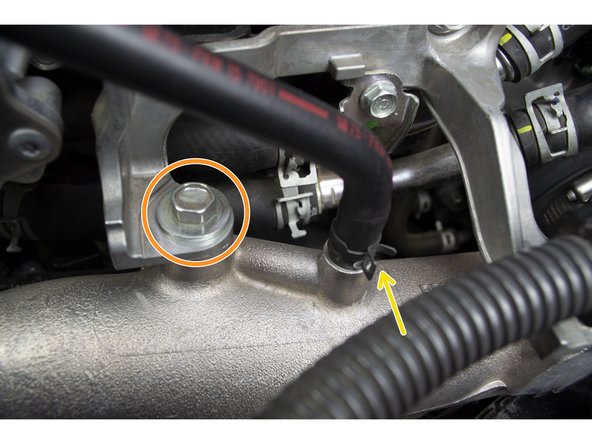
Install the two 12mm bolts back into the charge pipe with a 12mm socket and ratchet
-
Hook the hose back up to the stem with a pair of needle nose pliers
-
-
-
Partially start the two lower 12mm bolts by hand. The battery bracket will rest between the washer and the engine bay
-
Set the bracket into the engine bay and make sure the lower part is resting on the two lower bolts
-
With the bracket in place, install the 3 upper 12mm bolts with a 12mm socket and ratchet
-
With a 12mm socket, extension, and ratchet tighten the two lower bolts
-
-
-
Hook the plastic cable assembly back on the stud and reinstall the 10mm nut with a 10mm deep socket and ratchet
-
Reinstall the two 10mm bolts
-
Reinsert the clip into the battery bracket
-
-
-
Place the battery tray and foam on top of the battery bracket
-
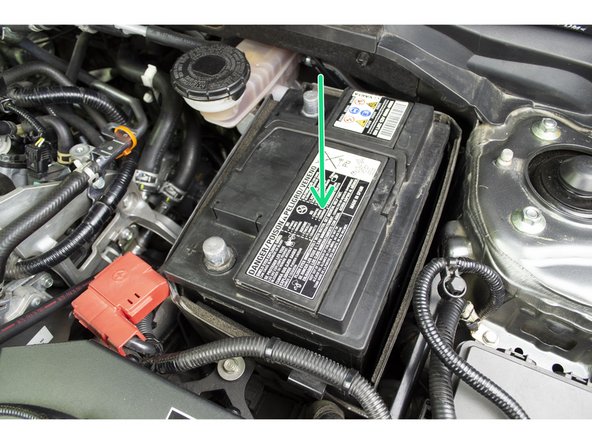
Set the battery on the tray and in the foam
-
Install the battery tie down
-
The long rod hooks to the battery tray
-
Install the 10mm nut onto the long rod,. Tighten with a 10mm deep socket and ratchet
-
-
-
Place the positive wire back on the positive terminal
-
Tighten the nut with a 10mm deep socket and ratchet
-
Place the negative wire back on the negative terminal
-
Tighten the nut with a 10mm deep socket and ratchet
-
-
-
Align the engine cover on the engine, and install the five 10mm bolt with a 10mm deep socket and ratchet
-
-
-
This completes the installation of your 27WON Performance Throttle Body Silicone. If you still need to install your 27WON Performance boost tubes, you can do that here:https://www.performanceinstalls.com/Guid...
-
We hope you were impressed with your 27WON experience and love your new Throttle Body Silicone for years to come. Email us at sales@27won.com or call us at 571-271-0271 with any questions or concerns
-
Please Leave a review here: https://store.27won.com/civic-type-r-int...
-
Stay Connected with the latest developments with the 27WON Monthly Newsletter: https://store.27won.com/27won-newsletter...
-
See the latest Products and Tech Videos from 27WON with a quick Subscribe:https://www.youtube.com/27won
-
Share your experience using #27WON on Instagram and Facebook
-