Introduction
In this installation guide we have provided step by step instructions to setup, remove the OEM exhaust, and install the 27WON Performance Front Pipe.
Advisory:
- Working under the vehicle requires a safe and sturdy location for the vehicle to sit on jackstands.
- The exhaust piping will be hot after recent vehicle operation. Allow the vehicle to cool or use a fan to cool the exhaust piping before working on the vehicle.
Tools
-
-
First and foremost; THANK YOU for becoming a part of the 27WON Family. We hope to REDEFINE your experience of the aftermarket with the highest level Parts, Customer Service, Packaging, & Support
-
-
-
If you will be installing the Front Pipe with the 27WON downpipe then use those instructions instead: L15-6-209-15 11th Gen Downpipe. Those instructions will refer back to these as needed
-
-
-
You will proceed to remove the OEM Front-pipe from the vehicle in the coming steps
-
The next steps will be performed underneath the vehicle. Please make sure vehicle is secured on a lift or jack stands
-
-
-
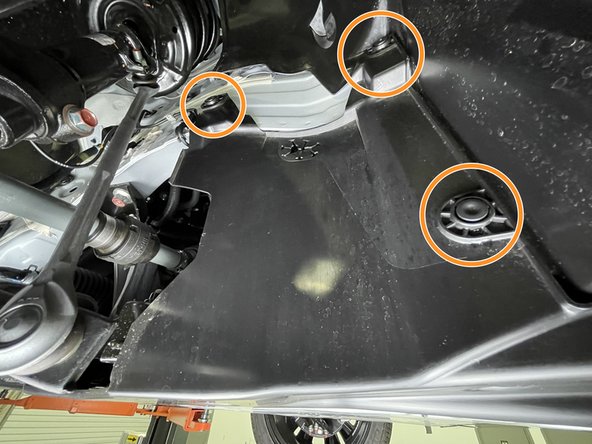
Locate the Skidtray
-
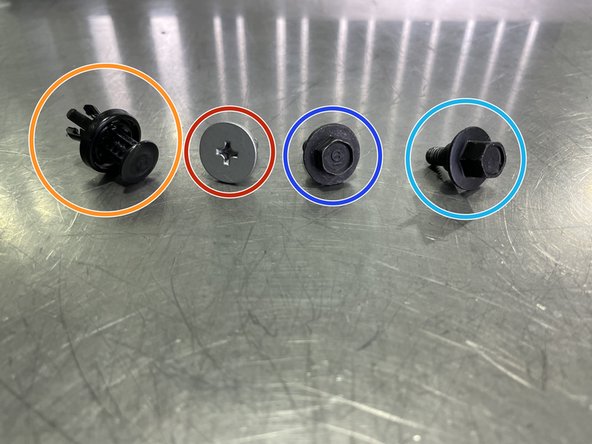
Use a flathead screwdriver or a prying tool to remove the fourteen (14) plastic push-clips circled in orange. Orange arrows identify the eight (8) additional push-clips described in the next step that are removed last
-
Use a #2 Philips head screw driver to remove the two (2) Philips pan head screws shown in red circles
-
Use a 10mm socket and ratchet to remove the two (2) short head shoulder bolts shown in dark blue circles
-
Use a 10mm socket & ratchet to remove the four (4) tall head shoulder bolts shown in light blue circles
-
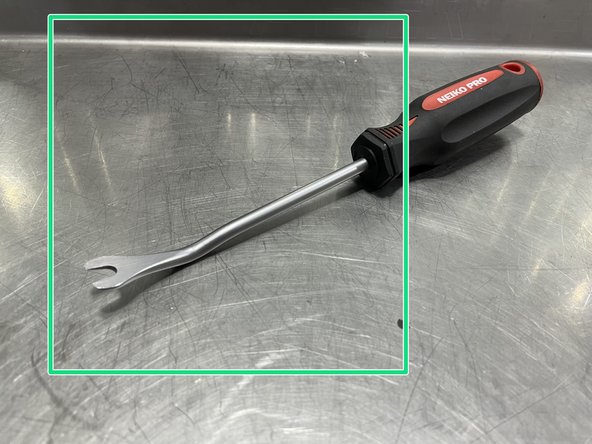
We recommend using a prying tool like the one shown by the green square
-
-
-
Use a large flat head screw driver or prying tool to remove the four (4) push-clips in each front wheel well
-
-
-
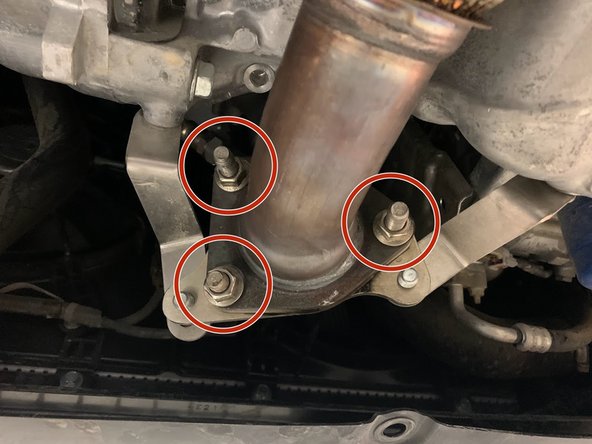
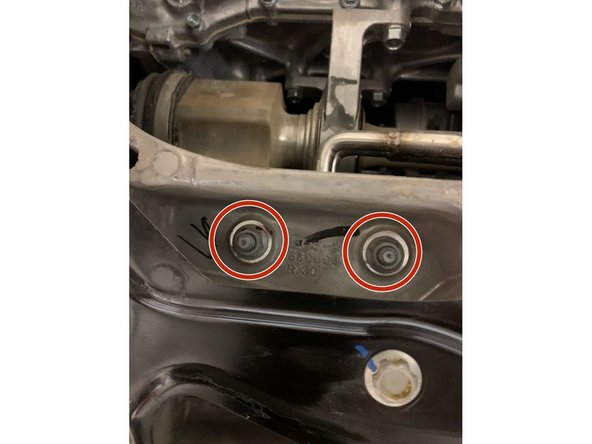
Use a 14mm socket and ratchet to remove the three OE nuts
-
It is possible that the stud will thread out of the downpipe flange. This is not an issue, the stud can be threaded back into the flange like a bolt
-
-
-
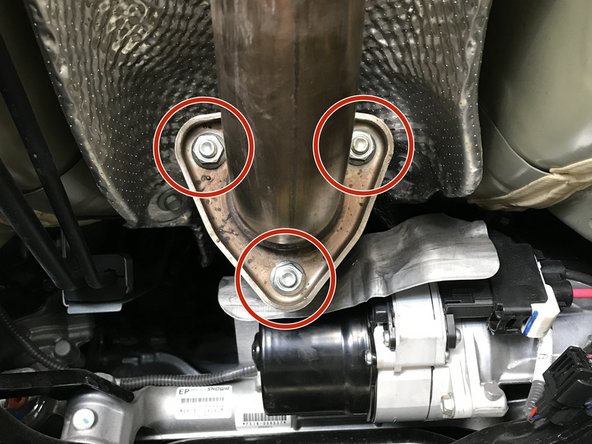
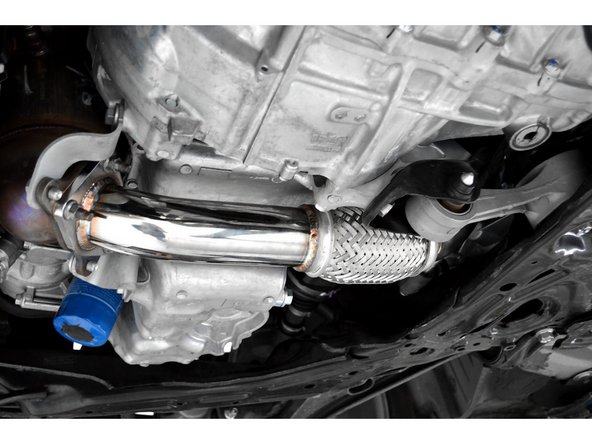
Locate the connection between the front-pipe and down stream exhaust
-
Verify that the exhaust is not to hot to touch, if still hot use a fan to cool the exhaust piping before proceeding
-
Use 14mm socket & ratchet to remove three (3) OE nuts in red circles, as shown
-
-
-
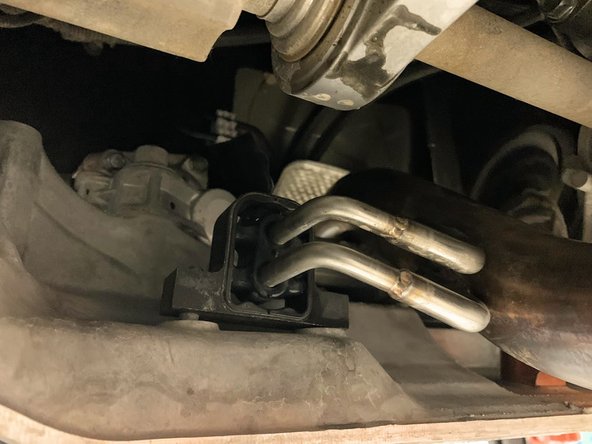
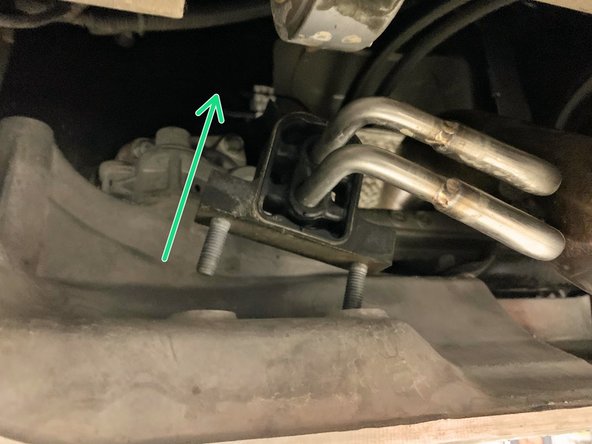
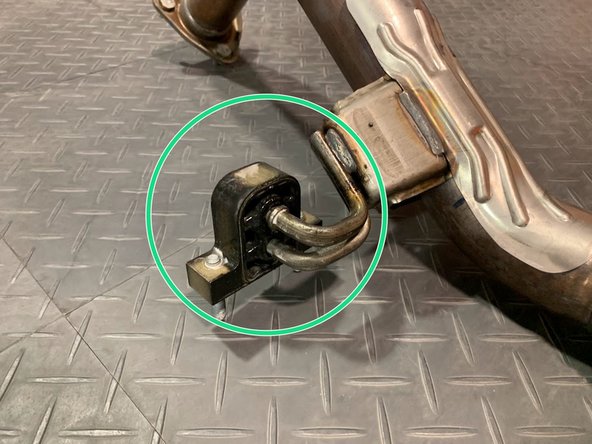
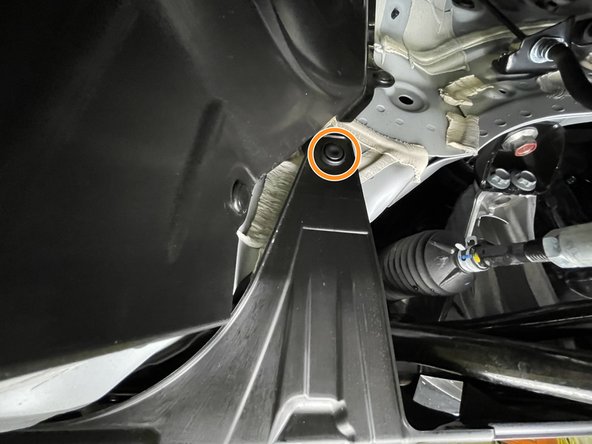
Locate the OEM front pipe hanger. Directly under this hanger will be two bolts mounting the hanger to the chassis
-
Using a 12mm socket, remove the bolts
-
Free the hanger from its mounting location as shown
-
-
-
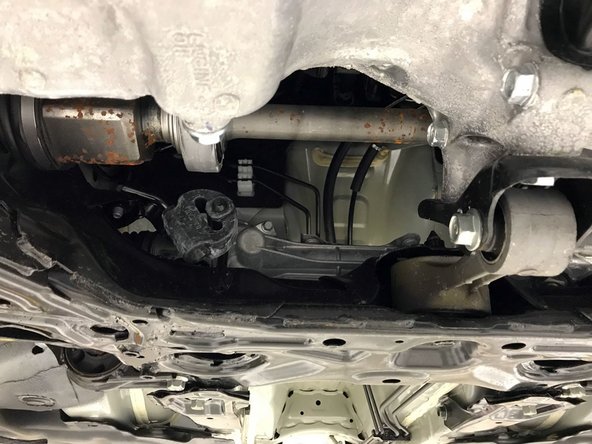
Remove the OE front-pipe from the vehicle through the access point directly under the engine
-
-
-
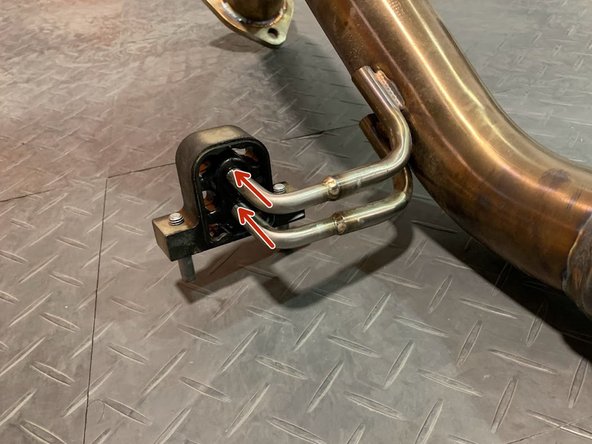
Using a spray cleaner, lubricate the front pipe hanger and remove it from the OE front pipe using tongue & groove pliers
-
Reinstall the hanger on the 27WON front pipe
-
-
-
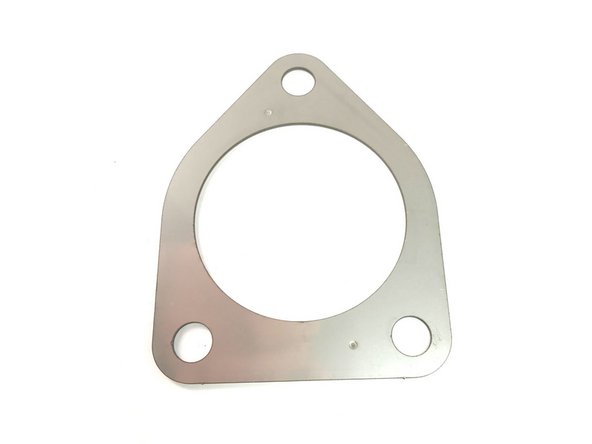
Locate the provided 2&1 MLS gasket for front-pipe installation
-
-
-
Guide the 27WON front pipe into the car
-
Guide the front pipe support studs back into their location
-
-
-
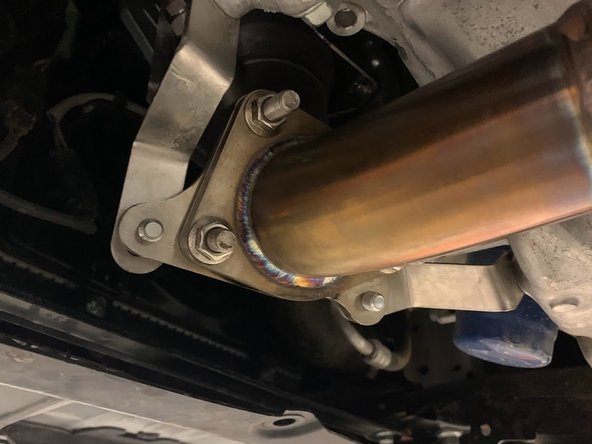
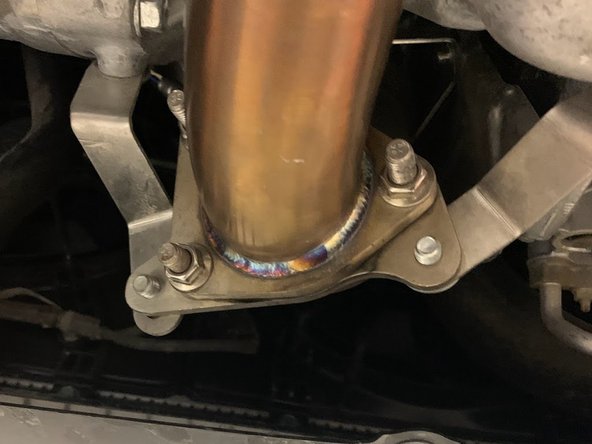
Install the provided 2&1 MLS gasket on the downpipe flange
-
Align the studs through the flange then hand tighten the nuts
-
Use a 14mm socket & torque wrench to torque each to 30-40 ft-lbs
-
-
-
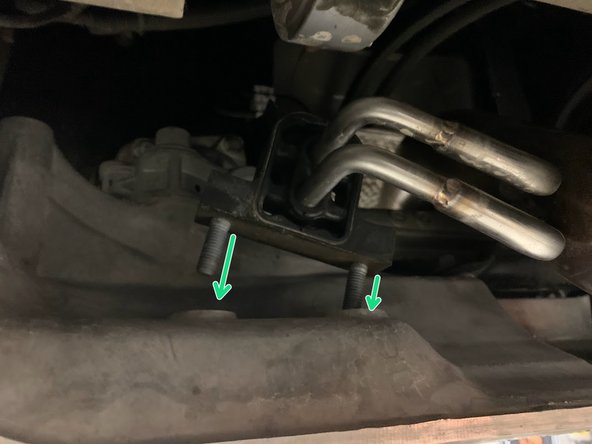
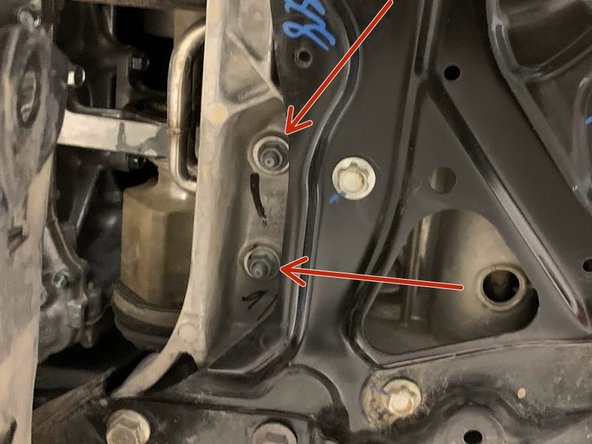
Using a 12mm socket, reinstall the (2) bolts to secure the front pipe support to the chassis
-
-
-
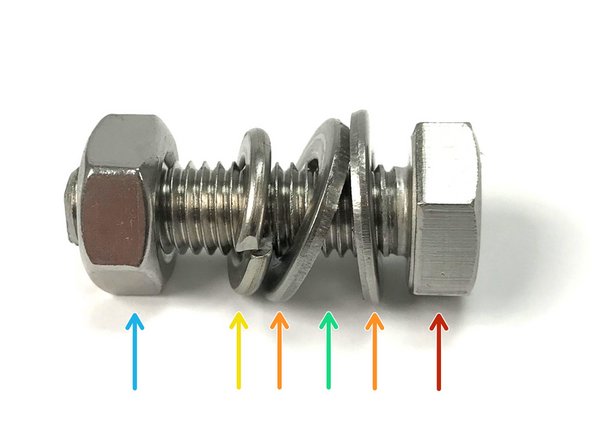
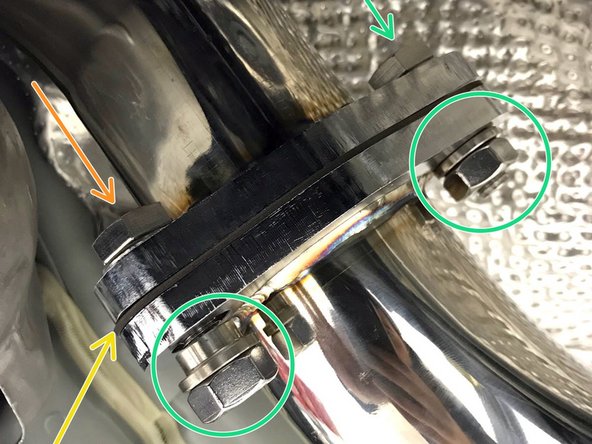
The location of the flat washers, flanges, and split lock washer are critical for proper fastening and vibration resistance.
-
17mm M10 Nut
-
M10 Split Lock Washer
-
M10 Flat Washers
-
Exhaust Pipe Flange Location - Between the two flat washers
-
17mm M10 Bolt Head
-
-
-
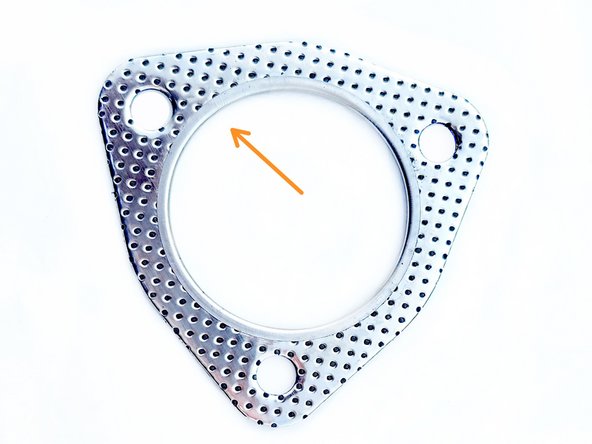
Locate the provided "tri-bolt" gasket for front-pipe installation
-
Locate QTY=3 provided 35mm length assembled M10 bolts
-
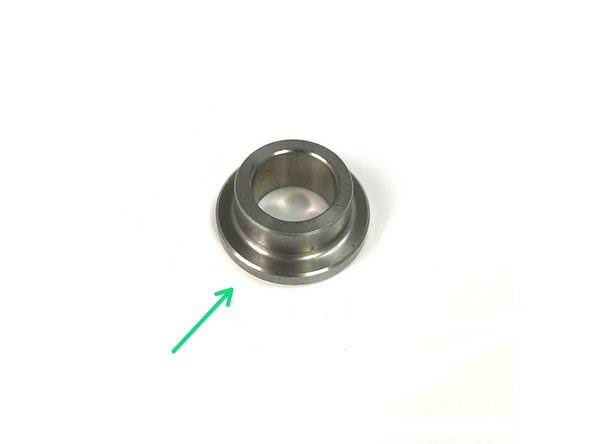
Locate QTY=3 provided step washers
-
-
-
For your assistance in installing the 27WON Front-Pipe, we have laid out the installation with the 27WON Front-Pipe Back Exhaust and OE Front-Pipe Back Exhaust
-
Step 18 Shows the installation with the 27WON Front-Pipe Back Exhaust
-
Step 19 Shows the installation with the OE Front-Pipe Back Exhaust
-
-
-
If you are connecting to the OE front-pipe back exhaust, skip to Step 19
-
Install the provide tri-bolt metal gasket
-
Using the 35mm length M10 bolts, insert the bolts through the front-pipe flange first
-
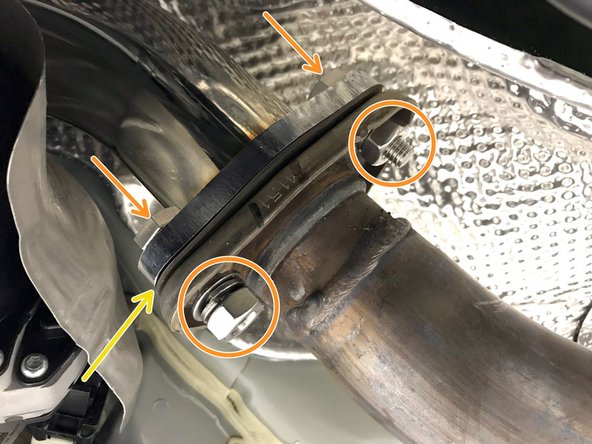
Install the provided step washers and nuts as shown
-
When using the step washer, DO NOT use the flat washer and split lock washer
-
It is important that the provided step washers are used with the 27WON Front-Pipe Back Exhaust to properly align the flanges
-
While hand tightening the nuts, verify that the step washers inserting into the flange correctly. Use a 17mm socket & torque wrench to torque the bolts to 30-40 ft-lbs
-
-
-
If you have already connect your Front-Pipe to the 27WON Exhaust then you can skip this step
-
Install the provided metal gasket
-
Using the 35mm length M10 bolts, insert the bolts through the front-pipe flange first
-
See Step 15 for hardware setup
-
Install the remaining washers and nuts. Use a 17mm socket & torque wrench to torque the bolts to 30-40 ft-lbs
-
-
-
Start the vehicle to check for leaks or rattles. If none, then take a spin around the block for further verification. If you do find a leak or rattle, please inspect the exhaust further
-
A leak could be caused by a loose flange bolt, improperly used gasket, or if debris is stuck between the gasket and flange
-
A rattle could be caused by misaligned pipe or a rubber hanger being orientated incorrectly
-
If you have exhausted all investigation then give us a call and we would be happy to help and resolve the issue with you
-
-
-
Reinsert the (4) push pins into the mounting spots as shown
-
Repeat this step on the other side
-
-
-
Reinstall the fourteen (14) plastic push-clips circled in orange
-
Using a Philips head screw driver, reinstall the two (2) Philips pan head screws shown in red circles
-
Using a 10mm socket and ratchet, reinstall the two (2) short head shoulder bolts shown in dark blue circles
-
Using a 10mm socket & ratchet reinstall the four (4) tall head shoulder bolts shown in light blue circles
-
-
-
This completes the installation of your 27WON Performance Front-Pipe
-
We hope you were impressed with your 27WON experience and love your new exhaust for years to come. Email us at sales@27won.com or call us at 571-271-0271 with any questions or concerns
-
Please Leave a review here: https://store.27won.com/1.5t-front-pipe-...
-
Share your experience using #27WON on Instagram and Facebook
-