Introduction
In this installation guide we have provided step by step instructions to remove the OEM exhaust and install the 27WON Performance Exhaust.
Advisory:
- Working under the vehicle requires a safe and sturdy location for the vehicle to sit on jackstands.
- The exhaust piping will be hot after recent vehicle operation. Allow the vehicle to cool or use a fan to cool the exhaust piping before working on the vehicle.
Tools
- 3/8" Ratchet
- 3/8" Torque Wrench
- 8mm Socket
- 12mm Socket - Deep
- 14mm Socket - Deep
- 17mm Socket - Deep
- 8mm Wrench
- 17mm Wrench
- Flathead Screwdriver
- Phillips Screwdriver
- Tongue and Groove Adjustable Pliers
- Bungee Cord
- Hydraulic Jack
- Jack Stand × 4
- Cleaner Spray or Equivalent Lubricant
- Pliers - Small
- Pliers - Large
- Optional: Pry Tool
- Optional: Exhaust Pliers
-
-
First and foremost; THANK YOU for becoming a part of the 27WON Family. We hope to REDEFINE your experience of the aftermarket with the highest level Parts, Customer Service, Packaging, & Support
-
These instructions were written with a 2021 Accord Sport
-
-
-
Jack up your 10th gen Accord and place your jack stands in the appropriate mounting spots
-
You can find this in your owners manual
-
Make sure you have supported your car properly. If done improperly, this could lead to serious injury
-
-
-
The following instructions are shown with no bubble wrap or cardboard for clarity of the installation process
-
We recommend leaving as much protective bubble wrap/cardboard on the exhaust as possible during install to protect against scratches and dings during the process
-
Cut holes in the bubble wrap to expose the flanges, hanger rods, and fastening locations
-
-
-
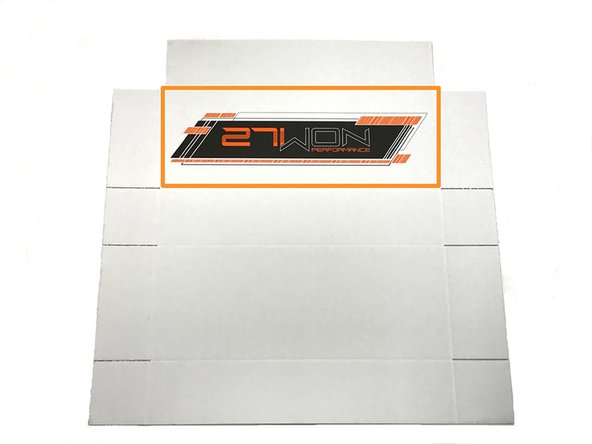
The 27WON packaging is not only designed to get your performance parts to your doorstep safely, but to also provide you with an awesome garage banner and/or comfy cardboard mat to lay on under your car for installation
-
You can cut out the banner as shown with the orange square
-
Or you can use the entire unfolded box as a mat to lay under your vehicle
-
Remove the staples from the box as they don't feel great on your backside...
-
-
-
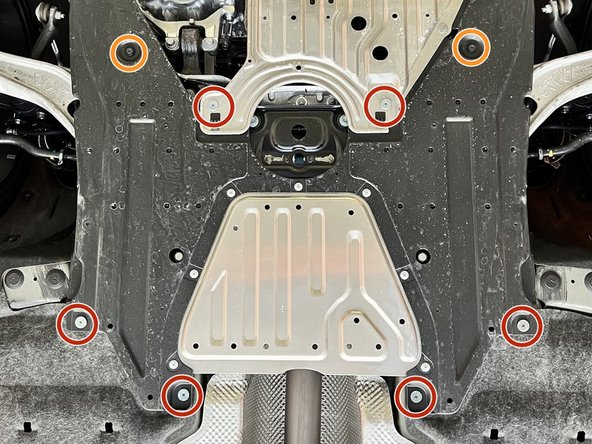
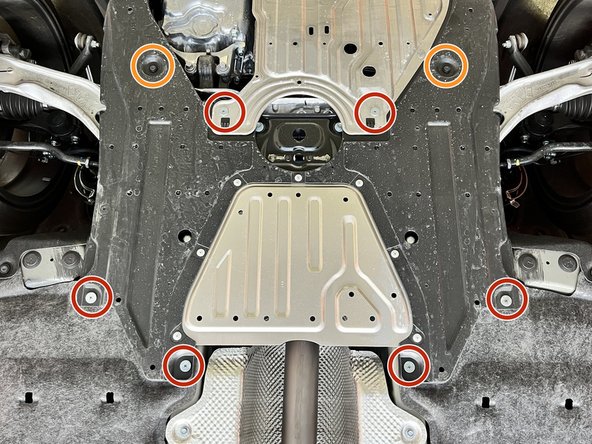
Locate the Skidtray
-
Use a #2 Philips head screwdriver to remove the six (6) Philips pan head screws shown in red circles
-
Use a flathead screwdriver or a prying tool to remove the two (2) plastic push-clips circled in orange
-
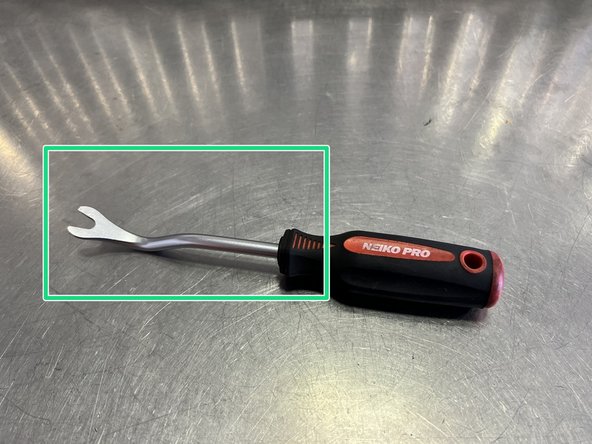
We recommend using a prying tool like the one shown by the green square if you have one
-
-
-
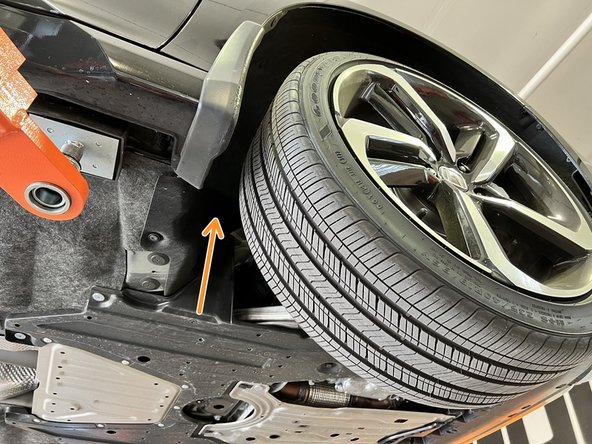
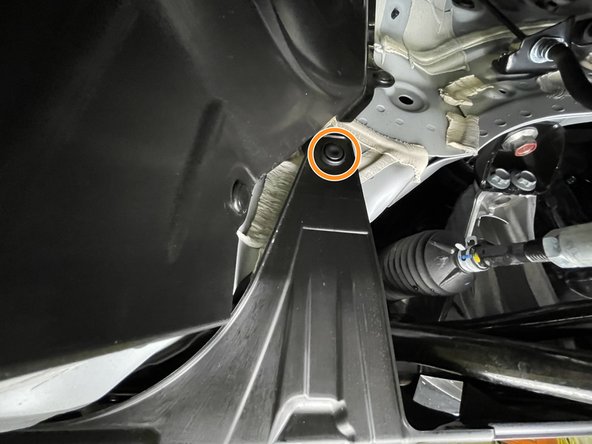
Push clips found in location of orange arrow
-
Use a large flat head screw driver or prying tool to remove the push-clip from each front wheel well
-
Once all screws and clips are removed your skid plate will hang as shown. It is not required to remove the entire skid plate
-
-
-
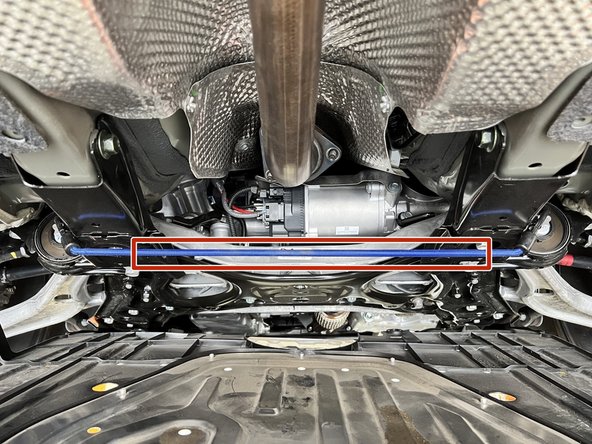
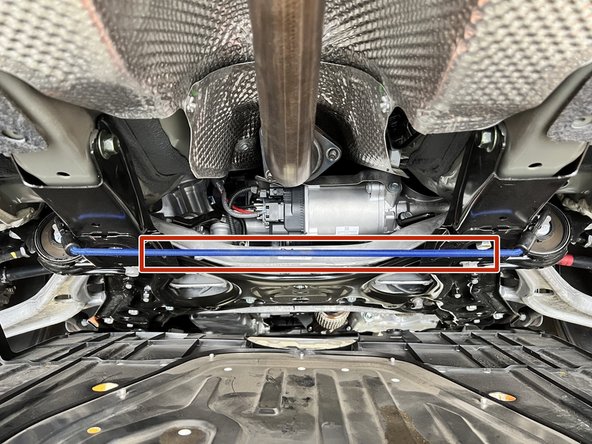
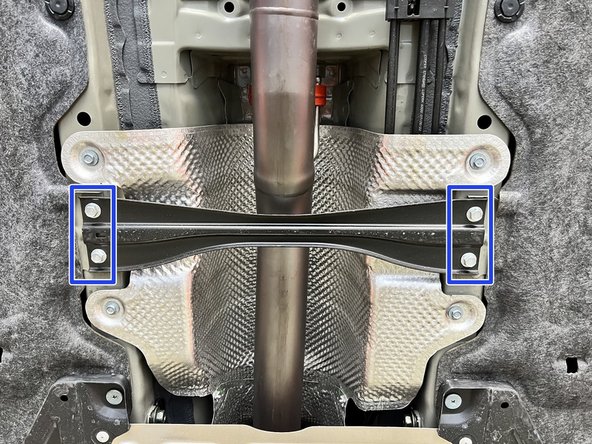
Remove (4) bolts with 12mm ratchet and socket shown
-
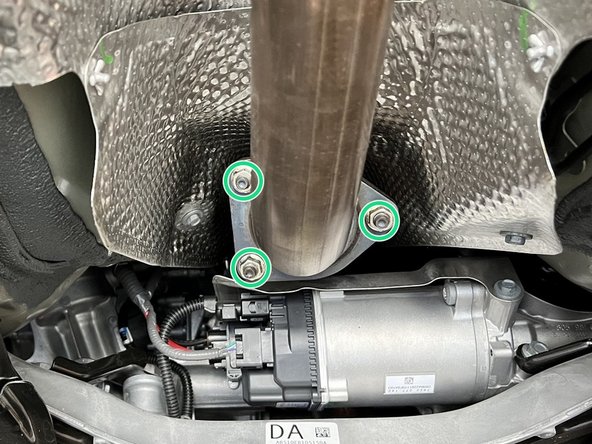
Using a 14mm socket, remove the (3) bolts shown to unbolt the front pipe (not shown) from back part of exhaust (shown)
-
-
-
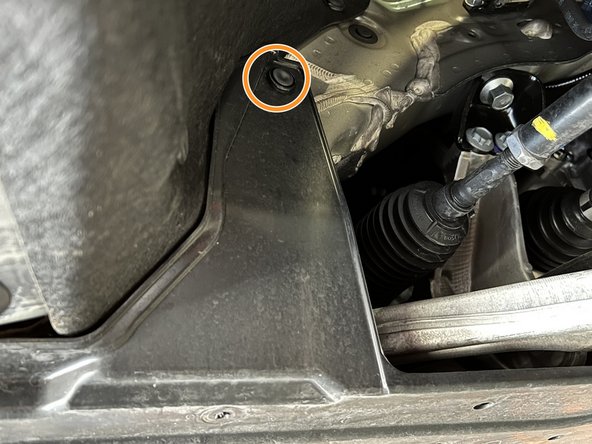
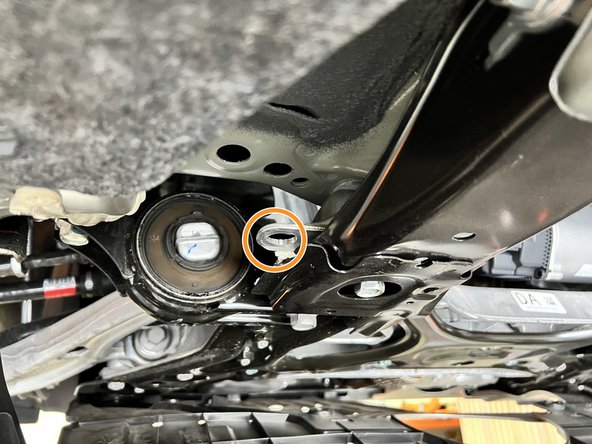
While not required it's helpful to set up a bungee cord under the front part of the exhaust to support it as the rest of the system is disconnected
-
Put each end of the cord in the silver pick-up points highlighted in orange circles
-
-
-
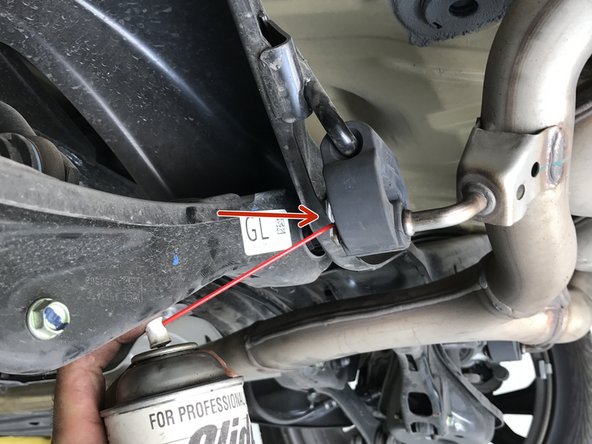
We'll show each hanger in the next steps. Hangers can be very difficult to get off. There are a few ways to approach this
-
First, spray hanger as shown with lubricant. We like foam glass cleaner
-
Then either use Tongue & Groove Pliers to pry the metal hanger from the rubber bushing/hanger
-
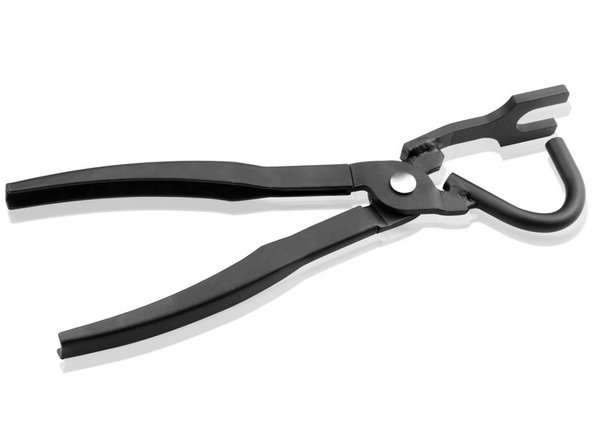
Or use a exhaust pliers (preferred). You can get these on Amazon for around $20
-
-
-
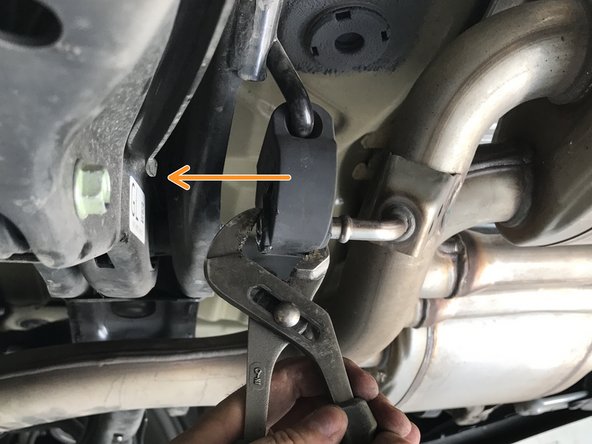
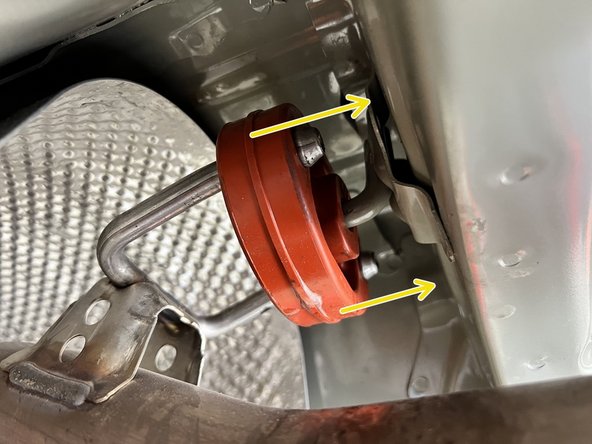
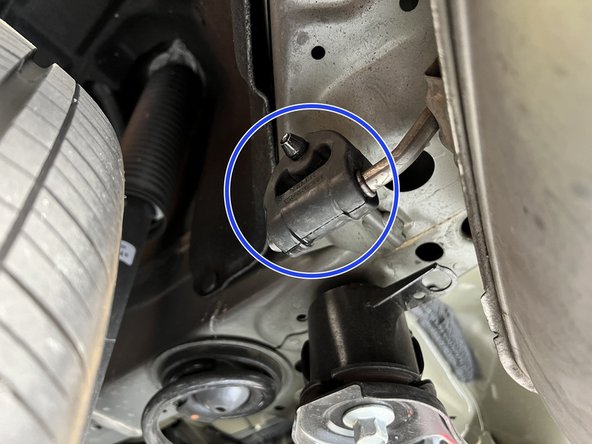
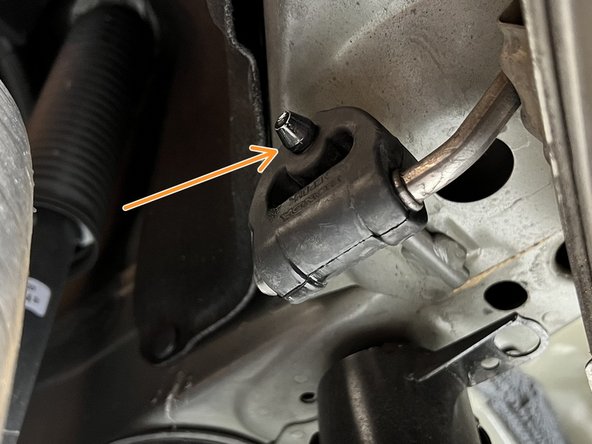
Using a spray cleaner, lubricate the front hangers and rubber support
-
Use tongue & groove pliers to press the two outer rods out of the rubber hanger. Leave the hanger on the car for install of the 27WON system later
-
-
-
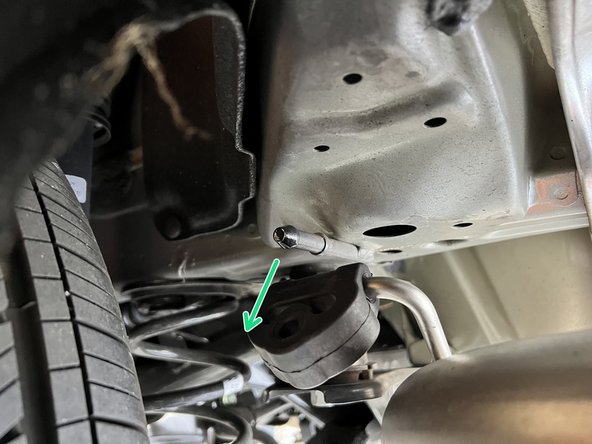
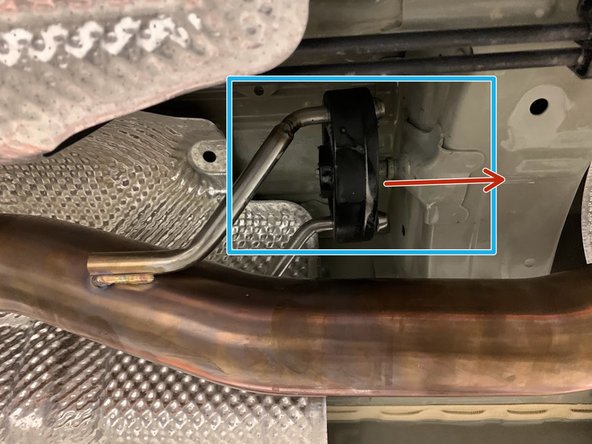
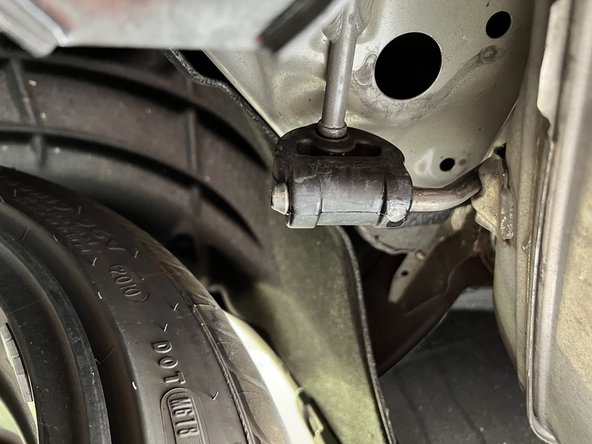
Shown is the driver-side rear hanger, repeat this for the passenger side
-
Using a spray cleaner, lubricate the rear hangers and rubber supports
-
Use tongue & groove pliers to press the rod out of the rubber hanger. Leave the hanger on the car for install of the 27WON system later
-
-
-
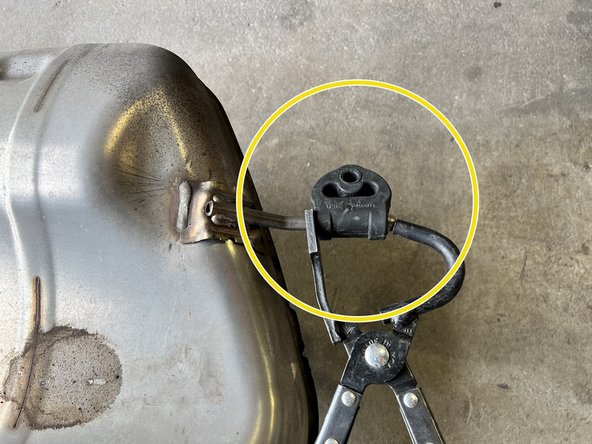
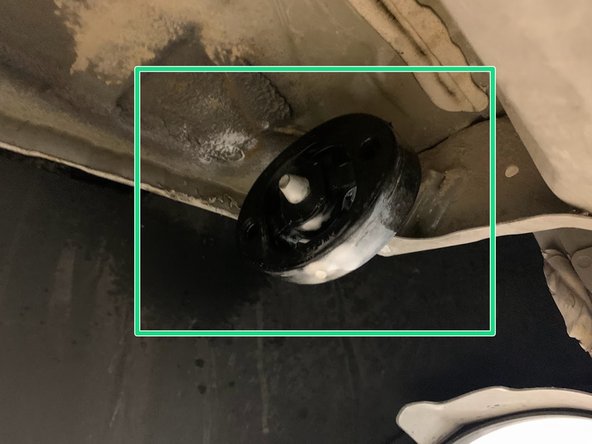
Shown is the driver-side forward muffler hanger, repeat this for the passenger side
-
Using a spray cleaner, lubricate the rear hangers and rubber supports
-
Use tongue & groove pliers to press the rod out of the rubber hanger, leave the rubber hanger on the exhaust for now. It will be transfer to the 27WON exhaust later
-
-
-
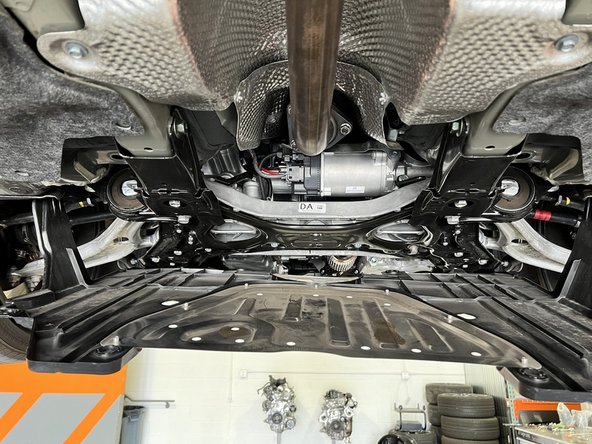
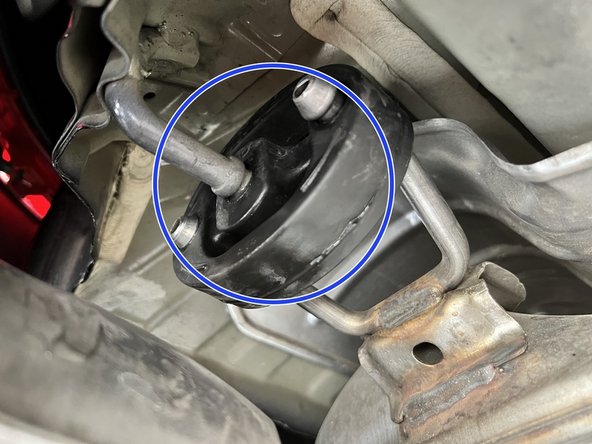
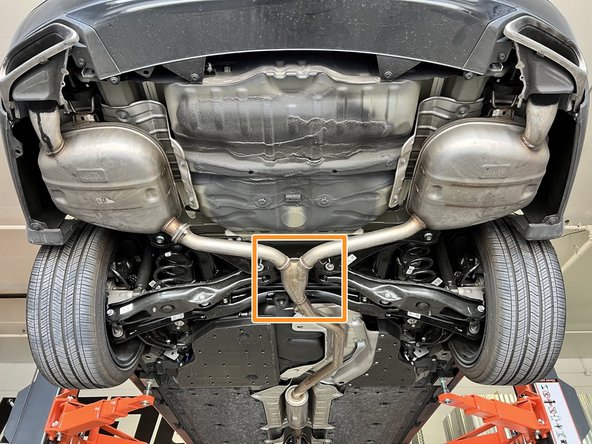
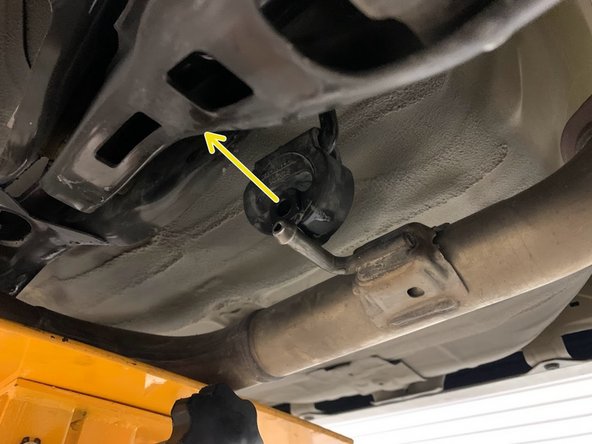
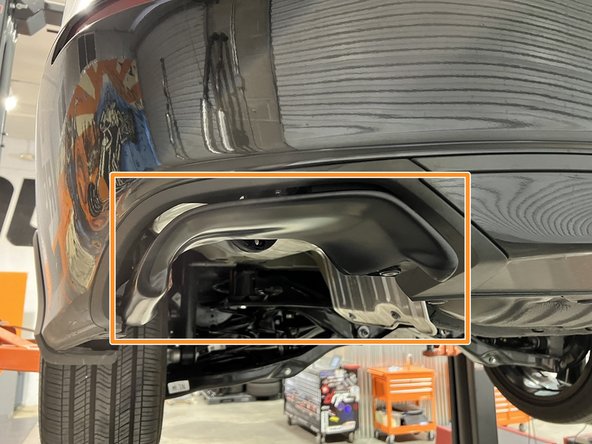
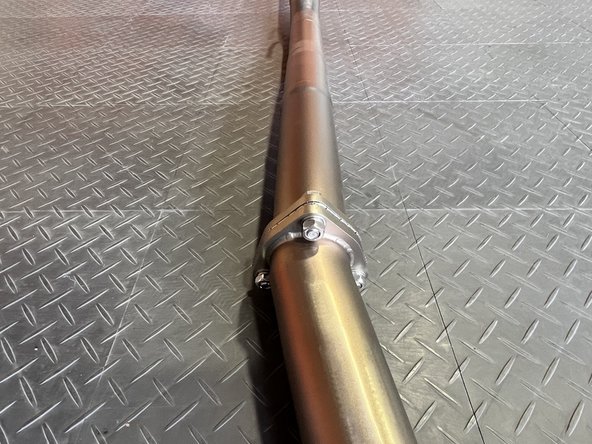
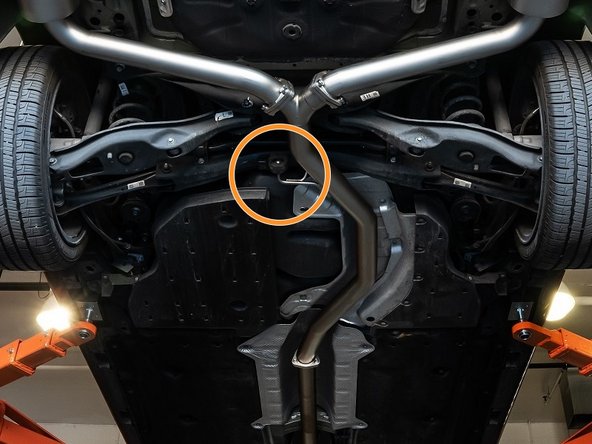
Using a transmission jack, floor jack, or a friend support the OE exhaust in the marked area
-
-
-
If the exhaust is unsupported it will fall and possibly become damaged. If not done yet, make sure you support the OE exhaust
-
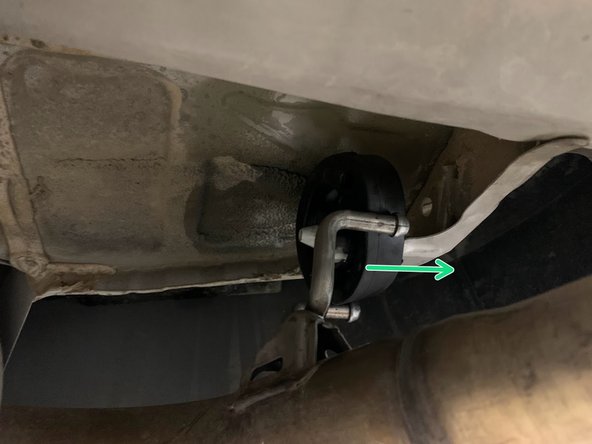
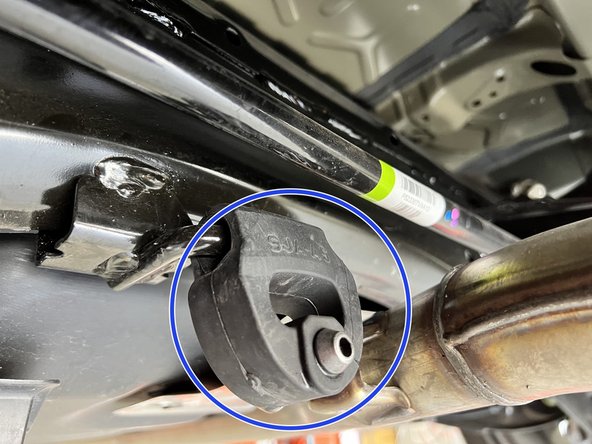
Using a spray cleaner, lubricate the remaining rear hangers and rubber supports
-
Use tongue & groove pliers to press the rod out of the rubber hanger. Leave rubber on car for install later
-
-
-
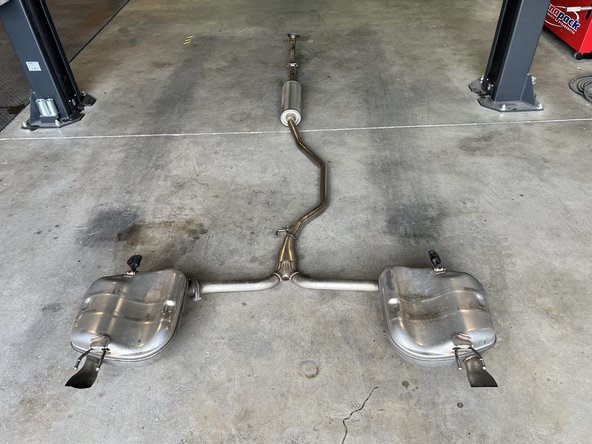
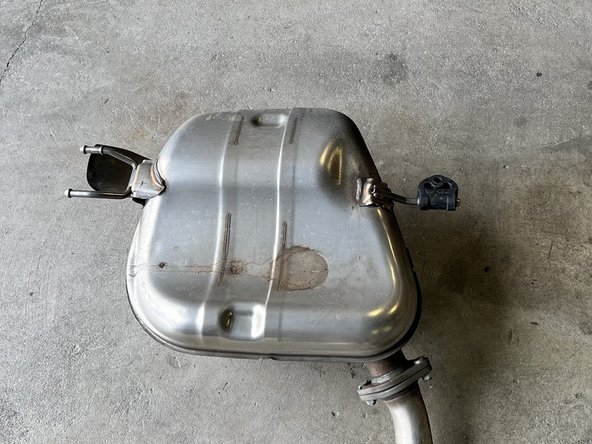
With the exhaust unbolted and removed from the hanger supports, remove from the car and set aside
-
-
-
27WON exhaust shrouds are made out of FRP, (Fiber Reinforced Polymer) a common material for many aftermarket body and dress-up components
-
References for prep, care, and maintenance of FRP and Gel Coat are widely available on the internet
-
The shrouds arrive in a Gel Coat finish. We recommend they be painted or otherwise protected prior to install
-
Because these parts are all hand made it is common to see small imperfections. These are not a sign of a defective part and are usually resolved during the preparation for protective painting
-
While you can install these parts with just the Gel Coat, it's not a very durable finish and the shrouds will quickly show cosmetic defects and fading
-
For any questions about install or care of this FRP product reach out to our team at 571-271-0271
-
If you will install shrouds as shipped then skip to step 19
-
-
-
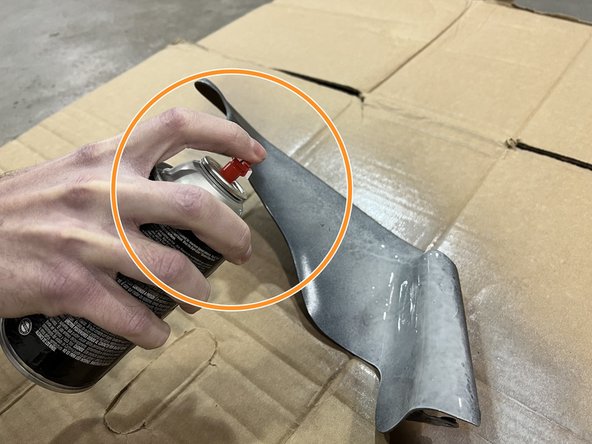
Let shrouds sit in the sun or otherwise warm them up a bit. Don't do this in a damp environment
-
Make sure the shrouds are dry and stay dry during the preparation process
-
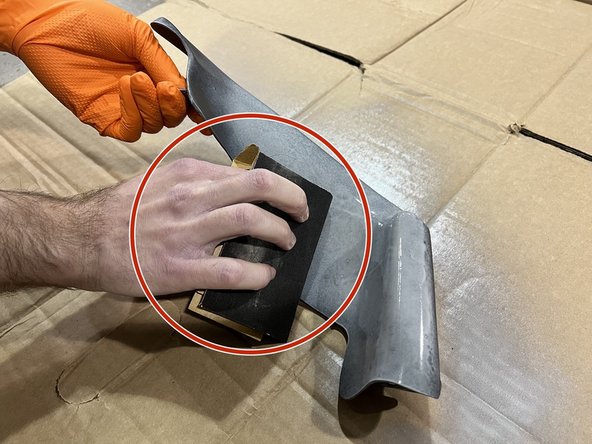
Lightly scuff the Gel Coat surface. A Scotch Brite pad works well for this. 400 grit sand paper works too
-
Do not sand through the black Gel Coat
-
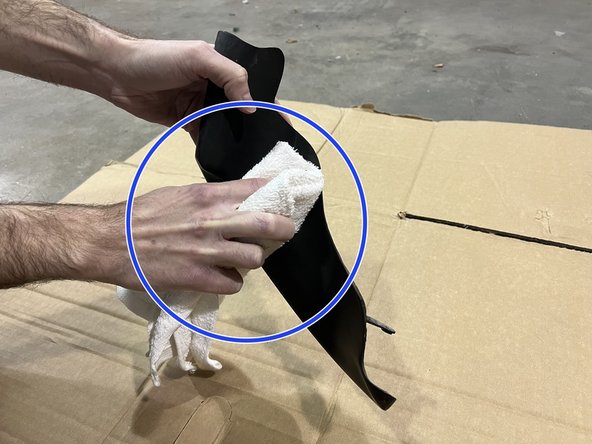
Wipe off particles with a dry cloth
-
Prime the shrouds with spray primer. Two coats recommended
-
Select a primer suitable for Gel Coat and Fiberglass
-
If shroud surface doesn't look good enough, you can sand the primer with 400 grit sandpaper
-
-
-
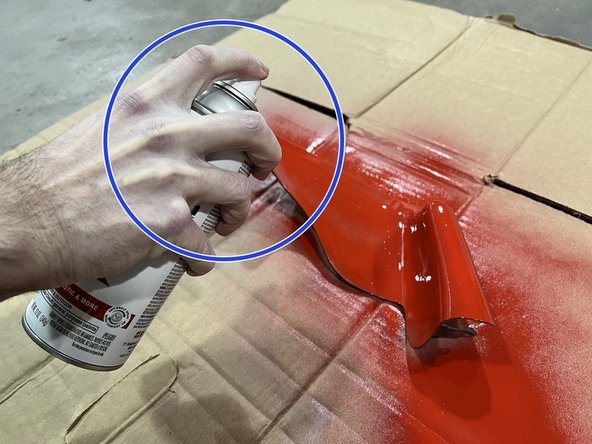
Apply first coat of finishing paint
-
Sand lightly with 400 grit sand paper
-
Let paint dry
-
Apply second coat of finishing paint
-
If finish is not as desired, let dry, wet sand with 1000 grit sandpaper and recoat
-
-
-
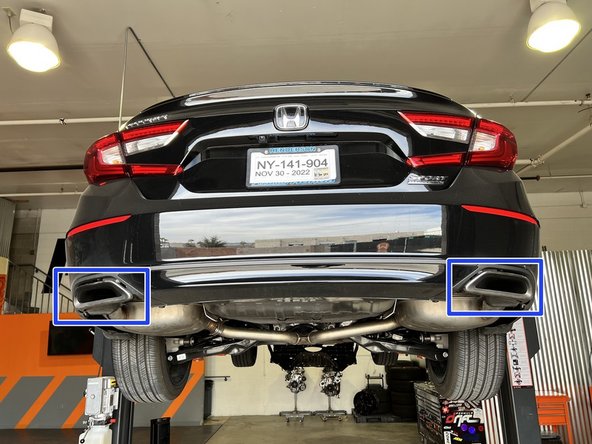
The next steps will show how to remove an OEM exhaust shroud and replace it with a 27WON shroud
-
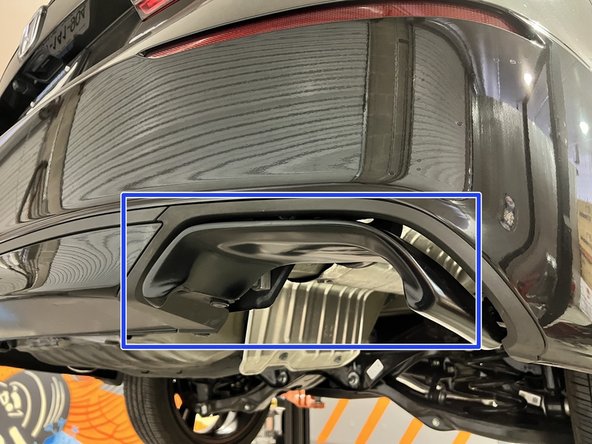
Take a moment to observe the gap between the OE shrouds and the bumpers. This will be helpful later when assessing fitment of 27WON shrouds
-
The passenger side shroud is shown. Repeat steps 20 to 24 for the driver side shroud before moving on to step 25
-
-
-
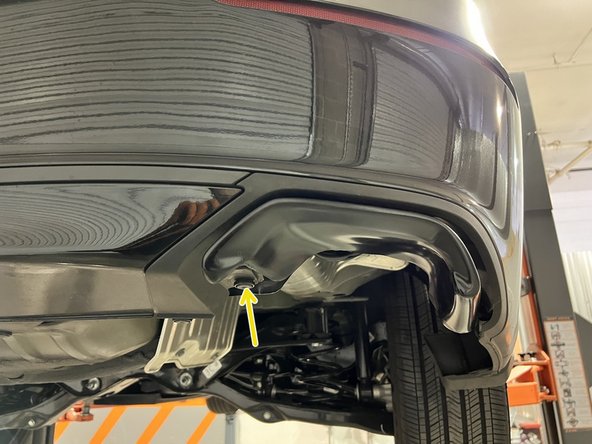
Use a flathead screwdriver or panel removal tool to remove the push clip and set aside for later
-
-
-
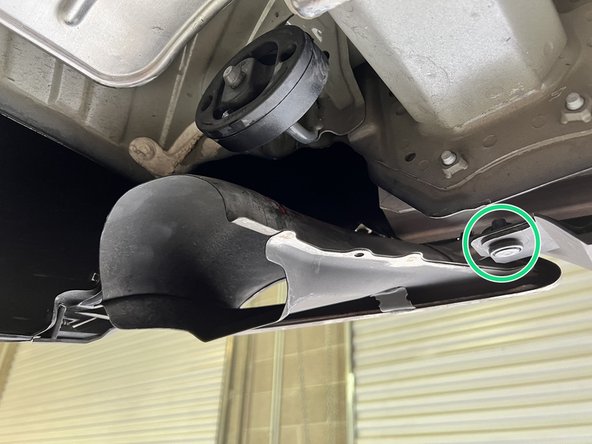
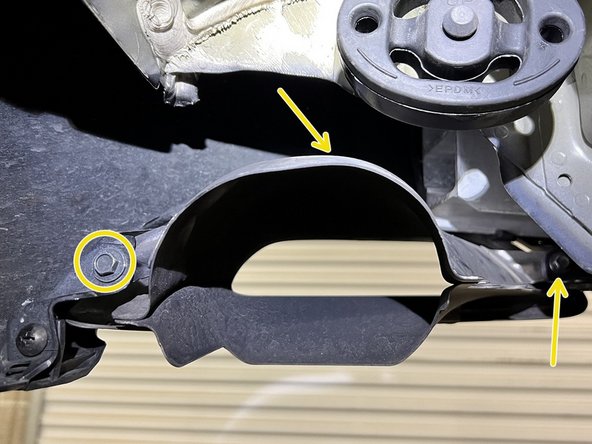
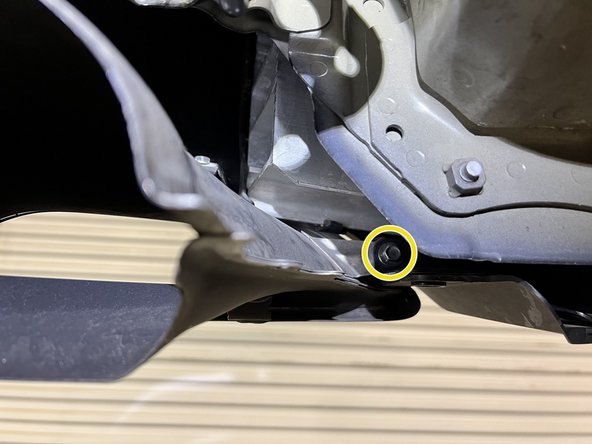
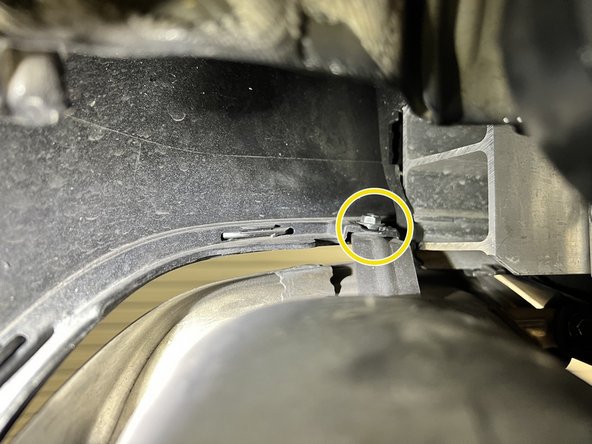
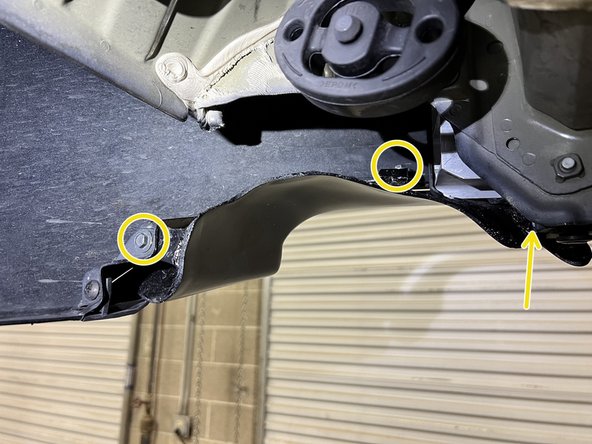
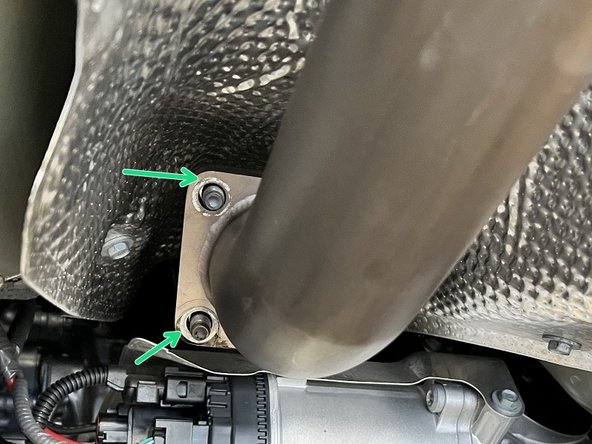
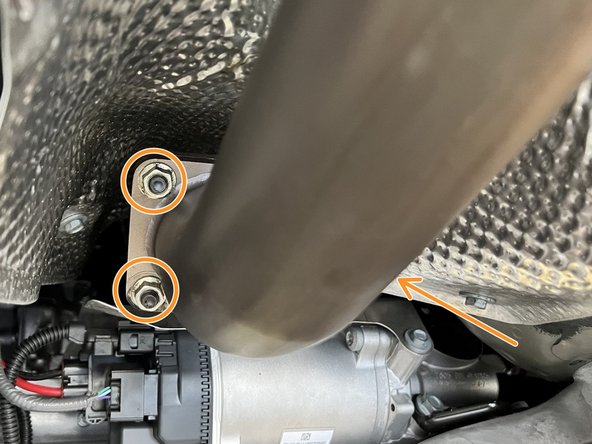
Locate the 3x 8mm bolts securing the shroud. They are highlighted yellow. The yellow arrows show the two hidden bolts and are then shown more clearly in the other pictures
-
Use your 8mm wrench or ratchet and socket to remove the 3x bolts. Remove the shroud and then set hardware aside to reuse later
-
-
-
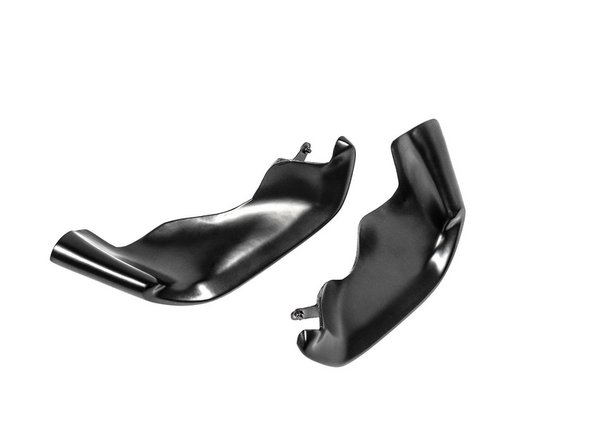
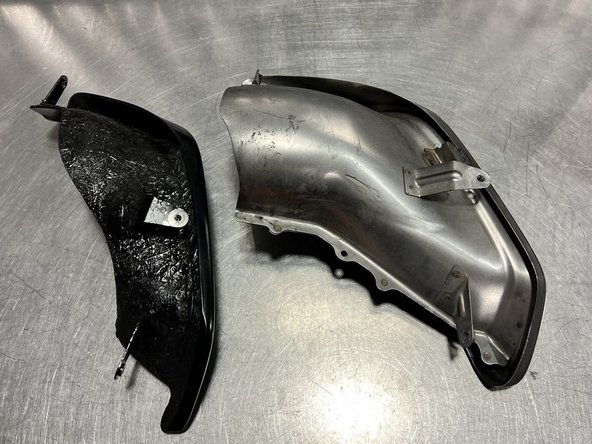
Identify the correct passenger side shroud as shown
-
-
-
Install the 27WON shroud in the reverse order you removed the OEM shroud reusing the 3x 8mm bolts
-
Torque to snug the 3x bolts
-
"Torque to snug" is defined as 1/4 to 1/2 more rotation after setting resistance is felt
-
-
-
Reinstall Push Clip by snapping in
-
Once complete shroud will mount and look as shown
-
If gap between the bumper and the 27WON shroud does not look good to you or it appears uneven, hold tight. Instructions to correct this come later
-
Repeat steps 20 to 24 for driver side shroud before moving on to step 25
-
-
-
Skip to step 27 if FRP shrouds fitment is good
-
Should there be an uneven gap between the top of your shroud and the bumper, the shroud fitment can be adjusted
-
Cars get in accidents. Bumpers deform over time. There are many reasons why the shrouds may not fit two different cars the same
-
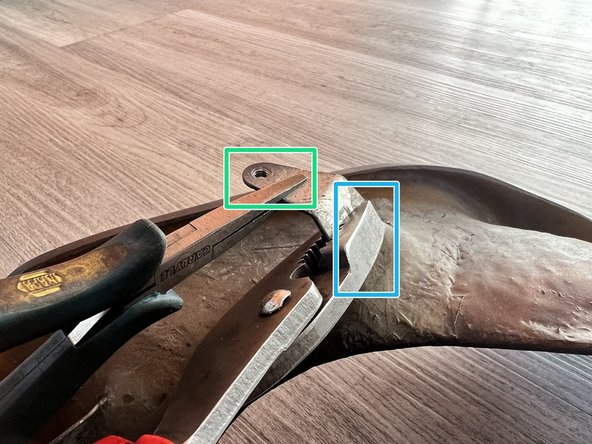
With the shroud removed from the car grab some small and large pliers. Place the large pliers on a bracket, close to the FRP as shown
-
Place the small pliers furthest away towards bracket tip end
-
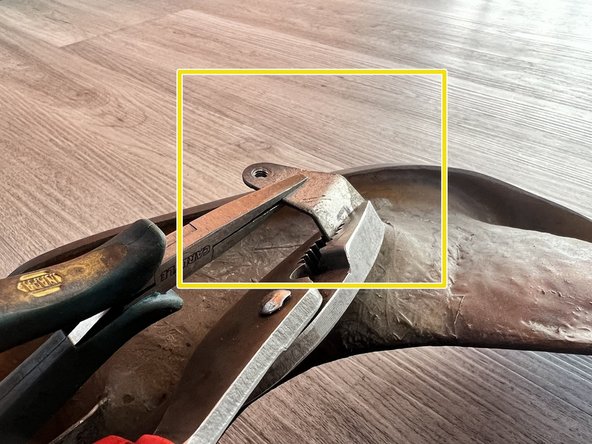
To adjust the shroud closer to the bumper, bend the small end of the bracket down, to move the shroud away from the bumper bend the small end of the bracket up
-
Be careful not to apply to much leverage to the bracket when bending as breaking of the FRP can occur
-
The large pliers are there to keep the force from the small pliers from getting to the FRP
-
-
-
Once the shroud has been adjusted reinstall the shroud and check the fitment
-
Make sure you are happy with the fitment
-
Remember how OE fit? These are complex surfaces and gaps can look even from one angle and not another
-
Shown here is what good fitment looks like from that particular angle
-
If further adjustment is required repeat step 25 until the desired result is achieved
-
-
-
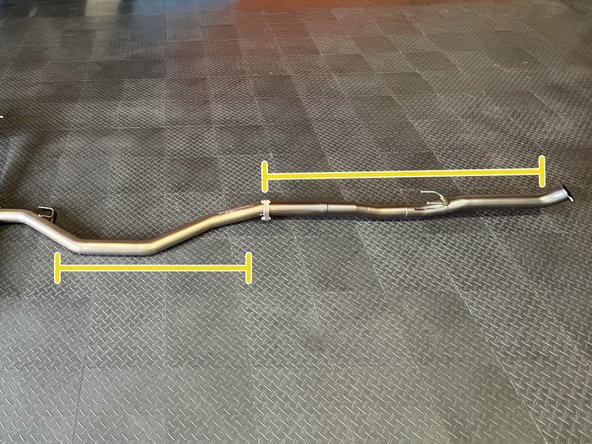
We recommend connecting the exhaust components as shown rather than installing each component on the car separately
-
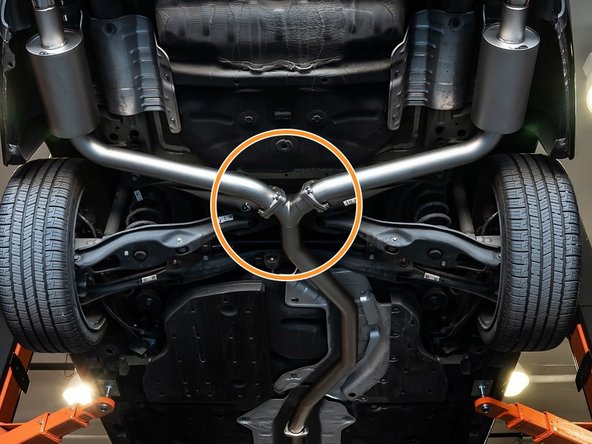
Align the two mid-pipes as shown
-
Use the hangers for reference
-
-
-
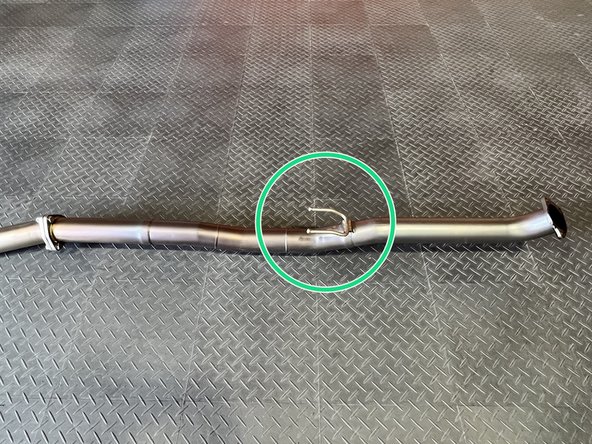
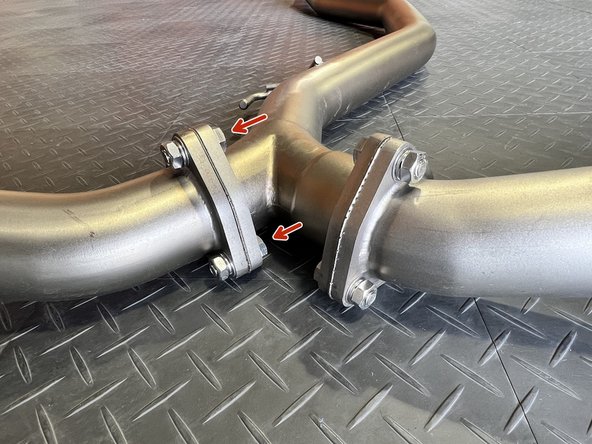
Insert a provided 70mm tri-bolt gasket between the two flanges of the mid-pipes
-
Align the flanges as shown
-
Perfect alignment of the flanges is recommended. Even 1mm of misalignment can cause a big fitment issue at the rear of the car
-
-
-
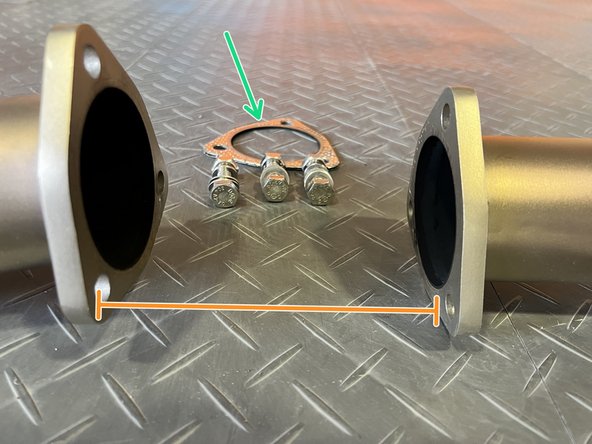
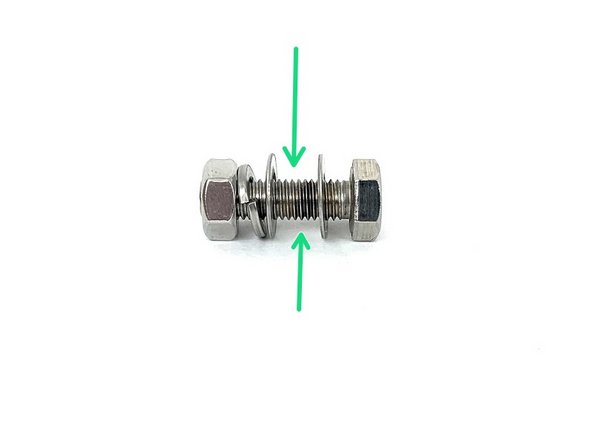
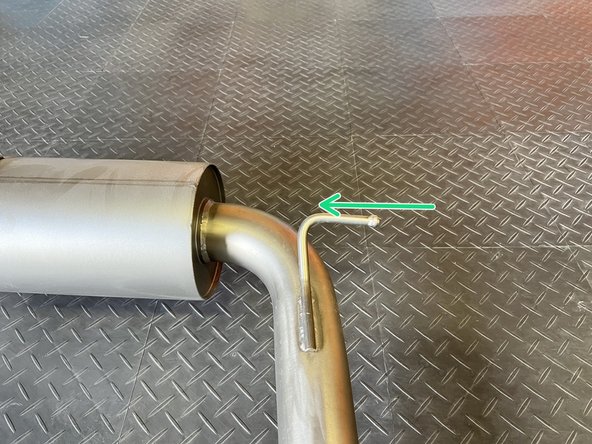
Make sure the exhaust flanges go where the green arrow is indicating when installing hardware in all the flanges of 27WON exhaust system
-
Install 3 sets of hardware as shown using a 17mm socket and 17mm wrench. Hand-tighten the hardware for now
-
-
-
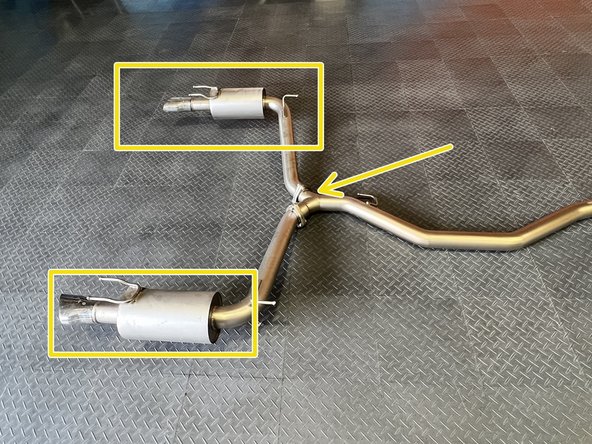
Use the same tri-bolt gaskets and 3 sets of hardware to attach the driver and passenger side muffler to rearward y-pipe as shown
-
Install the hardware as using a 17mm socket and 17mm wrench. Hand-tighten the hardware for now
-
-
-
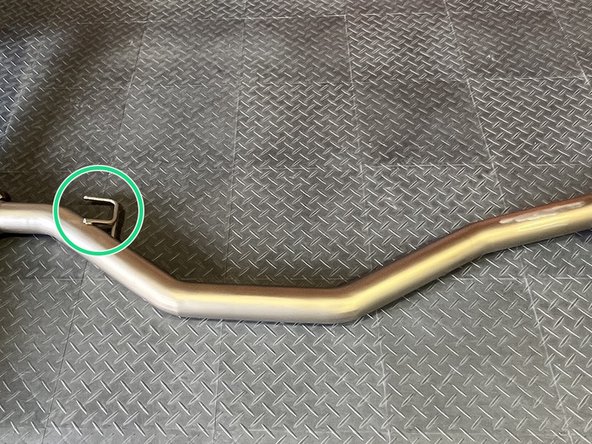
Use tongue and groove pliers or exhaust hanger pliers to remove driver side rubber hanger
-
Slide hanger onto 27WON exhaust in direction shown
-
Repeat for other side
-
-
-
Using the same location as before, support the back of your 27WON exhaust with a friend or jack
-
Support the front section with a bungee chord
-
-
-
Using a spray cleaner, lubricate the rubber hanger
-
Reinsert the front hanger to the chassis hanger as shown
-
-
-
Use caution not to damage exhaust tips
-
Using a spray cleaner, lubricate the hanger support for a muffler section
-
Reconnect the rubber hanger to the exhaust hanger
-
Repeat this step for the other side
-
-
-
Using a spray cleaner, lubricate the hanger support
-
Reconnect the rubber hanger to the exhaust hanger
-
-
-
Using a spray cleaner, lubricate the hanger support
-
Reconnect the rubber hanger to the exhaust hanger
-
OE Exhaust shown
-
Repeat on other side
-
-
-
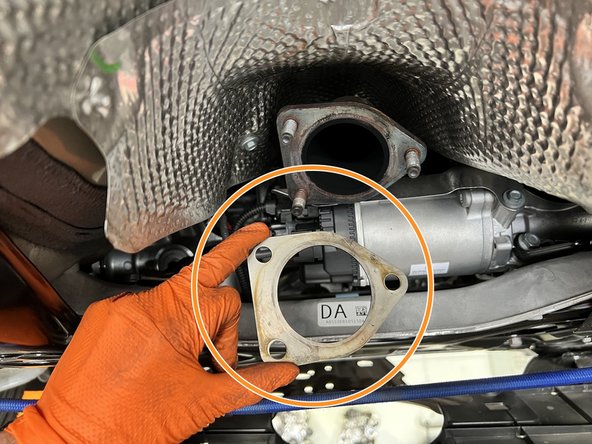
Locate a provided "house gasket" for front-pipe installation
-
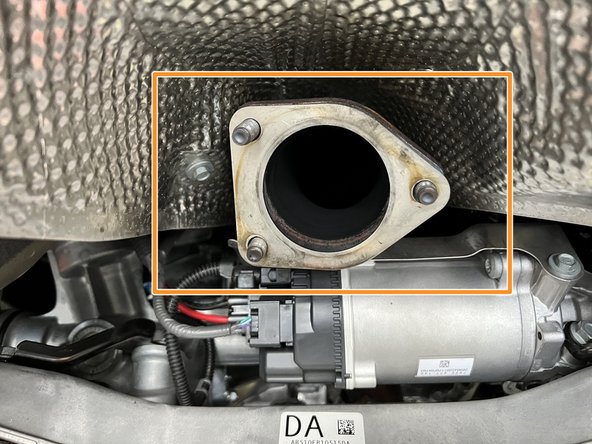
Place "house gasket" on stock front pipe as shown
-
Place forward mid-pipe over front pipe studs as shown
-
-
-
Torque the three (3) OEM nuts to 32 ft-lbs using the 14mm socket and 3/8 torque wrench
-
-
-
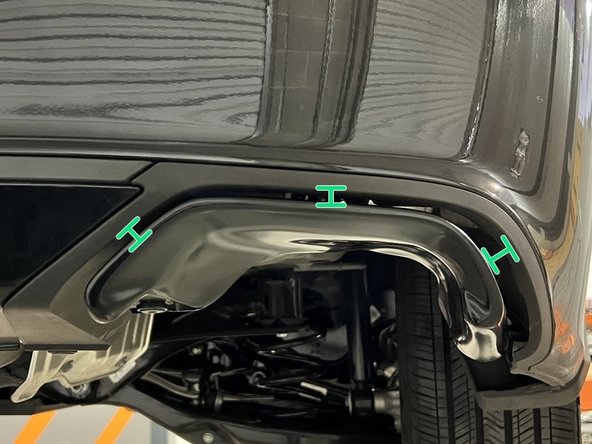
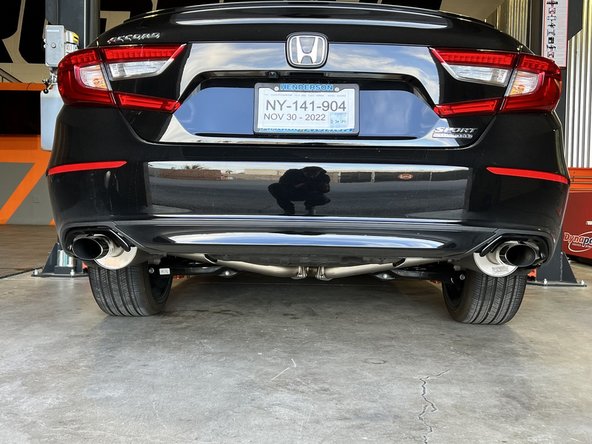
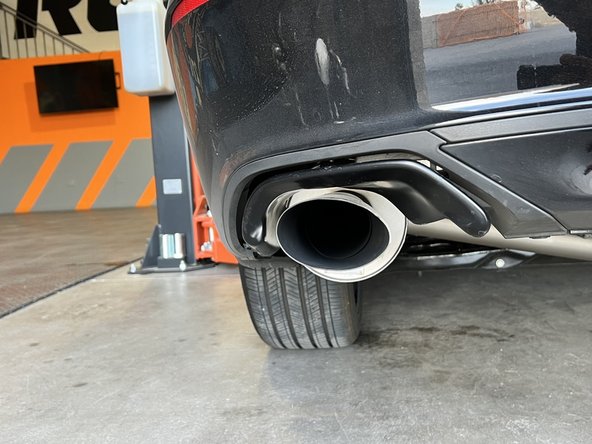
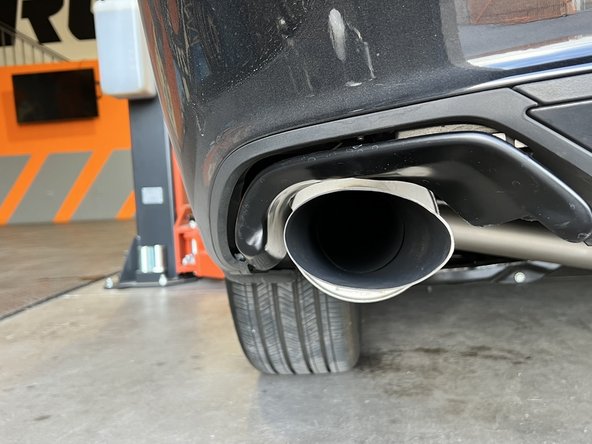
Stand back from the car and verify that the tips are centered and have at least 1/3 inch clearance from the shrouds on both sides
-
If the tips are sitting high, there may be a rubber hanger that is upside-down. Verify that all hangers are oriented correctly
-
If the tips are not centered, starting from the rear section, loosen the flange bolts and nuts hardware moving down the system and re-align the flanges
-
It can be tricky to get all the flanges just so. A very small fitment difference at the front pipe can make a big difference to how the mufflers hang
-
Once tips are centered, torque down all hardware to 25~30 ft lbs
-
Check again that exhaust tips are positioned properly
-
-
-
Reinsert the (1) push pins into the mounting spot as shown
-
Repeat this step on the other side
-
-
-
Reinstall the six (6) Phillips heads screwdrivers circled in orange
-
Reinstall the two push clips circles in orange
-
-
-
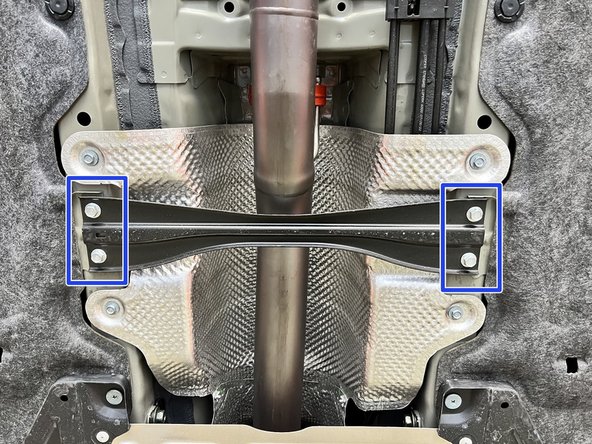
Reinstall the 4x 12mm bolts for the chassis brace and torque to 20 ft/lbs
-
-
-
Start the vehicle to check for leaks or rattles. If none, then take a spin around the block for further verification. If you do find a leak or rattle, please inspect the exhaust further
-
A leak could be caused by a loose flange bolt, improperly used gasket, or if debris is stuck between the gasket and flange
-
A rattle could be caused by misaligned pipe or a rubber hanger being orientated incorrectly
-
Give us a call and we would be happy to help resolve any issues
-
-
-
Exhaust may smoke for the first 30 minutes or so of use. This is normal
-
Exhaust sound will settle a bit during the first 100 miles of use. This is normal
-
Your Honda has a cold start system which causes louder exhaust for around 15 seconds when you start your car cold
-
-
-
This completes the installation of your 27WON 10th Generation Accord Performance Exhaust
-
We hope you were impressed with your 27WON experience and love your new exhaust system for years to come. Email us at sales@27won.com or call us at 571-271-0271 with any questions or concerns
-
Please leave a review here: https://store.27won.com/10th-gen-honda-a...
-
Stay Connected with the latest developments with the 27WON Monthly Newsletter: https://store.27won.com/27won-newsletter...
-
See the latest Products and Tech Videos from 27WON with a quick Subscribe: https://www.youtube.com/27won
-
Share your experience using #27WON on Instagram and Facebook
-