Introduction
In this installation guide we have provided step by step instructions to remove the OEM shift knob and install the 27WON Performance Leather Shift Knob.
Advisory:
- Verify Parking Brake is on during installation as you may knock the vehicle out of gear.
Tools
Parts
-
-
First and foremost; THANK YOU for becoming a part of the 27WON Family. We hope to REDEFINE your experience of the aftermarket with the highest level Parts, Customer Service, Packaging, & Support
-
These instructions are for 10th gen Civic. For 11th gen click here: PDF or WEB
-
The following instructions will show steps with both the OEM Type R shift knob (step 2) and the OEM SI shift knob (step 5). Base model manual transmission Civics will be similar
-
-
-
For SI and Base Models skip to Step 5
-
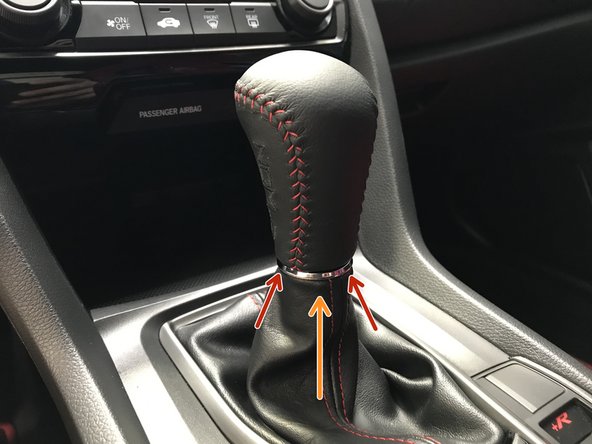
Locate the silver ring at the top of the shift boot as shown
-
Press down on the silver ring to pop the silver ring and shift boot off the bottom of the shift knob
-
You will need to press firmly on the ring
-
Push the shift boot down until you can see the entire black locking nut
-
-
-
Locate the two flat spots on the OEM locking nut
-
While holding the shift knob, use a 14mm wrench to loosen the locking nut
-
You can hand loosen once there is a small gap between the locking and the shift knob
-
-
-
Unthread the OEM shift knob
-
Unthread the OEM locking nut
-
Type R Owners should now skip to Step 8
-
-
-
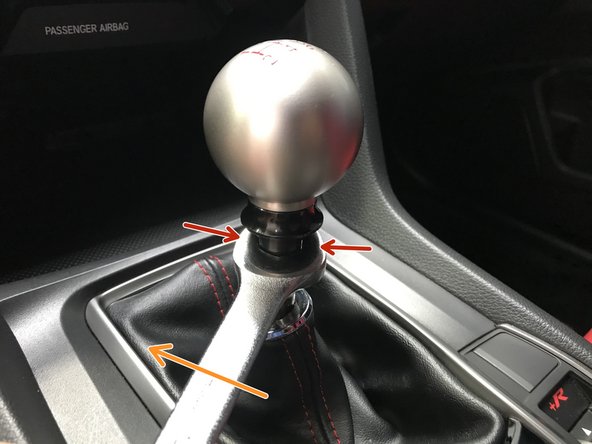
Locate the silver ring at the top of the shift boot as shown
-
Press down on the silver ring to pop the silver ring and shift boot off the bottom of the shift knob
-
You will need to press firmly on the ring
-
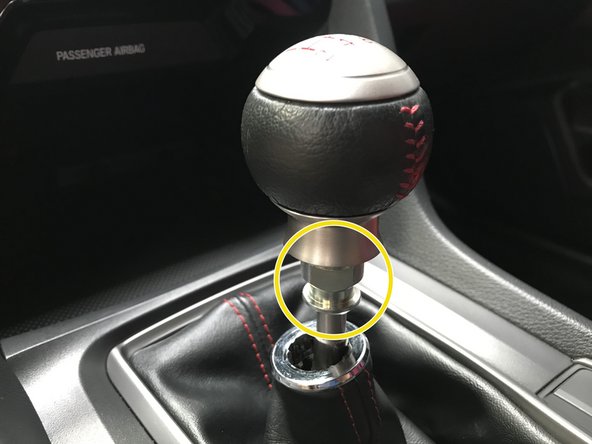
Push the shift boot down until you can see the entire silver locking nut
-
-
-
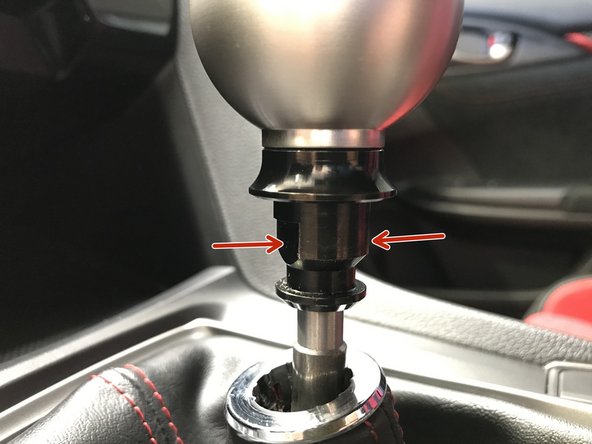
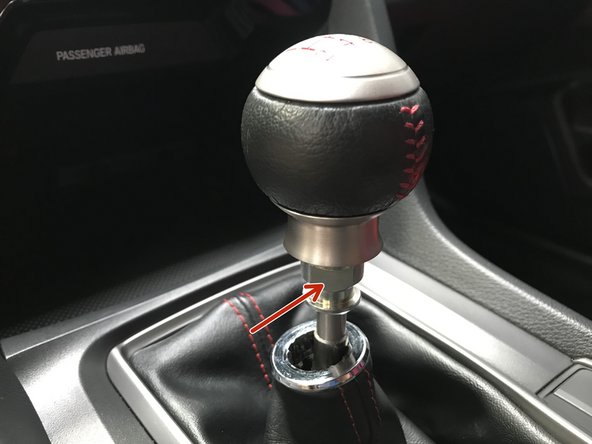
Locate the two flat spots on the OEM locking nut
-
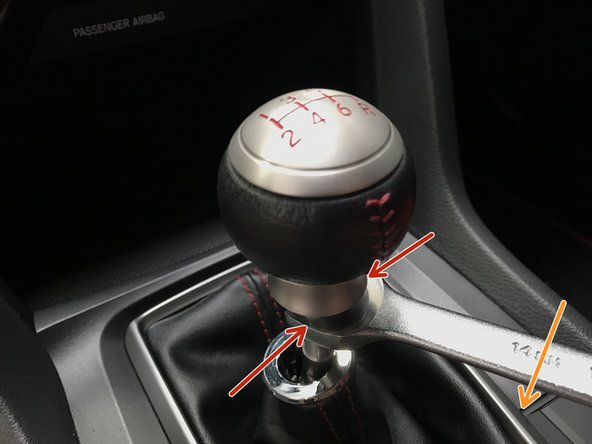
While holding the shift knob, use a 14mm wrench to loosen the locking nut
-
You can hand loosen once there is a small gap between the locking and the shift knob
-
-
-
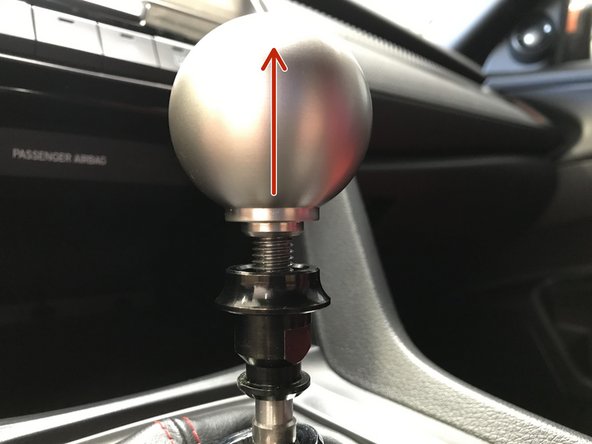
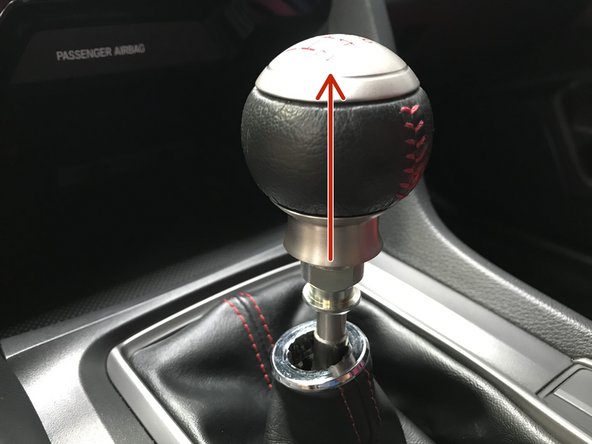
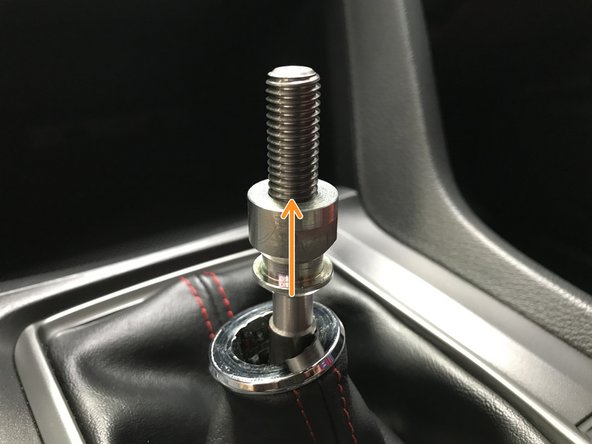
Unthread the OEM shift knob
-
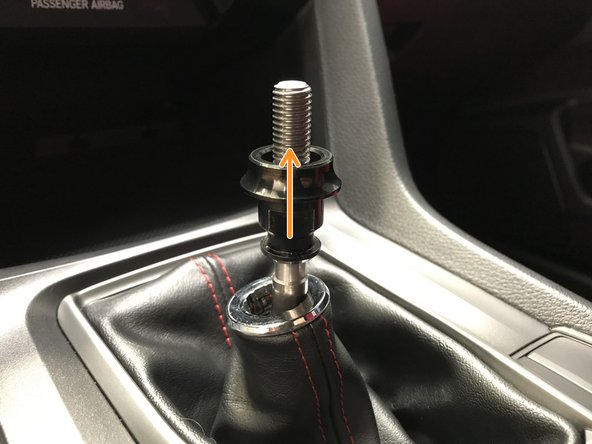
Unthread the OEM locking nut
-
-
-
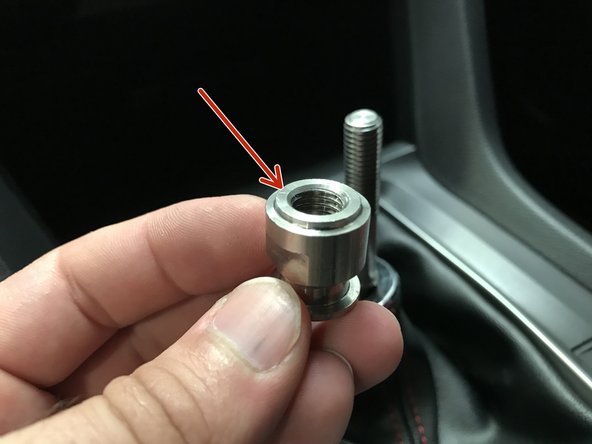
Locate the 27WON locking nut
-
The 27WON locking nut has a small step at the top
-
Hand thread the 27WON locking nut onto the shift rod until it bottoms out
-
-
-
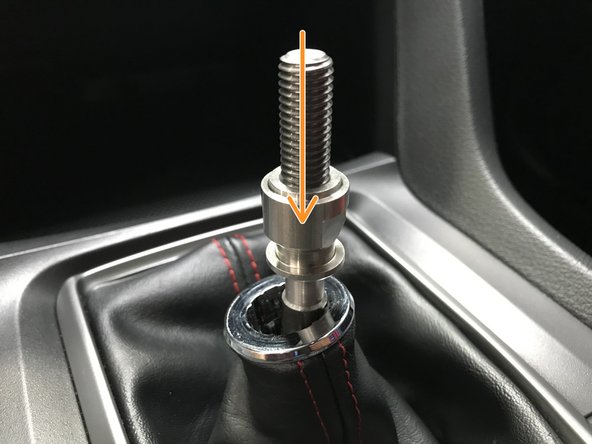
Hand thread the 27WON shift knob onto the shifter rod until it bottoms out
-
Unthread the shift knob until the desired orientation is achieved as shown
-
Shift knob orientation incorrectly set as shown
-
Shift knob orientation correctly set as shown
-
Locate the flat spots on the locking nut then use the 14mm wrench to tighten
-
While holding the shift knob in place use the wrench to tighten the locking nut up against the shift knob
-
Tighten the locking nut until the shift knob cannot rotate by hand
-
-
-
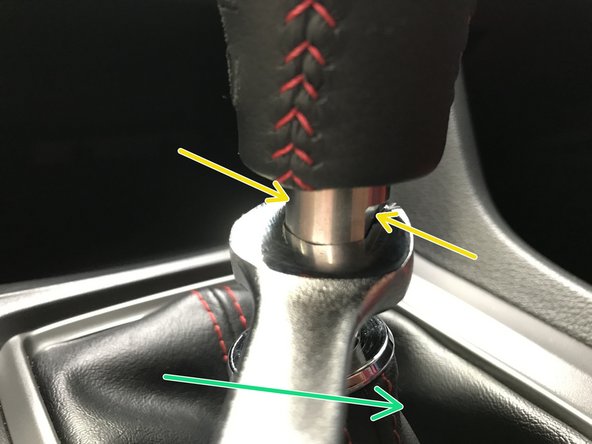
Locate the silver ring on the shift boot as shown
-
Press the silver ring up onto the locking nut
-
The silver ring should snap into place on the locking nut as shown
-
-
-
Approximately every 6 months use a cleaner and conditioner intended for genuine leather to keep the 27WON shift knob looking great
-
Follow manufacturer instructions for cleaning process and tools
-
-
-
This completes the installation of your 27WON Performance Leather Shift Knob
-
We hope you were impressed with your 27WON experience and love your new Shift Knob for years to come. Email us at sales@27won.com or call us at 571-271-0271 with any questions or concerns
-
Please Leave a review here: https://store.27won.com/honda-civic-leat...
-
Stay Connected with the latest developments with the 27WON Monthly Newsletter: https://store.27won.com/27won-newsletter...
-
See the latest Products and Tech Videos from 27WON with a quick Subscribe: https://www.youtube.com/channel/UCF7uI0N...
-
Share your experience using #27WON on Instagram and Facebook
-