Introduction
In this installation guide, we have provided step-by-step instructions to install the 27WON Performance Radiator Shroud.
Advisory:
- Fitment is only confirmed for the USDM version of the 2022+ Honda Civic. Fitment is not guaranteed for Right-hand drive models but should work
-
-
First and foremost; THANK YOU for becoming a part of the 27WON Family. We hope to REDEFINE your experience of the aftermarket with the highest level Parts, Customer Service, Packaging, & Support
-
This does not fit 2023+ Integra
-
-
-
Open the hood to access the front part of the engine bay
-
-
-
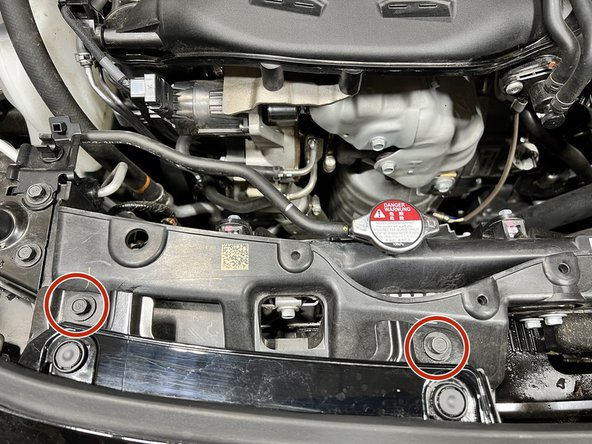
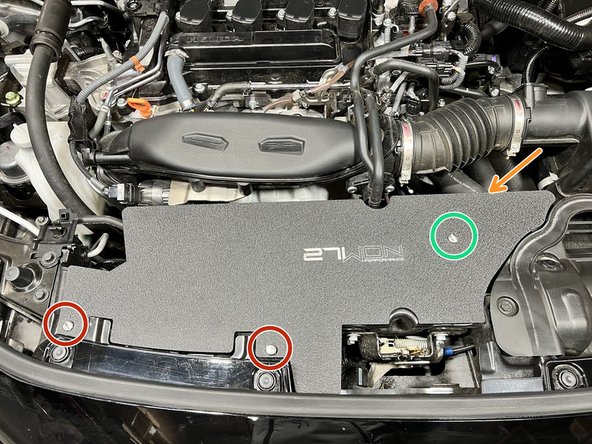
Locate the 2x 10mm bolts and remove them from the car. You will not reuse these bolts later
-
-
-
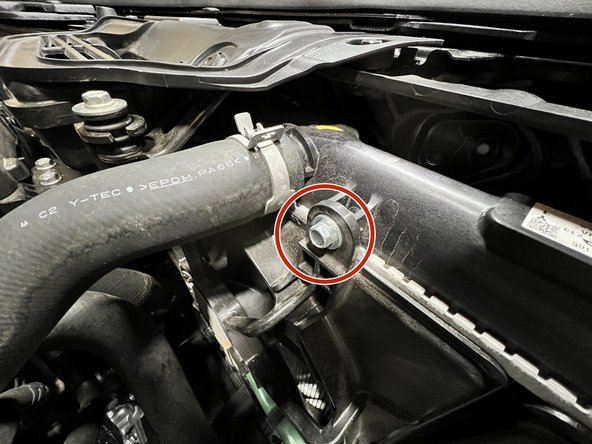
Locate the 10mm bolt next to the radiator hose as shown and remove it
-
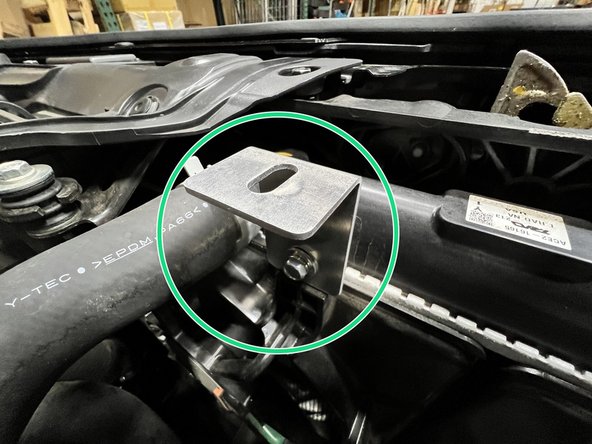
Install the supplied bracket in the orientation shown and rethread the 10mm bolt and torque to snug
-
"Torque to snug" is defined as 1/4 to 1/2 more rotation after setting resistance is felt
-
-
-
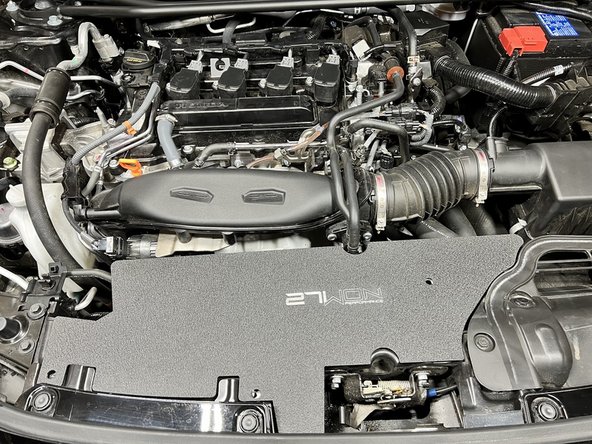
Place Radiator Shroud as shown
-
-
-
Use two of the supplied flat-head pan screws and SS washers to secure the two most forward holes using a flat head screwdriver. Torque to snug
-
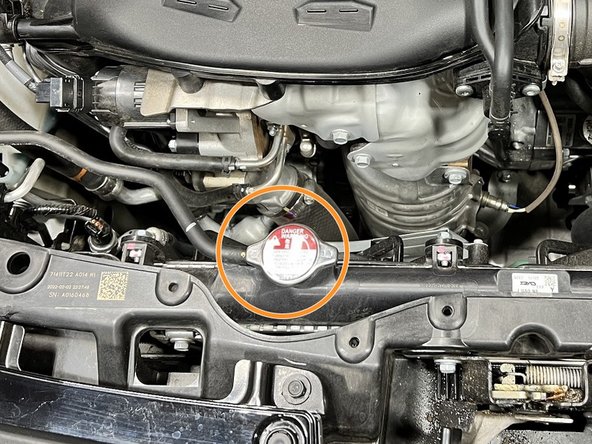
Notice you are covering your radiator cap. Pan head screws were chosen here so removal of the shroud can be done without shop tools
-
Put the last supplied flat-head pan screw and SS washer through the top of shroud and previously installed bracket and secure underneath with supplied M6 nut using the 10mm socket and ratchet. Torque to snug
-
You can easily get tool and nut under the shroud by accessing it by the intake tube
-
-
-
After prolonged driving the radiator shroud can get to temperatures in excess of 140 degF. Do not touch the surface immediately after driving and allow the shroud to cool down fully before touching
-
Place supplied sticker in visible location. Safety first!
-
-
-
Radiator cap is now underneath the shroud
-
Follow owners manual for removal of cap. Contents can be under pressure
-
Pan head screws were selected to secure the 27WON radiator shroud. This allows removal of the radiator shroud with a flat head screw driver, key, or even a coin
-
-
-
This completes the installation of your 27WON Performance Radiator Shroud
-
We hope you were impressed with your 27WON experience and love your new shroud for years to come. Email us at sales@27won.com or call us at 571-271-0271 with any questions or concerns
-
Please Leave a review here: https://store.27won.com/11th-gen-honda-c...
-
Share your experience using #27WON on Instagram and Facebook
-