
Introduction
In this installation guide, we have provided step-by-step instructions to install the 27WON Performance Radiator Shroud.
Advisory:
- Fitment is only confirmed for the USDM version of the 2016-2021 Honda Civic. Fitment is not guaranteed for Right-hand drive models but should work
-
-
First and foremost; THANK YOU for becoming a part of the 27WON Family. We hope to REDEFINE your experience of the aftermarket with the highest level Parts, Customer Service, Packaging, & Support
-
-
-
These instructions are written using a readily available riv rut install tool. The following steps require a tool like this. A similar style riv nut tool will suffice
-
This riv nut tool can be had for around $40 from places like Amazon or your local hardware store. Be sure to have an M6 size adapter in your kit
-
Riv Nuts are supplied with the Radiator Shroud set
-
-
-
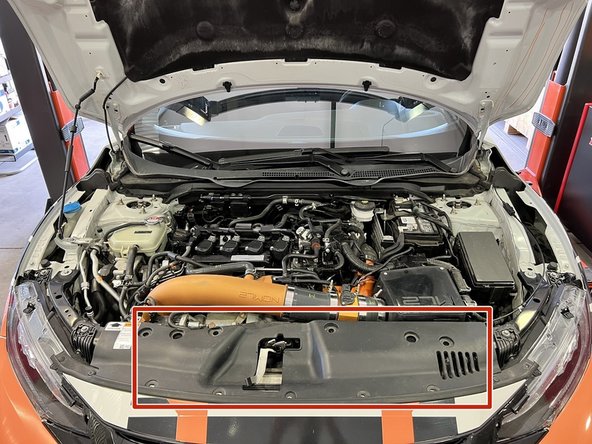
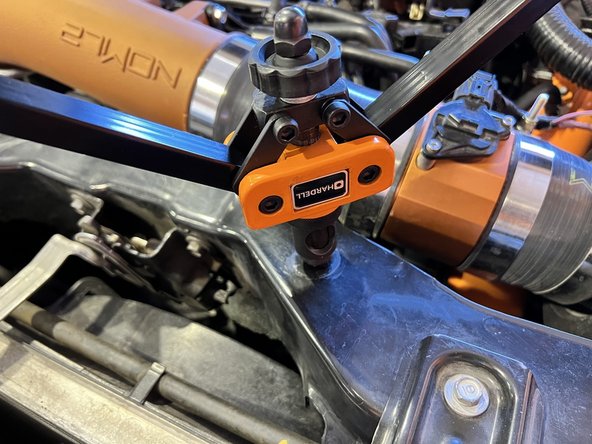
Open the hood to access the OEM radiator shroud
-
-
-
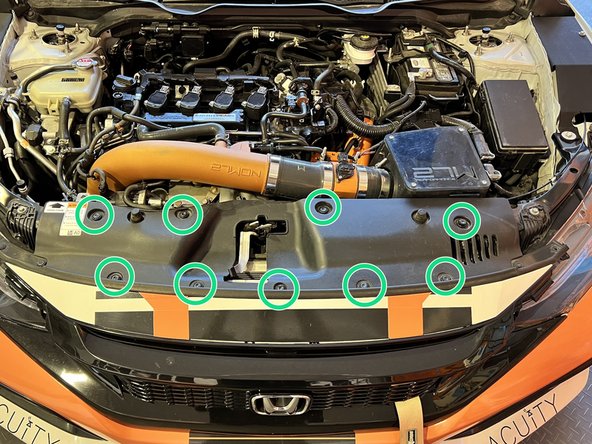
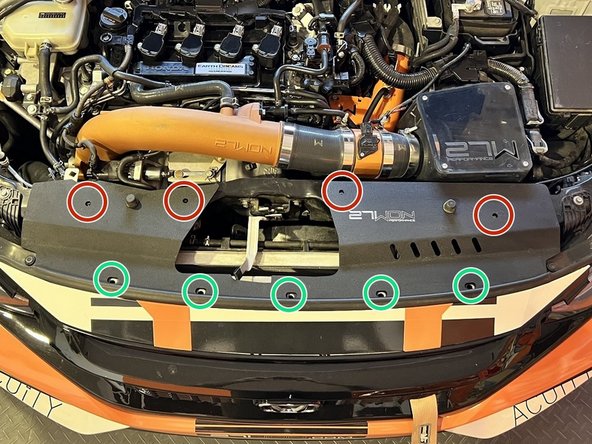
Locate the nine plastic push clips circled in green
-
Use your push clip removal tool to remove the clips and set them aside. You will not reuse any of these clips. ( a flathead screw driver can be used if you do not have a removal tool)
-
Remove the OEM shroud from the car
-
-
-
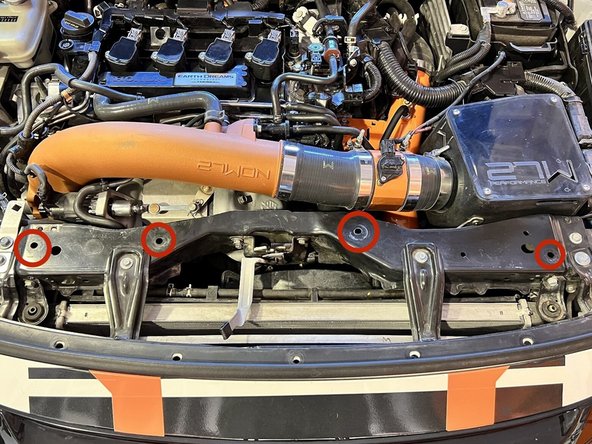
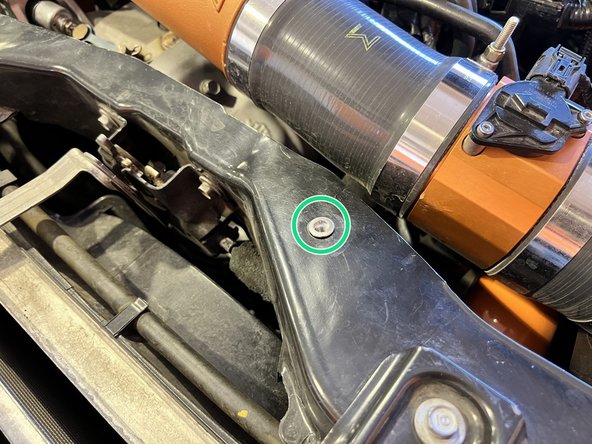
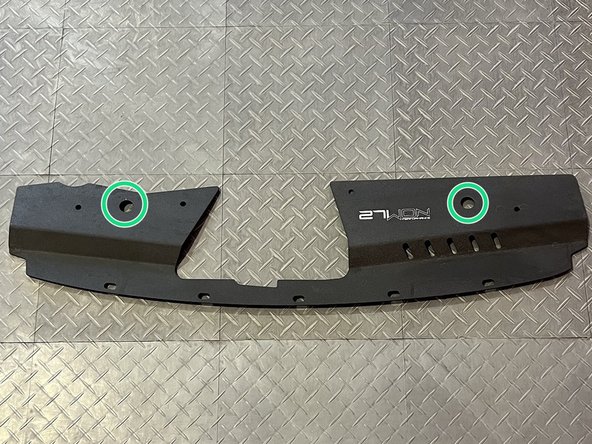
Locate the 4x 10mm holes shown in red circles. This is where we will install the supplied Riv Nuts
-
Use Riv Nut tool to install provided M6 riv nuts
-
Riv Nut successfully installed. It is confirmed installed correctly when the riv nut is snug in place and will not pull back out from the hole
-
-
-
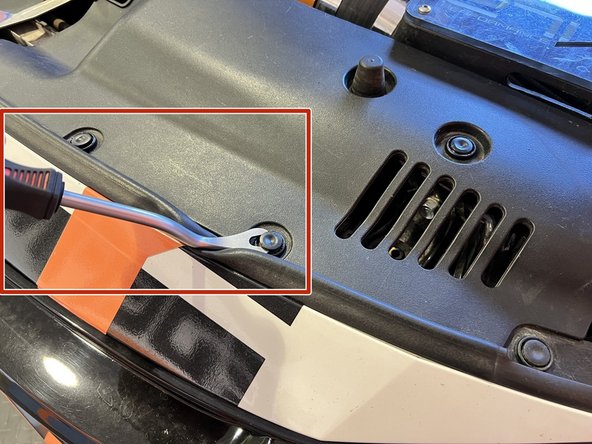
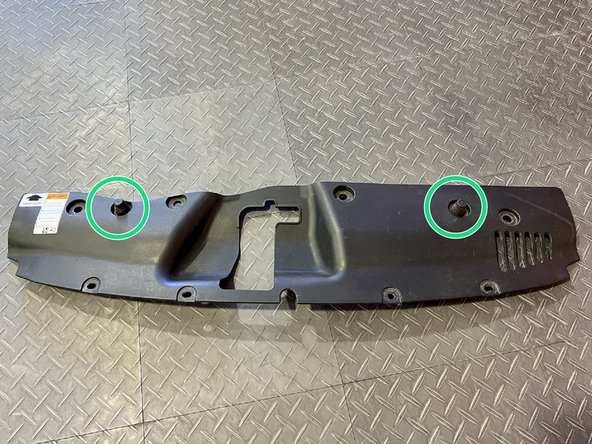
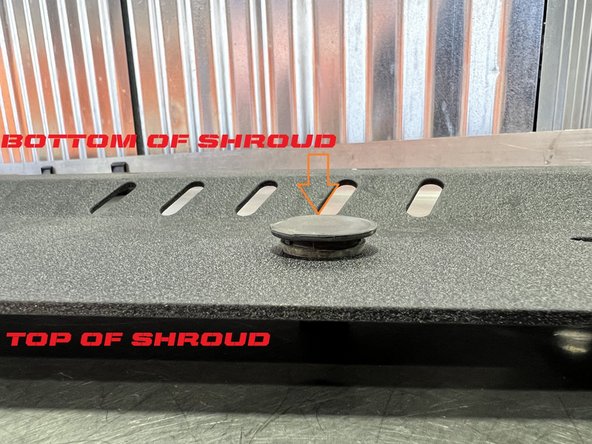
Grab the OEM shroud you removed in Step 4 and locate the two rubber stops circled in green
-
Using your fingers to press down hard on the rubber stop until it pushes out from the other side. Repeat this step for the other rubber stop
-
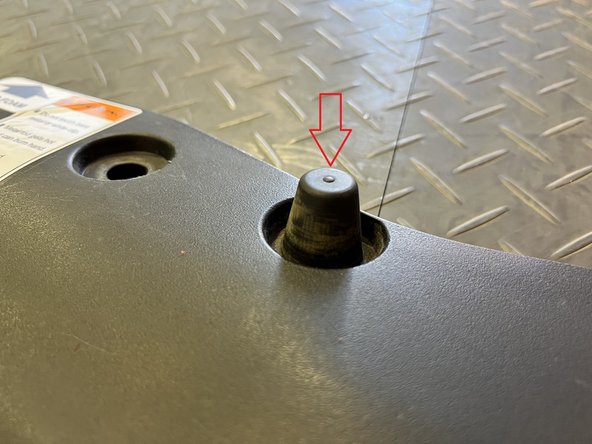
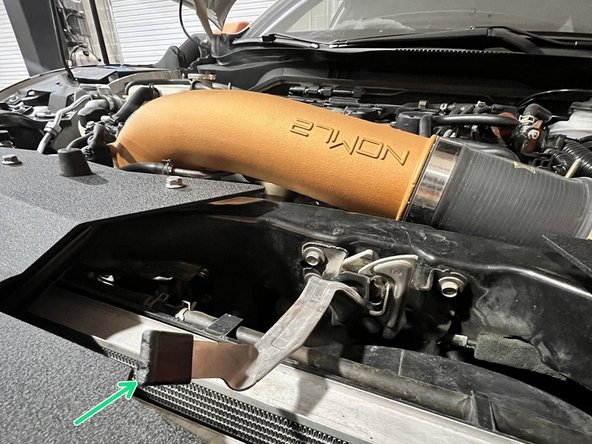
If you struggle to remove the rubber stop you can use your pry tool to pry up from the underside in the area of the yellow arrow
-
-
-
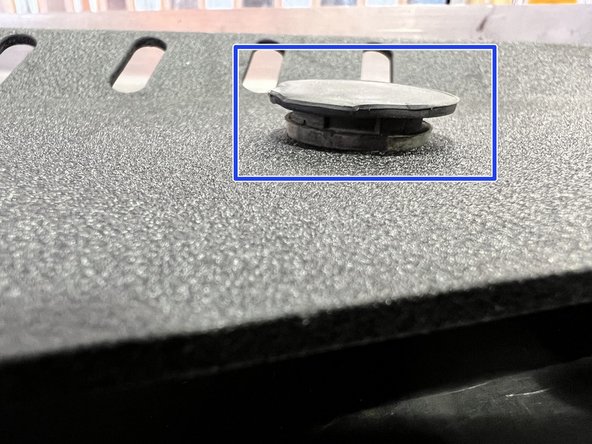
Locate the two large holes in the 27WON shroud. This is where you will install the 2x rubber stops you just removed
-
Flip the shroud over and insert the rubber stop down so the tip of the cone goes in first and is pointing up when the shroud is flipped back over
-
Push down until there is ~2mm showing of the stacked cone part. You will feel some resistance and notice the rubber stop will not go to the lip
-
Do not force the cone to the lip
-
-
-
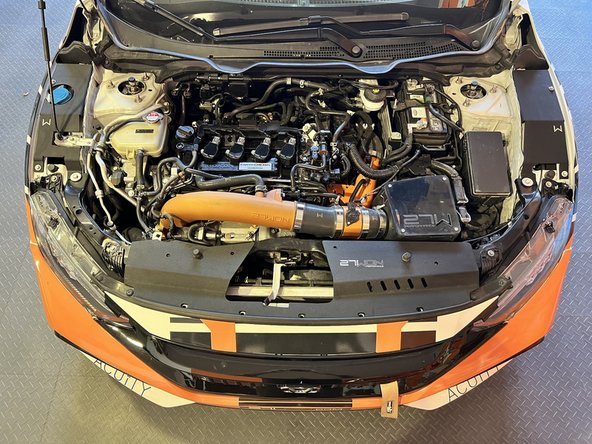
Place the shroud onto the header panel lining up all of the holes as shown
-
Install the 4x M6x1.0x30mm bolts in the areas of the red circles first and get them started but do not tighten all the way down yet
-
Install the 5x provided push clips in the areas of the green circles
-
You can use your hand or knee to push the front of the bumper towards the firewall to help line the bumper holes and fender holes so the push clips go in easy
-
Torque to snug the 4x bolts
-
"Torque to snug" is defined as 1/4 to 1/2 more rotation after setting resistance is felt
-
Once the 4 bolts circled in red are screwed into the riv nuts in the header panel a small gap will be seen from the backside of the shroud. This is normal and do not continue to further tighten down the shroud as it is not required and can deform your shroud
-
-
-
Make sure hood latch is high enough to use. Rubber cover should be sticking up above the surface of the shroud
-
If extra clearance is needed between the hood latch and the radiator shroud you can adjust the hood latch by pushing up and towards the firewall on the front of the latch where the rubber cover is
-
Doing so will eliminate any contact between the latch and front of shroud
-
-
-
After prolonged driving the radiator shroud can get to temperatures in excess of 140 degF. Do not touch the surface immediately after driving and allow the shroud to cool down fully before touching
-
Place supplied sticker in visible location. Safety first!
-
-
-
This completes the installation of your 27WON Performance Radiator Shroud
-
The 3x remaining push clips are extras just in case and not required to complete install
-
We hope you were impressed with your 27WON experience and love your new shrouds for years to come. Email us at sales@27won.com or call us at 571-271-0271 with any questions or concerns
-
Please Leave a review here: https://store.27won.com/2016-2021-honda-...
-
Share your experience using #27WON on Instagram and Facebook
-


Cancel: I did not complete this guide.
One other person completed this guide.