Introduction
In this installation guide we have provided step by step instructions to remove the OEM front brake pads and install the 27WON Performance replacement brake pads.
Advisory:
- Working under the vehicle requires a safe and sturdy location for the vehicle to sit on jackstands.
- The brake rotors can be hot after recent vehicle operation. Allow the vehicle to cool or use a fan to cool the brake rotors before working on the vehicle.
-
-
First and foremost; THANK YOU for becoming a part of the 27WON Family. We hope to REDEFINE your experience of the aftermarket with the highest level Parts, Customer Service, Packaging, & Support
-
These instructions reference "Left Hand" & "Right Hand" sides. Left Hand & Right Hand is always defined from the driver seat viewpoint
-
For rear pad check out this guide.
-
-
-
Raise the vehicle and support with jackstands in the OE recommended locations
-
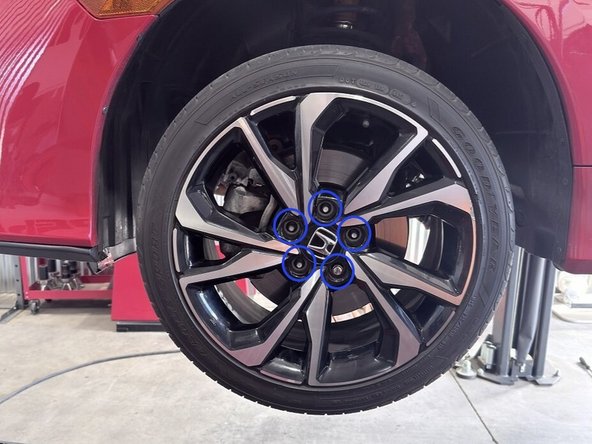
Remove the front wheels/tires using your lug nut socket and breaker bar
-
The following instructions show the left-hand side removal of OE components and installation of 27WON replacement pads. The right-hand side is done with the same steps
-
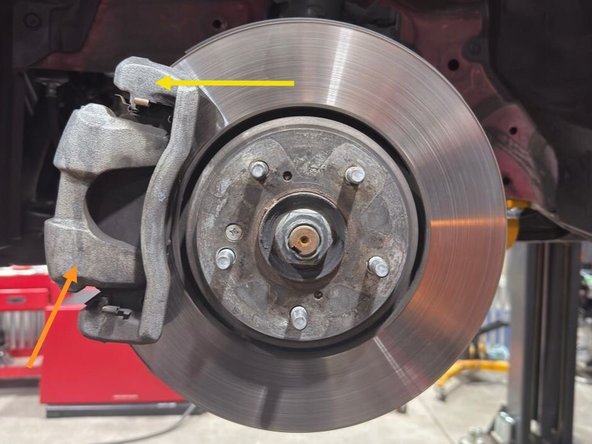
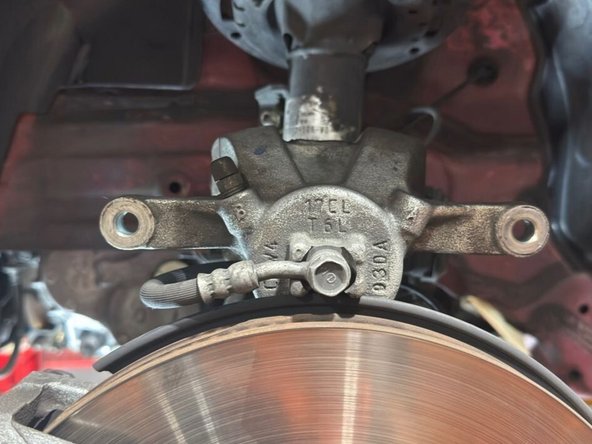
Identify Components
-
Brake Caliper
-
Brake Caliper Bracket
-
-
-
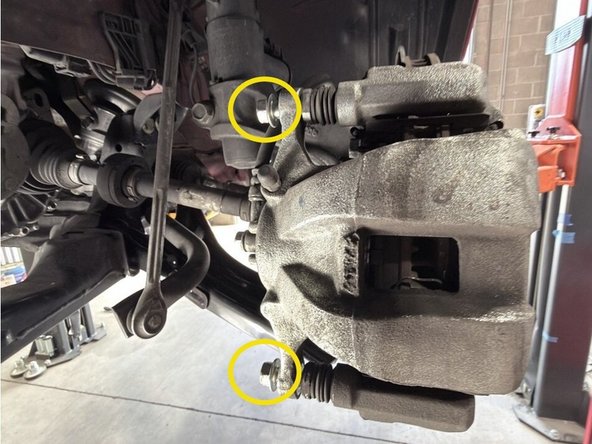
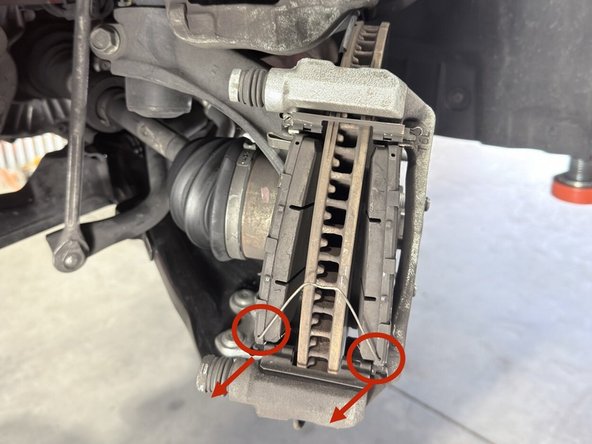
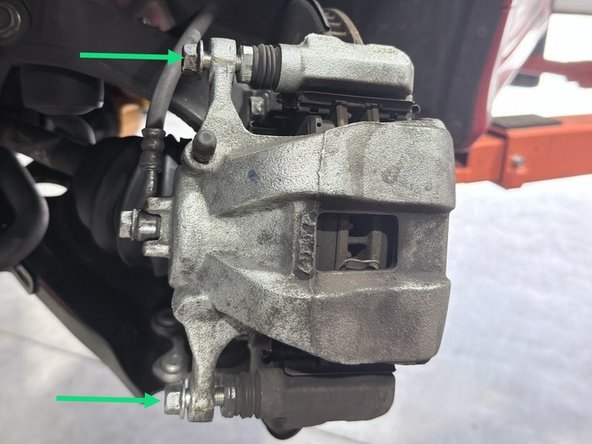
Move to the back side of the caliper for the removal process
-
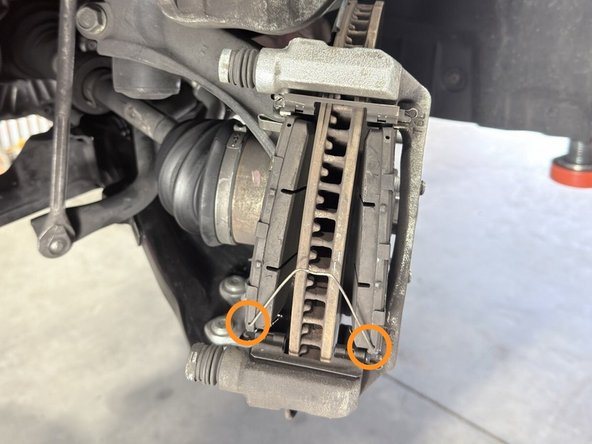
Using a 14mm socket and a 3/8" drive ratchet, remove the two caliper slider bolts circled in yellow
-
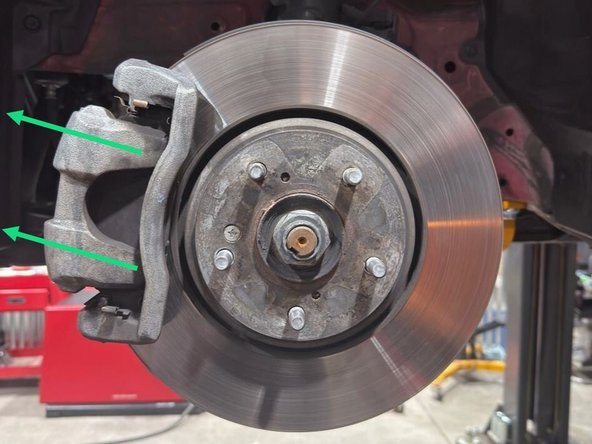
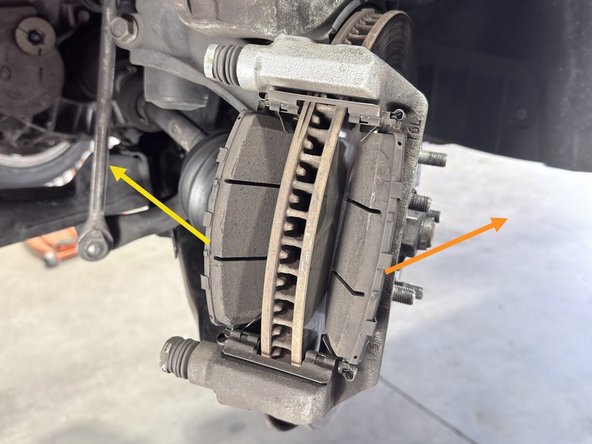
Remove the caliper from the rotor as shown
-
If the rotor is heavily worn, you may need to spread the brake pads apart to gain the clearance needed to remove the caliper
-
Do not let the caliper hang from the brake line, this could cause damage to the line or fittings. Set on top of rotor as shown
-
-
-
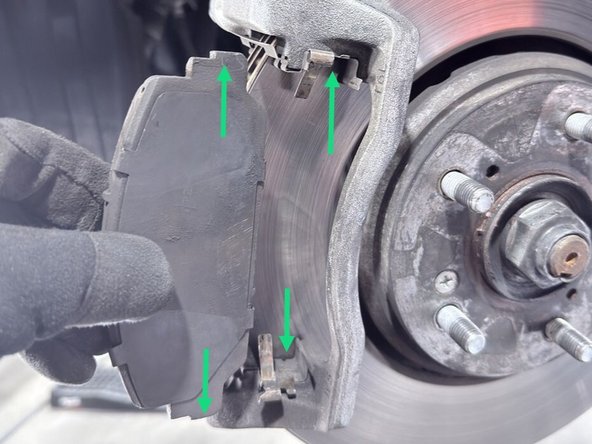
Remove brake pad retaining clip by pulling out as shown. Set aside, it's reused
-
Remove the outer brake pad. This will come straight out to the side as shown
-
Remove the inner brake pad. This will come straight out to the side as shown
-
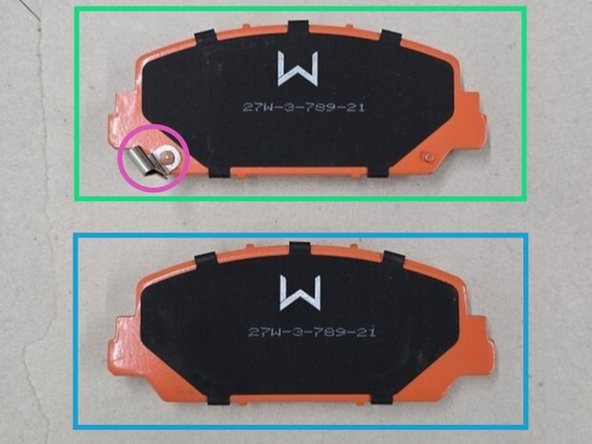
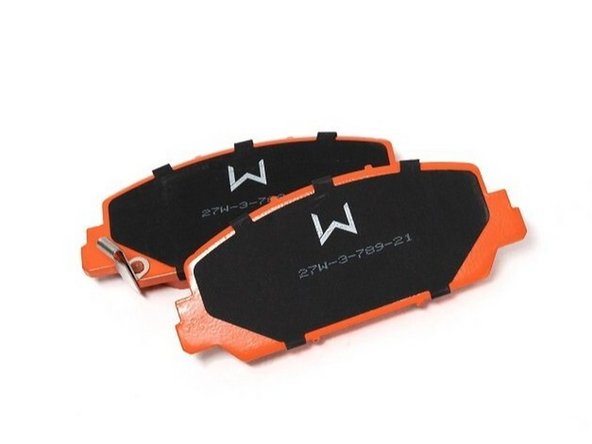
Lay out your 27WON replacement pads to make sure you have the correct pads for each side. Note, you'll have four total pads. Only one side is shown here
-
Inner
-
Outer
-
Wear indicator location
-
Note, the wear indicator is only on the inner pad side
-
-
-
Follow Factory Service Manual (FSM) for proper maintenance of braking system
-
Worn/damaged rotors or calipers can cause brake system failure and premature pad wear. Make sure your brake system doesn't need the other components serviced
-
These parts are shown off of the vehicle, but can still be easily inspected without removing them
-
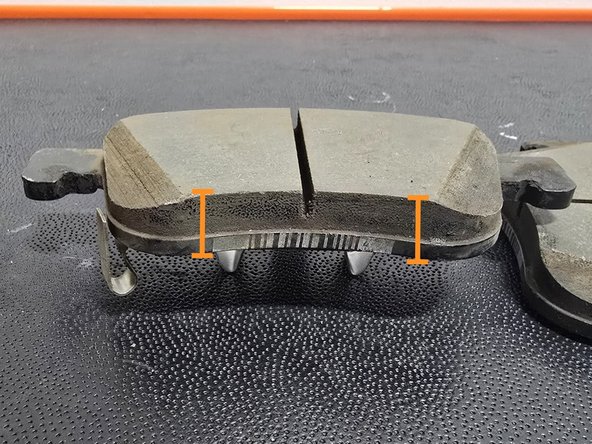
Verify the removed brake pads are worn even. Both ends of the pads should be roughly the same thickness. If your pads are wearing unevenly this could indicate a bad rotor or caliper. Your brake pads may look different than what's shown here
-
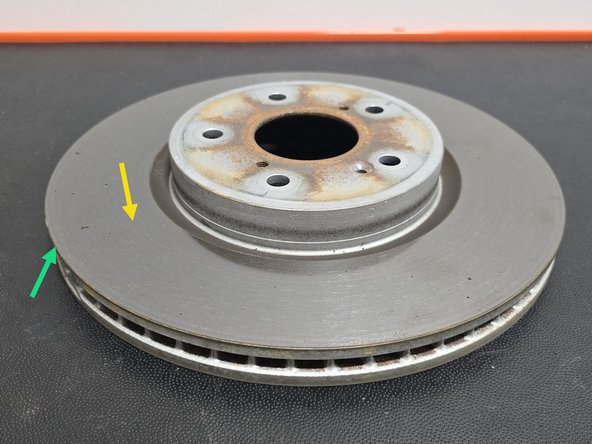
Inspect your rotors for any cracks or gouges. The contact surfaces of your rotors should be smooth and flat. Damaged or warped rotors will cause excessive brake pad wear
-
Rotors need to be a minimum thickness to be used. Consult FSM for this specification. Inspect the edge of your rotors for an excessive lip. A large lip on the edge of your rotor can be an indicator that it is time to replace the rotor
-
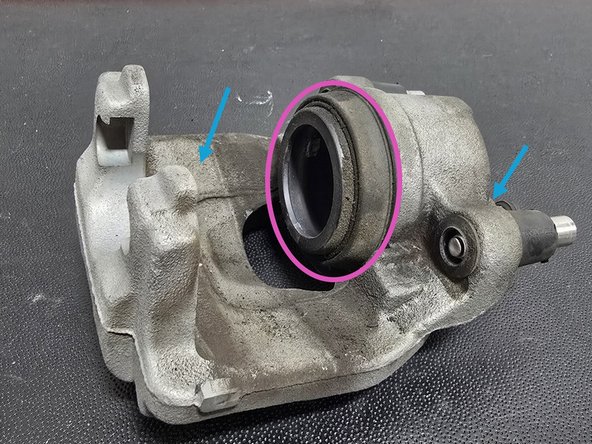
Inspect your calipers for any cracking or obvious leaks
-
Inspect your caliper piston boot for any rips or tears. This is may indicate that the caliper needs replaced
-
-
-
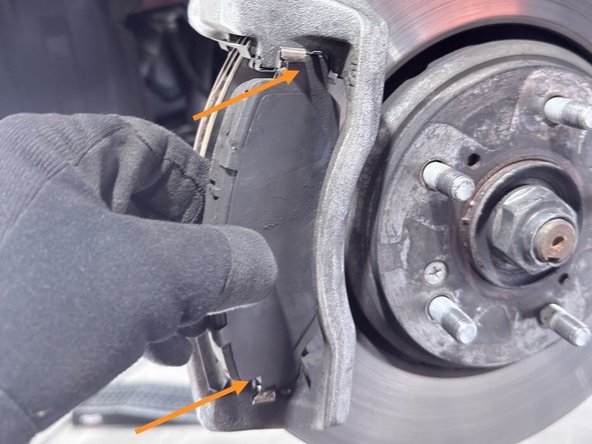
Note the location of the brake pad retaining hardware. This is reused
-
The top and bottom of the 27WON brake pads align into the groove of the brake pad retaining hardware as shown
-
Install the outer brake pad into the caliper bracket by aligning the top and bottom edges and pushing at an angle as shown
-
Repeat with the inner brake pad in the same way
-
-
-
Note the wear indicator at the top of the inner brake pad. Only the inner brake pads will have such indicators
-
Align the brake pad retaining clip in each brake pad and reinstall as shown
-
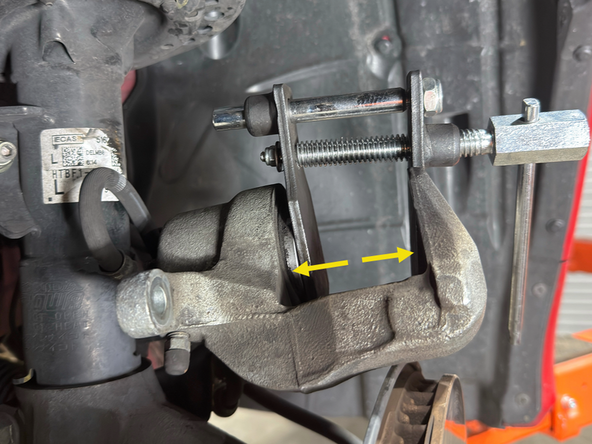
Using a C-clamp or a caliper compressing tool as shown, compress the caliper piston enough for the caliper to slide over the new pads
-
This step can be skipped if you already compressed the caliper or your OE pads were brand new
-
-
-
Slide the caliper over the 27WON brake pads and OE rotor as shown
-
Before proceeding, verify the brake pads are sitting in the caliper and caliper bracket as shown
-
Using a 14mm socket and a 3/8" ratchet, reinstall the caliper slider bolts as shown and torque to 25 Ft/lbs
-
-
-
This completes the Brake Pad installation for the left hand side of the vehicle. The right hand installation process is the same
-
Complete the right hand installation process starting on Step 3
-
-
-
Reinstall your wheels. Follow FSM for proper wheel lug nut torque. Lower your car back on the ground and proceed to bedding your new pads in following steps
-
This completes the installation of the 27WON brake pads - The following step provides instruction for Brake Pad Bedding
-
-
-
Brake pad bedding is an essential process to the life and durability of the brake pads and rotors - for optimal brake pad performance please follow the steps below
-
Proper pad bedding slowly heats and cools the rotors & pads - do not hard brake during initial driving until after complete bedding procedure is complete
-
Find an open road and accelerate to 30mph - Brake evenly and smoothly at ~50% effort until the vehicle is almost stopped, then accelerate to 30mph again
-
Repeat above step 8-10 times
-
Find an open road and accelerate to 50mph - Brake evenly and smoothly at ~80% effort until the vehicle is almost stopped, then accelerate to 50mph again
-
Repeat above step 2-3 times
-
Allow ~15min for brakes to cool - You can now use the brakes for normal driving
-
-
-
This completes the installation & setup of your 27WON Performance Front Brake Pads
-
We hope you were impressed with your 27WON experience and love your new brake pads for years to come. Email us at sales@27won.com or call us at 571-271-0271 with any questions or concerns
-
Please Leave a review here: https://store.27won.com/2016-civic-2023-...
-
Share your experience using #27WON on Instagram and Facebook
-