Introduction
In this installation guide we have provided step by step instructions to remove the OEM rear brake pads and install the 27WON Performance brake pads.
Advisory:
- Working under the vehicle requires a safe and sturdy location for the vehicle to sit on jackstands.
- The brake rotors can be hot after recent vehicle operation. Allow the vehicle to cool or use a fan to cool the brake rotors before working on the vehicle.
-
-
First and foremost; THANK YOU for becoming a part of the 27WON Family. We hope to REDEFINE your experience of the aftermarket with the highest level Parts, Customer Service, Packaging, & Support
-
-
-
These instructions reference the separate sides of the vehicle as "Left Hand" & "Right Hand". Left Hand & Right Hand is always defined from the driver seat viewpoint
-
The parking brake must be disengaged before starting this process
-
Exercise caution when working under your car with the parking brake disengaged. We recommend blocking your front wheels to prevent the car from rolling in the event of an emergency
-
-
-
Disengage the parking brake
-
Raise the vehicle and support with jackstands in the OE recommended locations and remove the rear wheels/tires
-
The following instructions show the left-hand side complete removal of OE components and installation of 27WON replacement pads. The right-hand side is completed with the same steps
-
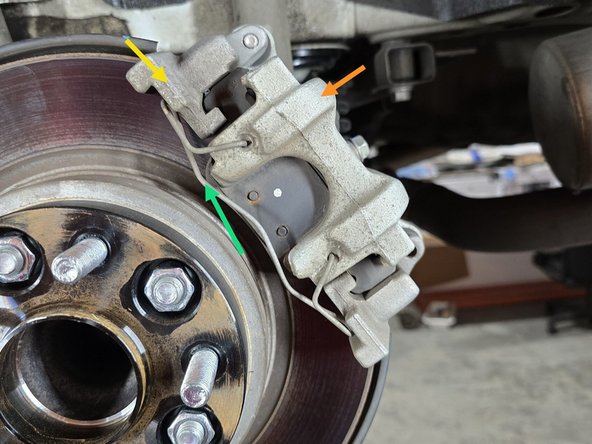
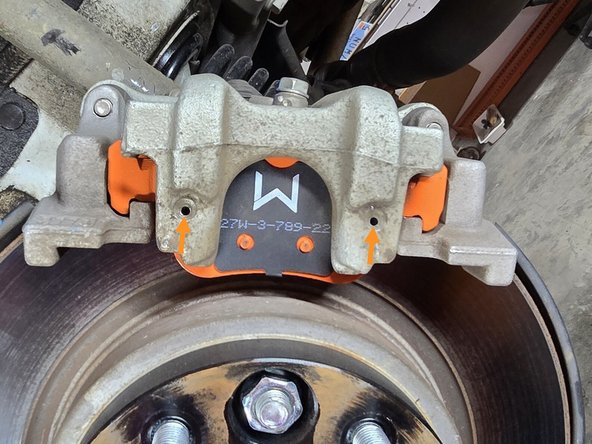
Brake Caliper
-
Brake Caliper Bracket
-
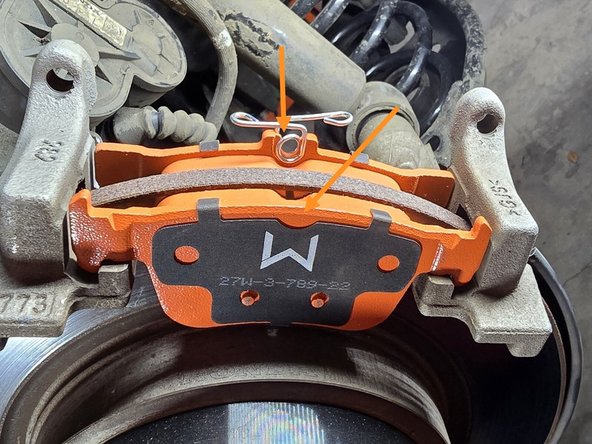
Caliper Tension Clip
-
-
-
Using a flat head screw driver, pop the tension clip out of its retaining holes as shown
-
Watch your fingers here! This clip can come off with some force and potentially injure you
-
With the little bit of force this should come off easily as shown
-
-
-
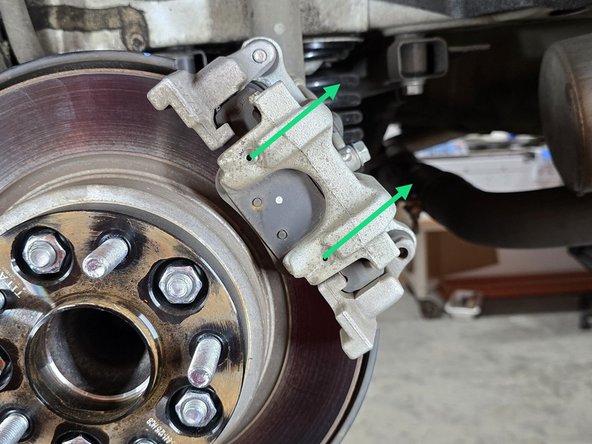
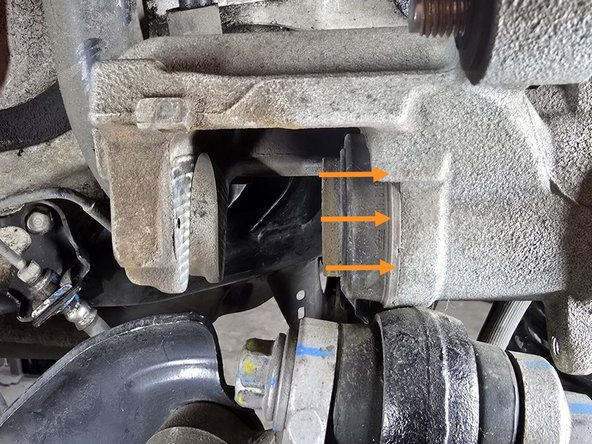
Move to the back side of the caliper for the removal process
-
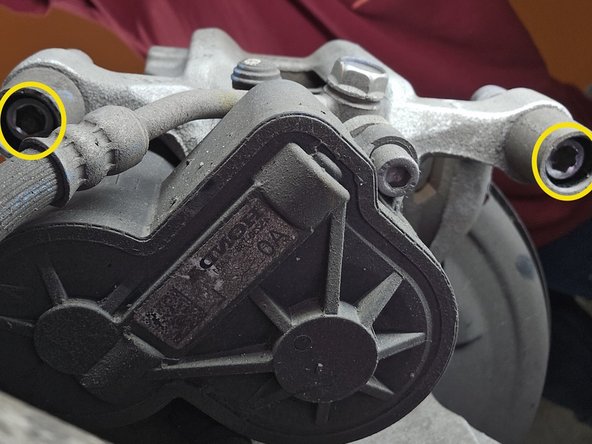
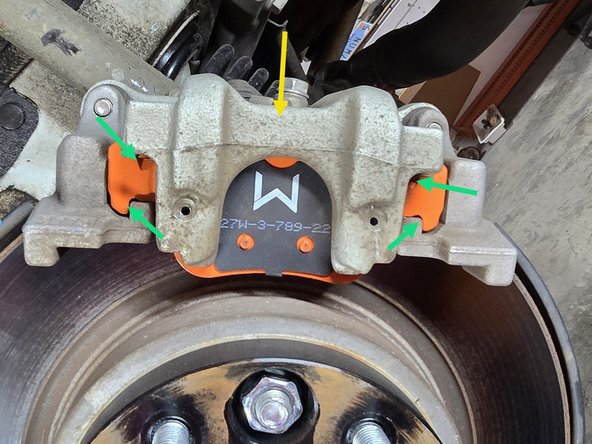
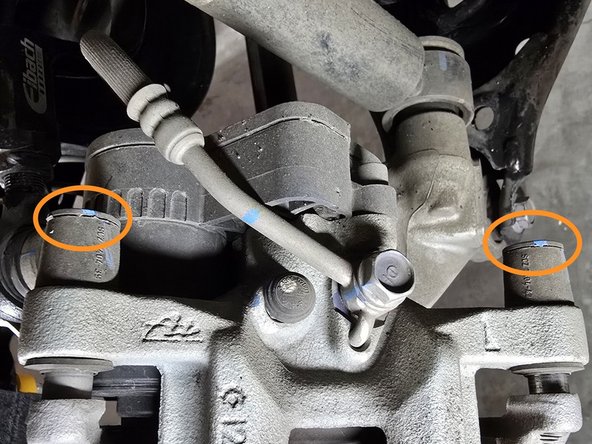
Using a flat head screw driver or your finger remove the two plastic caps circled in orange
-
Using a 7mm Allen head socket and a 3/8" drive ratchet, remove the two caliper slider bolts circled in yellow
-
Remove the caliper from the rotor as shown
-
If the rotor is heavily worn, you may need to spread the brake pads apart to gain clearance
-
Do not let the caliper hang from the brake line! This could cause damage to the line or fittings
-
-
-
With the caliper removed, we will now proceed to putting the caliper into "Brake maintenance" mode
-
The following steps will show you how to perform this manually. If you have a scanner tool that can do this electronically then you can skip to Step 8
-
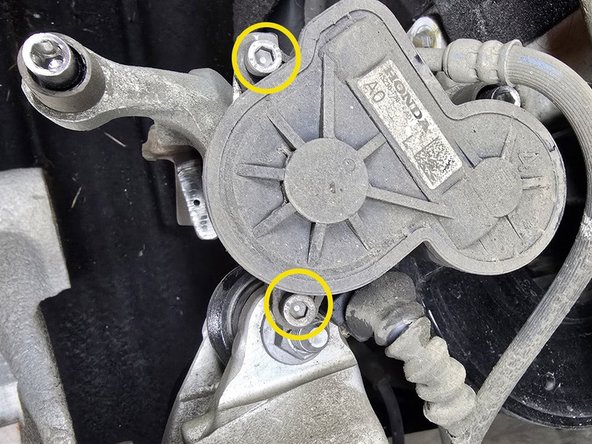
Use a 5mm Allen head socket and a 3/8" drive ratchet to remove the two bolts securing the parking brake motor as shown
-
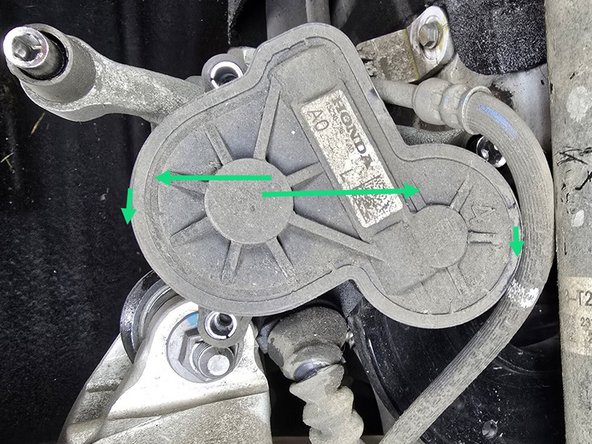
Firmly holding the caliper, wiggle the motor back and forth while pulling the motor away from the caliper until the motor detaches
-
This can take a bit of force, and a lot of wiggling. Be patient to ensure it doesn't fly off and damage the motor. Or worse your hand!
-
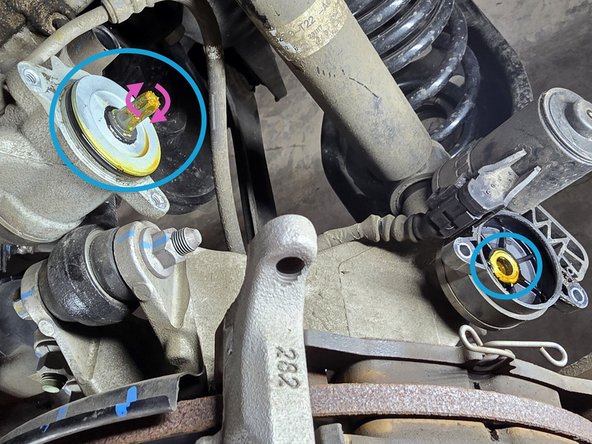
Once the motor is removed you will see the internal spindle as shown
-
Do not wipe away the grease on the spindle unless you plan to re-grease it!
-
Using a 9mm socket and your hand turn the male end of the spindle clockwise until it stops moving. DO NOT force it to turn any further once you feel resistance
-
-
-
With the spindle turned clockwise you can safely compress the rear caliper piston using a compressor tool or C-clamp
-
Once the piston is compressed the position of the spindle does not matter. Rotating it back can help realign it with the female end of the spindle
-
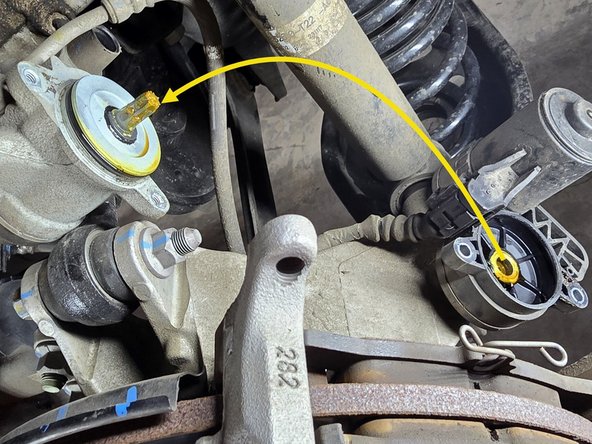
Gently insert the male end of the spindle into the parking brake motor as shown
-
Be sure that the male and female end of the spindle line up before installing the bolts. The motor should sit flush with the parking brake assembly if they are aligned correctly
-
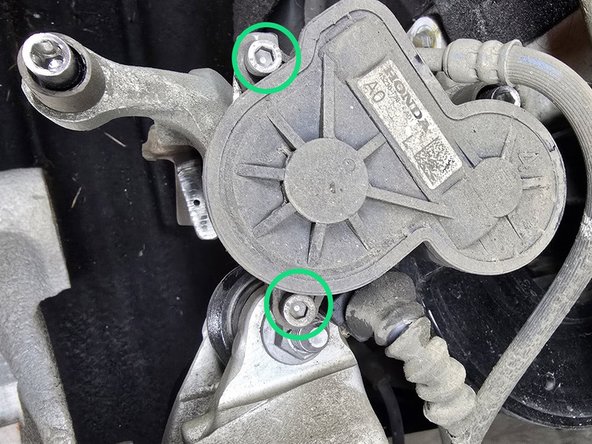
Using a 5mm Allen head socket and a 3/8" drive ratchet, install the two bolts circled in green and torque to 12 Ft/Lbs to secure the parking brake motor
-
-
-
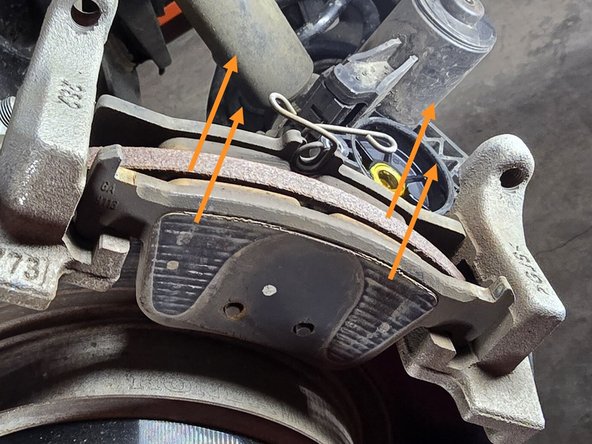
Remove both brake pads as shown, these will come straight up and out
-
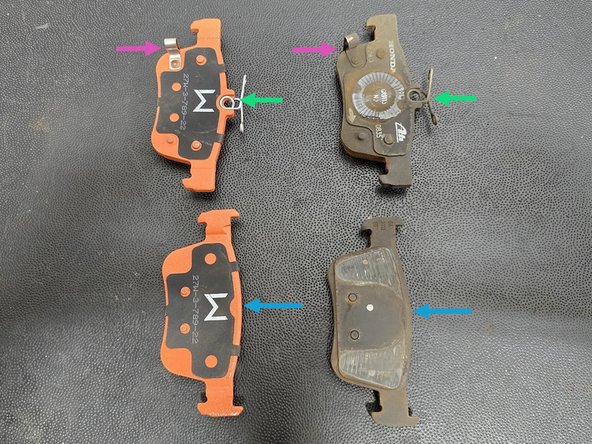
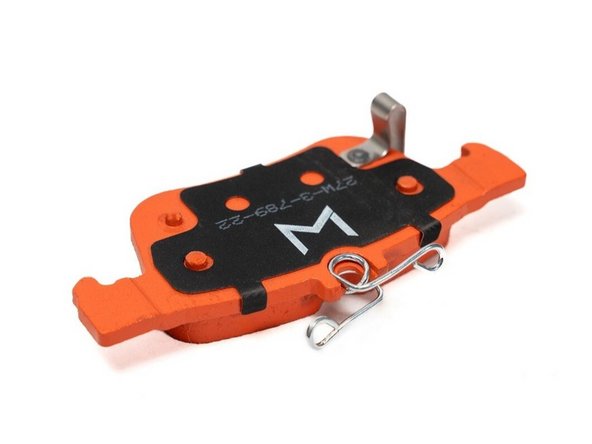
Lay out your OE pads with your 27WON replacement pads to make sure you have the correct pads for each side
-
Inner
-
Outer
-
Matching wear indicator location
-
-
-
Follow Factory Service Manual (FSM) for proper maintenance of braking system
-
Worn/damaged rotors or calipers can cause brake system failure and premature pad wear. Make sure your brake system doesn't need the other components serviced
-
These parts are shown off of the vehicle, but can still be easily inspected without removing them
-
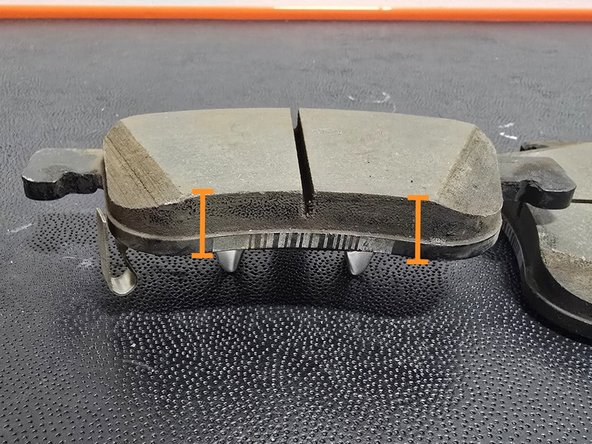
Verify the removed brake pads are worn even. Both ends of the pads should be roughly the same thickness. If your pads are wearing unevenly this could indicate a bad rotor or caliper
-
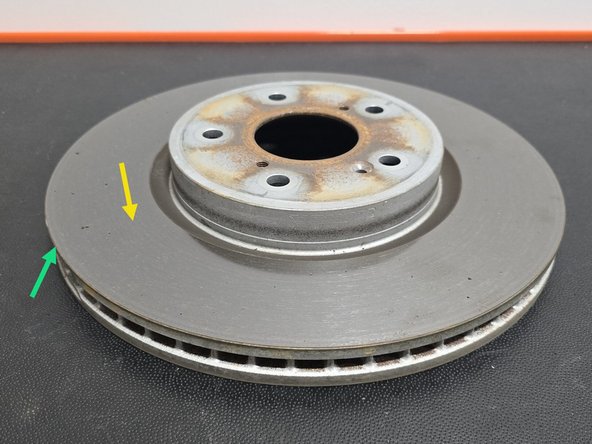
Inspect your rotors for any cracks or gouges. The contact surfaces of your rotors should be smooth and flat. Damaged or warped rotors will cause excessive brake pad wear
-
Rotors need to be a minimum thickness to be used. Consult FSM for this specification. Inspect the edge of your rotors for an excessive lip. A large lip on the edge of your rotor can be an indicator that it is time to replace the rotor
-
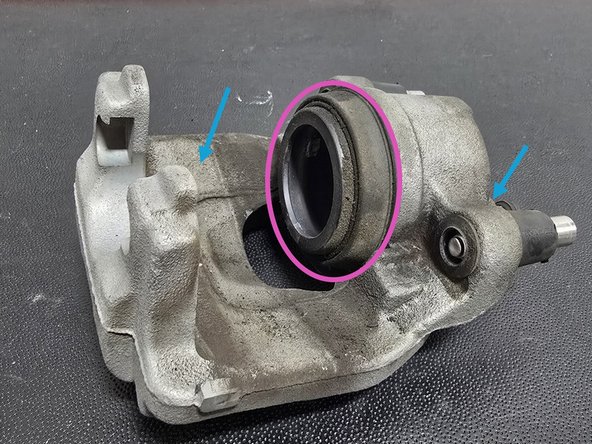
Inspect your calipers for any cracking or obvious leaks
-
Inspect your caliper piston boot for any rips or tears. This is may indicate that the caliper needs replaced
-
-
-
Install the inner and outer brake pads into the caliper bracket as shown
-
Install your OE caliper over the brake pads as shown
-
Before proceeding, verify the brake pad alignment tabs are sitting in the caliper and caliper bracket as shown
-
-
-
Using a 7mm Allen head socket and a 3/8" ratchet, reinstall the caliper slider bolts as shown and torque to 25 Ft/Lbs
-
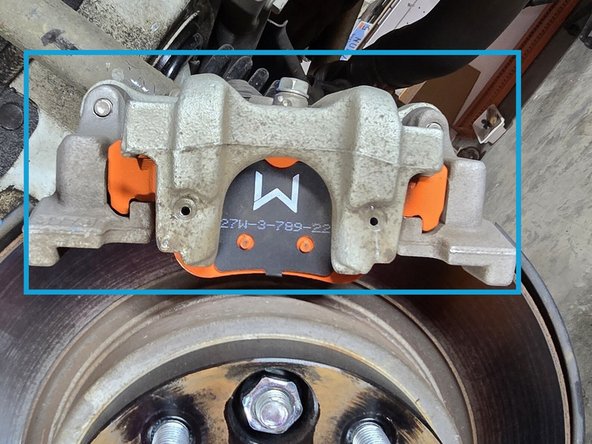
Replace the previously removed plastic caps over the slider bolts as shown
-
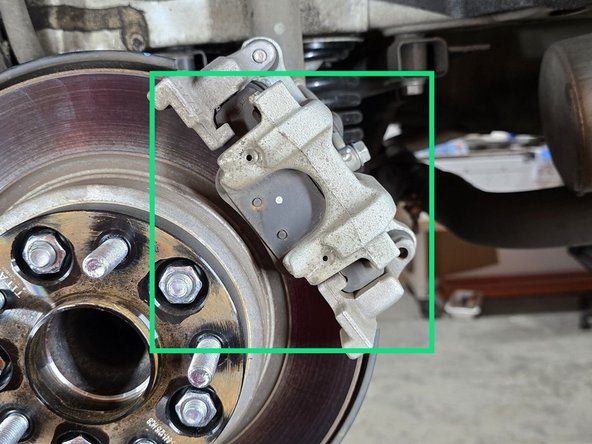
Secured caliper should appear as shown
-
-
-
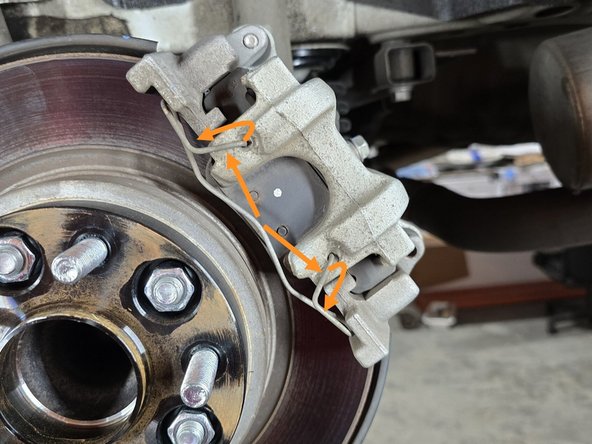
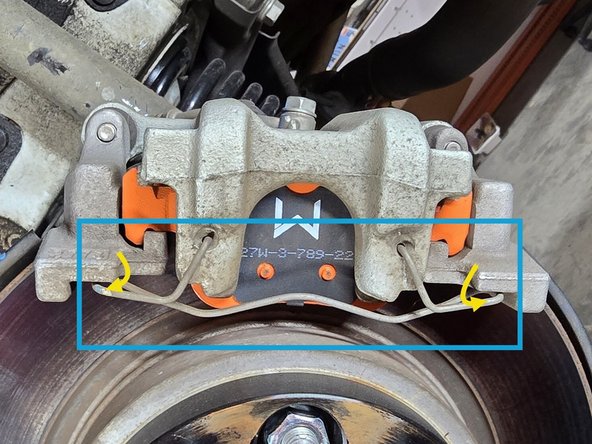
Using both hands, insert the tension clip ends into the mounting holes on the caliper as shown
-
This will need to be held in place until both ends of the clip are pressed into place to ensure the clip does not pop out!
-
Using your hands, or a screw driver press the top and bottom of the tension clip into its resting place on the caliper bracket as shown
-
Once the clip is pressed into position, give the whole clip a once over to ensure it is fully secure and seated in to the caliper
-
-
-
This completes the Brake Pad installation for the left hand side of the vehicle. The right hand installation process is the same
-
Complete the right hand installation process starting on Step 4
-
-
-
Reinstall your wheels at this time and safely get your car back on the ground before proceeding to bedding your new pads
-
Before proceeding with brake pad bedding, verify your parking brake appears to be operating as normal by turning it on and off a few times
-
This completes the installation of the 27WON brake pads - The following step provides instruction for Brake Pad Bedding
-
-
-
Brake pad bedding is an essential process to the life and durability of the brake pads and rotors - for optimal brake pad performance please follow the steps below
-
Proper pad bedding slowly heats and cools the rotors & pads - do not hard brake during initial driving until after complete bedding procedure is complete
-
Find an open road and accelerate to 30mph - Brake evenly and smoothly at ~50% effort until the vehicle is almost stopped, then accelerate to 30mph again
-
Repeat above step 8-10 times
-
Find an open road and accelerate to 50mph - Brake evenly and smoothly at ~80% effort until the vehicle is almost stopped, then accelerate to 50mph again
-
Repeat above step 2-3 times
-
Allow ~15min for brakes to cool - You can now use the brakes for normal driving
-
-
-
This completes the installation & setup of your 27WON Performance Front Brake Pads
-
We hope you were impressed with your 27WON experience and love your new BBK for years to come. Email us at sales@27won.com or call us at 571-271-0271 with any questions or concerns
-
Please Leave a review here: https://store.27won.com/performance-rear...
-
Share your experience using #27WON on Instagram and Facebook
-