Introduction
In this installation guide we have provided step by step instructions to remove your old CHRA and replace it with a new 27WON CHRA
-
-
First and foremost; THANK YOU for becoming a part of the 27WON Family. We hope to REDEFINE your experience of the aftermarket with the highest level Parts, Customer Service, Packaging, & Support
-
These instructions are for both a W1 and W2 turbochargers. The photographs are mostly of a W1 turbocharger. Photos of a W2 are provided when necessary for clarity
-
These instructions do not cover removal and reinstallation of the turbocharger
-
-
-
Ensure you have a clean work surface or lay down a clean cover to ensure nothing can make its way into your turbocharger
-
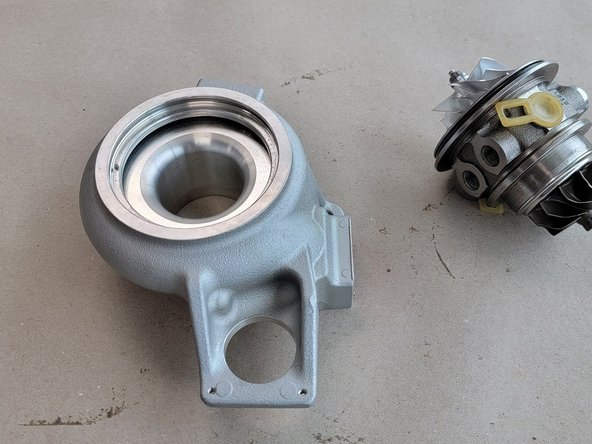
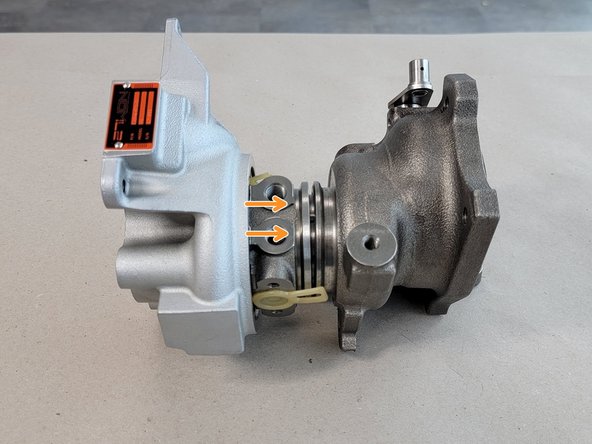
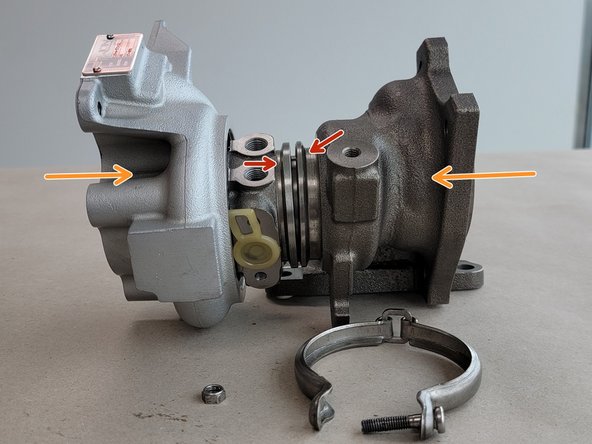
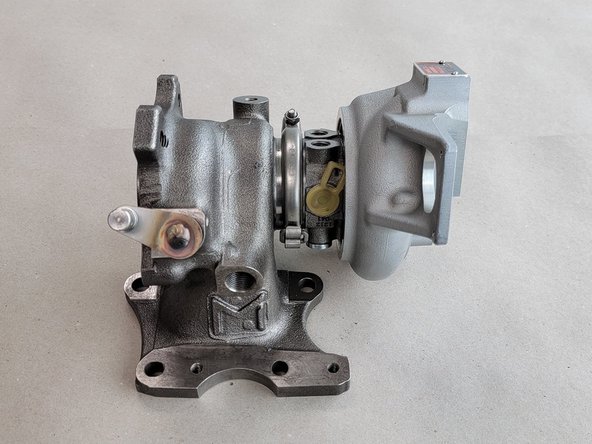
Set out your turbocharger on a workbench as shown
-
Turbine Housing
-
CHRA
-
Compressor COver
-
-
-
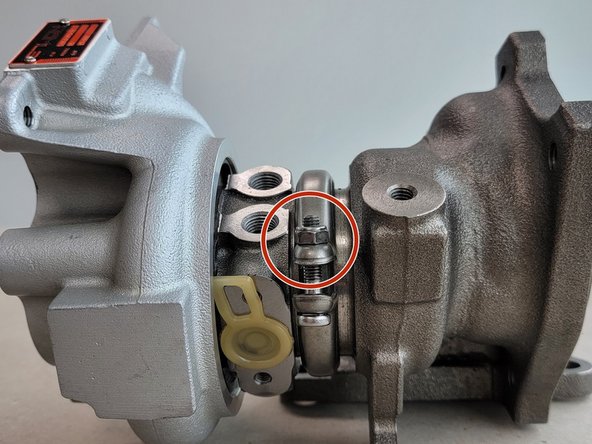
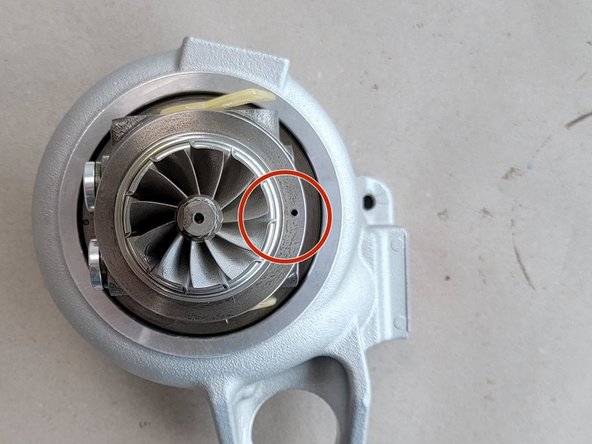
Using a 10mm socket remove the nut (red circle) holding the V-band clamp
-
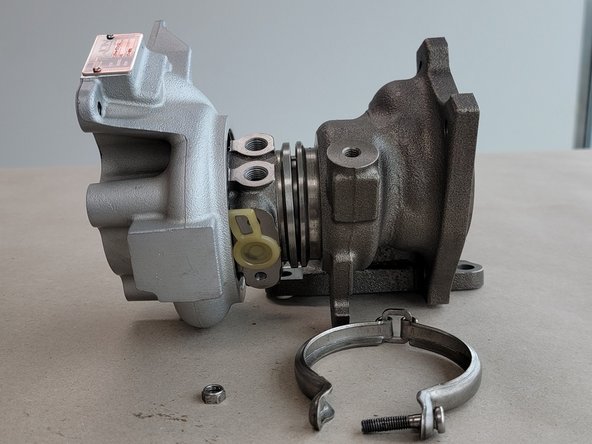
Remove the clamp
-
The clamp should easily come off of the turbo once the nut is removed
-
-
-
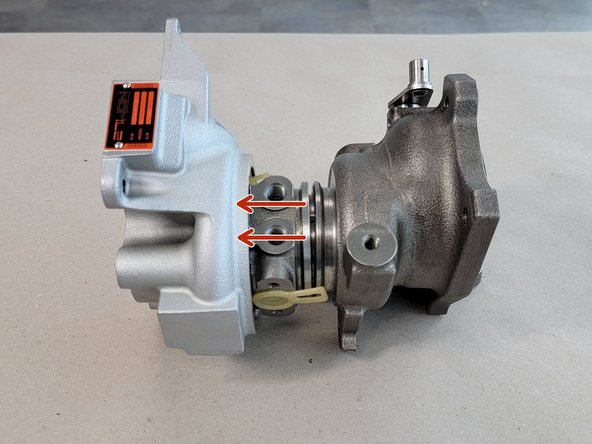
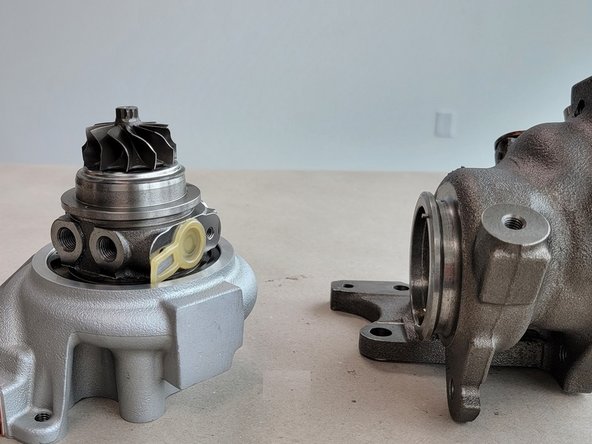
Carefully pull the CHRA straight out of the turbine housing
-
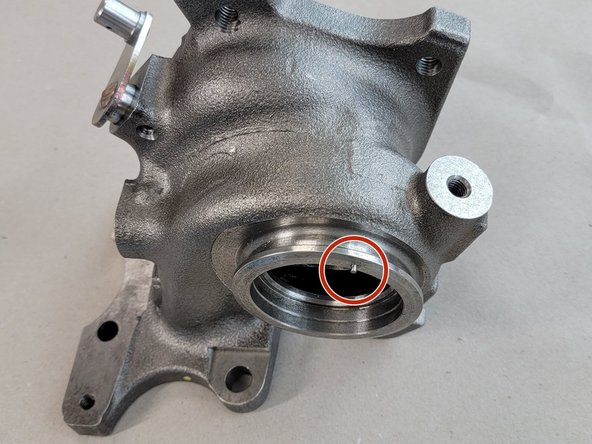
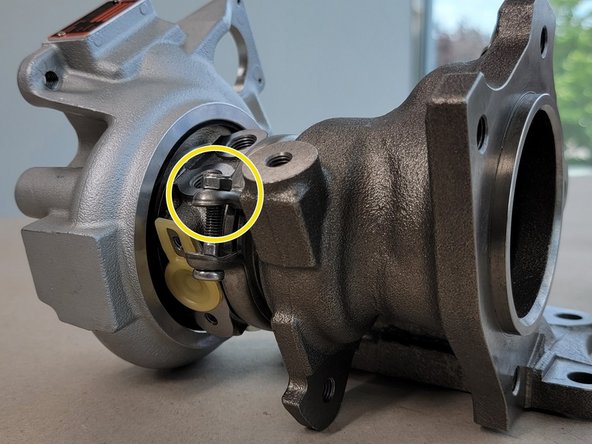
There is a locating pin between the CHRA and turbine housing
-
The turbocharger may be stuck to the turbine housing. In this case you can tap the turbine housing lightly with a rubber mallet to break it loose
-
-
-
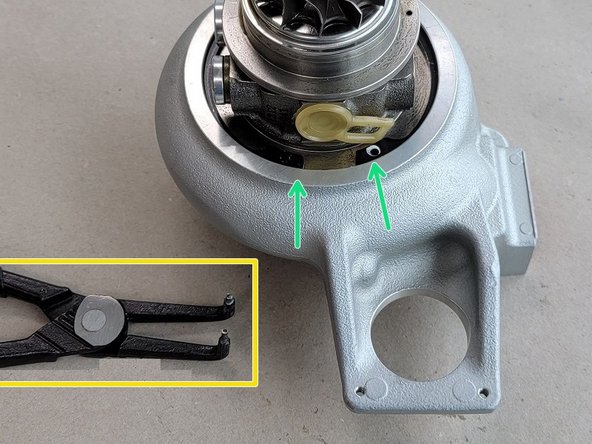
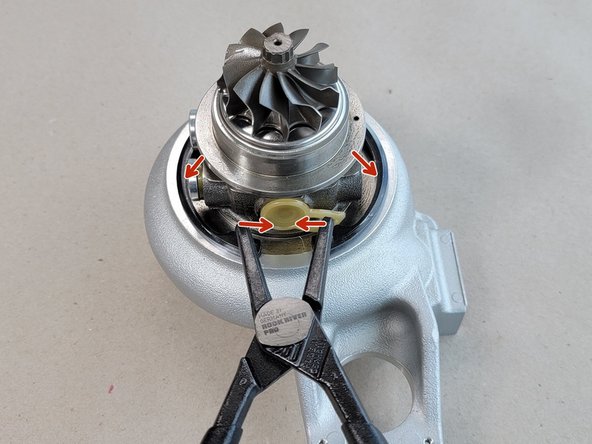
Snap Ring
-
Snap Ring Pliers
-
Use snap ring pliers to compress and lift the snap ring out of the groove in the compressor cover
-
Once the snap ring is free lift it straight up and remove it from the CHRA
-
You may need to rotate the snap ring around the CHRA to remove it more easily
-
If you do not have snap ring pliers, needle nose pliers will work but they are not recommended
-
-
-
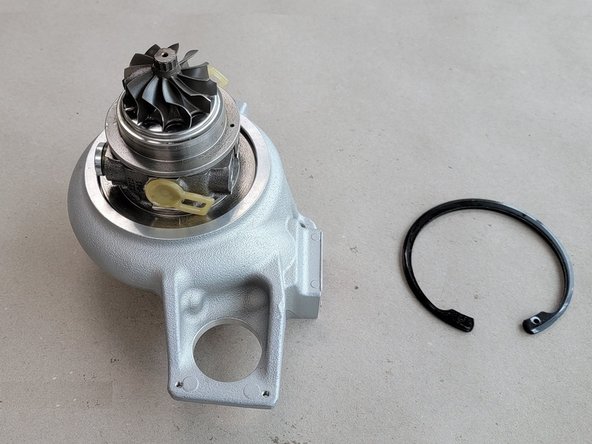
Remove CHRA
-
The CHRA should now easily come straight out of the compressor cover
-
Sometimes the O-ring around the CHRA will stick a little. In this case wiggle the CHRA side to side while holding the compressor cover down being careful to not hit the inside of the cover with the compressor blades
-
-
-
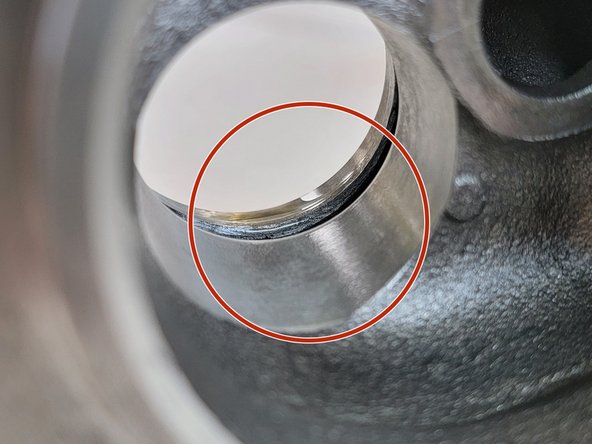
When failure occurs in a turbocharger there is a chance the blades will make contact with the inside of the compressor cover
-
Small scratches or dings are fairly normal on used OEM and aftermarket housings and are not a point of concern
-
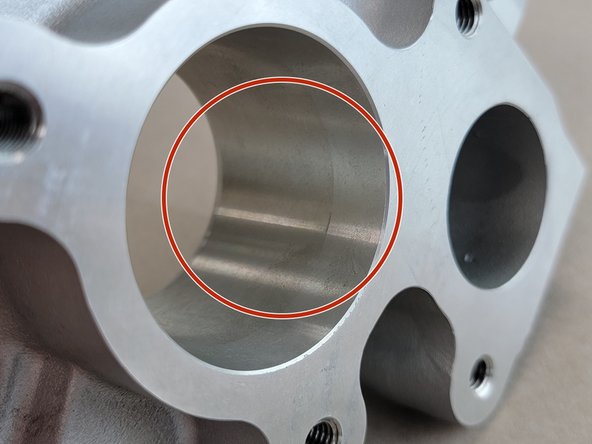
Visually inspect and feel the inside of the compressor cover to ensure there is no metal sticking up that could make contact with your new blades
-
If you feel any burrs these can be knocked down with a lighter grit sandpaper such as 500 or 600 grit
-
Be sure to clean your compressor cover, especially after sanding
-
Do not need to remove much material, just enough to knock down any burrs
-
-
-
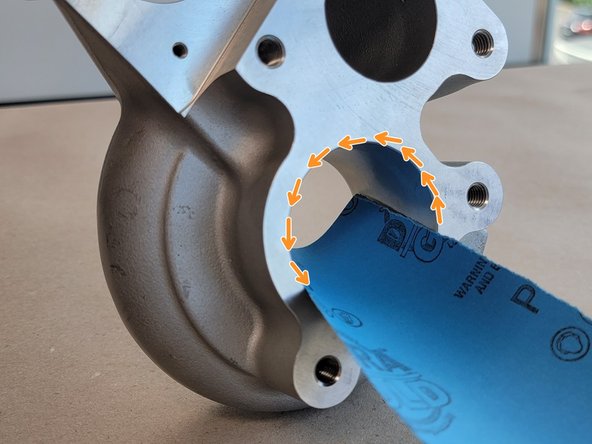
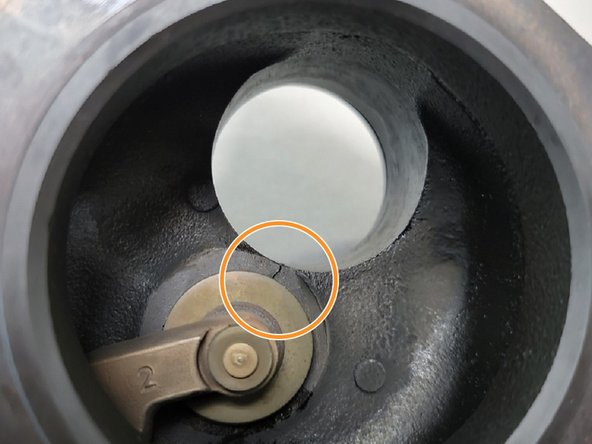
Visually inspect the inside of the Turbine housing
-
Some small cracks in the turbine housing are not uncommon on OE and aftermarket turbos. Normally, this is not a performance issue
-
This is a good example of a small crack that wouldn't cause concern
-
If you notice anything concerning with your turbine housing then give us a call at 571-271-0271
-
The Turbine housing is far less likely to have suffered damage as it is made of steel rather than aluminum. This makes it much more laborious to repair
-
-
-
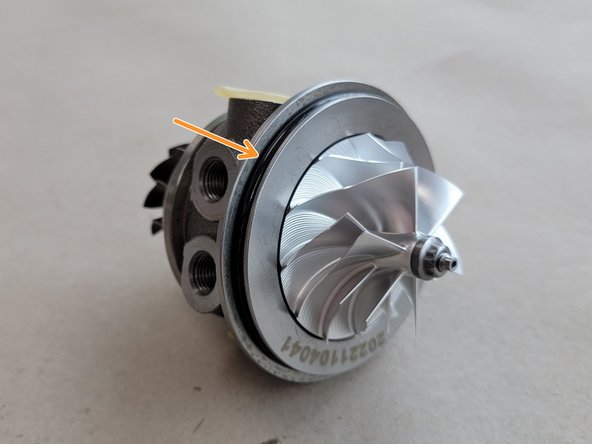
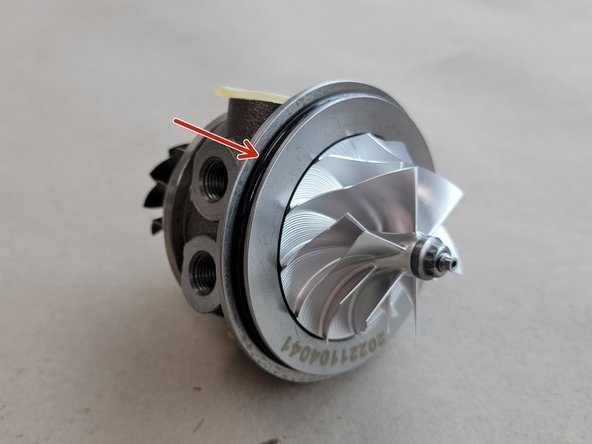
Prime the o-ring on the CHRA by dipping your finger in fresh engine oil and spreading a thin layer around the outide of the o-ring
-
-
-
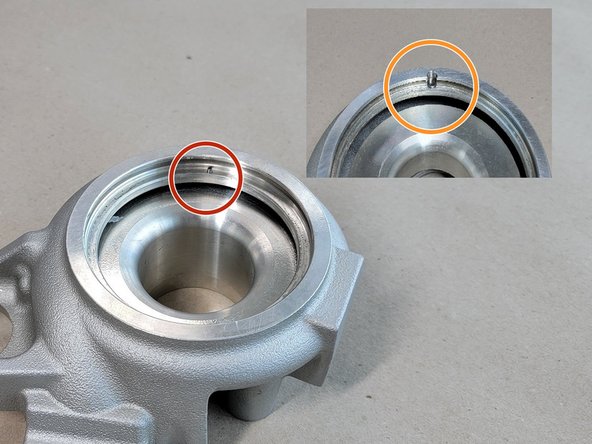
Set the CHRA into the compressor cover ensuring the pin on the cover and the hole on the CHRA align
-
This is the only diference between a W1 and W2 CHRA installation, note the larger pin on the cover, and the divot on the CHRA
-
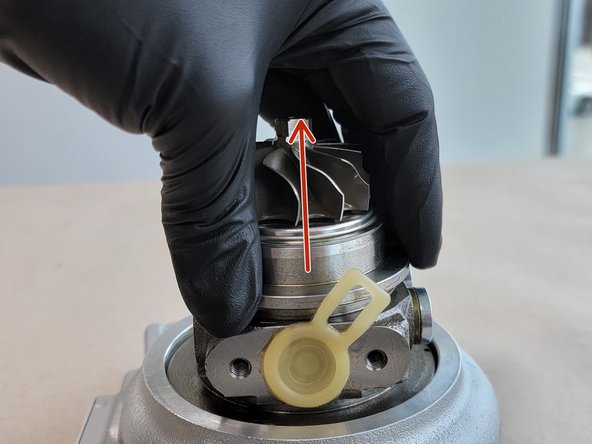
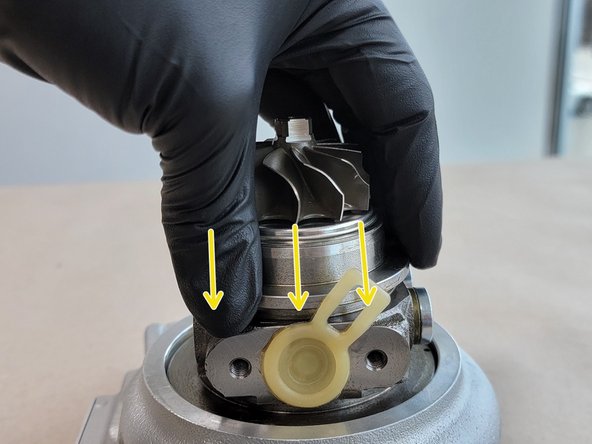
Using both hands press the CHRA into the cover. Ensure this goes in straight
-
You should be able to feel the CHRA seat into the Compressor cover
-
DO NOT press down on the turbine wheel itself, hold the CHRA by the body as shown
-
Make sure the compressor wheel goes in straight to ensure no contact is made with the Compressor cover
-
-
-
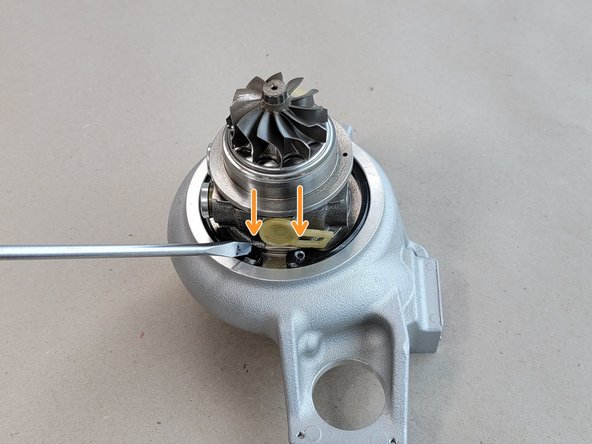
While holding the CHRA in the seated position compress the snap ring and set it into the groove in the compressor cover
-
Press the two end tabs into the groove with a flathead screw driver
-
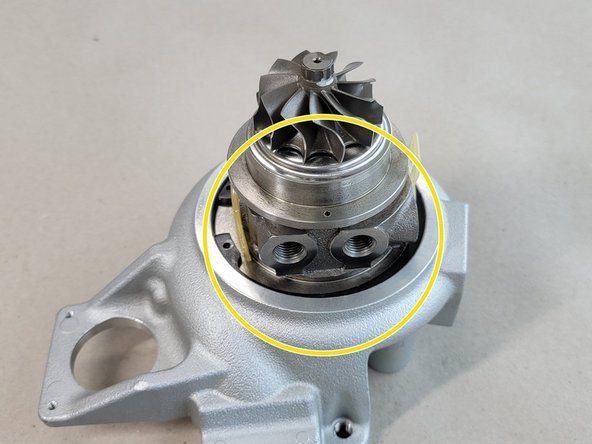
Check the snap ring all the way around the CHRA to be sure it is seated correctly as shown
-
If you are unsure if the snap ring is seated correctly use your flat head screwdriver to press the snap ring down around the entire CHRA
-
-
-
Ensure the pin on the turbine housing and the hole on the CHRA align when you press them together
-
Insert the CHRA into the turbine housing
-
Be sure the turbine blades go into the housing straight and do not make contact with the housing
-
-
-
Wrap the V-band clamp around the CHRA and the turbine housing ensuring both flanges are caught by the clamp
-
Push on both sides of the turbo to push the two flanges together
-
Thread the 10mm nut onto the bolt then torque to 6 FT/LBS or 62 IN/LBS
-
The reassembled turbo should appear as shown
-
-
-
We do recommend blowing your turbocharger out with compressed air after assembly to ensure there is no foreign objects in the housings that could cause trouble down the line
-
-
-
-
-
This completes the installation of your 27WON W1/W2 CHRA
-
We hope you were impressed with your 27WON experience and love your new CHRA for years to come. Email us at sales@27won.com or call us at 571-271-0271 with any questions or concerns
-