Introduction
In this installation guide we have provided step by step instructions to remove the OEM intake then install the 27WON Hybrid Intake.
Advisory:
- Working under the vehicle requires a safe and sturdy location for the vehicle to sit on jackstands
- The engine will be hot after recent vehicle operation. Allow the vehicle to cool or use a fan to cool the engine bay before working on the vehicle
-
-
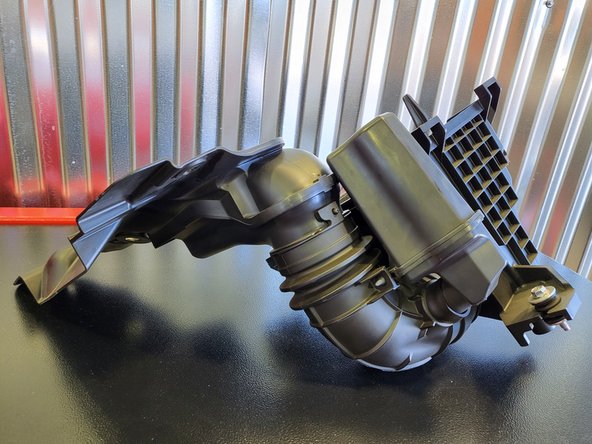
First and foremost; THANK YOU for becoming a part of the 27WON Family. We hope to REDEFINE your experience of the aftermarket with the highest level Parts, Customer Service, Packaging, & Support
-
This guide describes a process to install your new Hybrid Cold Air Intake
-
Handle the Airbox lid with care so as not to scratch it
-
-
-
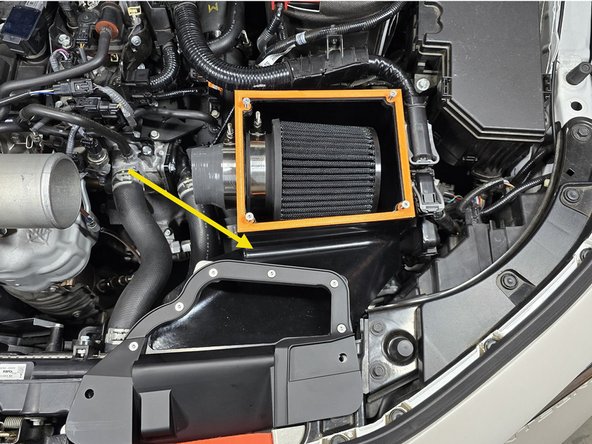
Open the hood to gain access to the intake air box
-
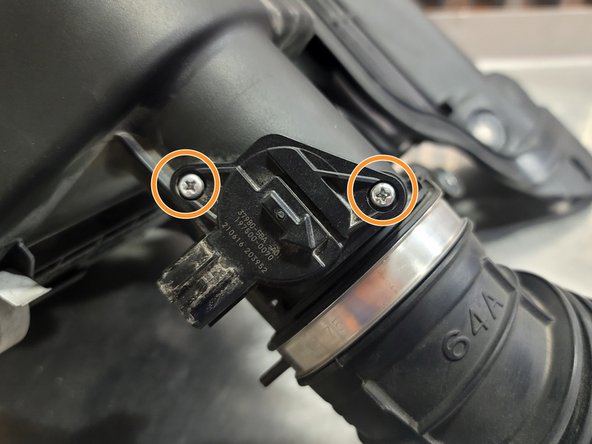
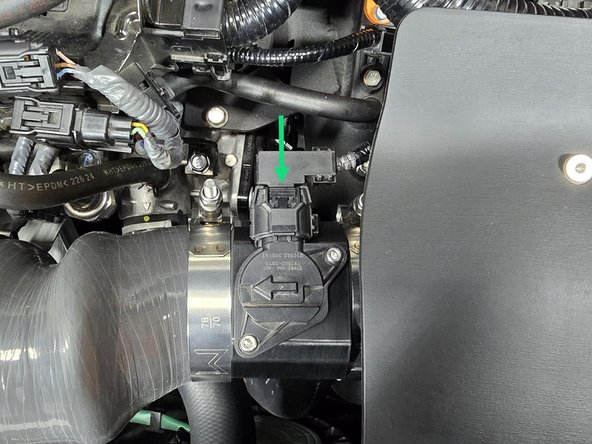
Unplug the connector for MAF sensor using your fingers
-
-
-
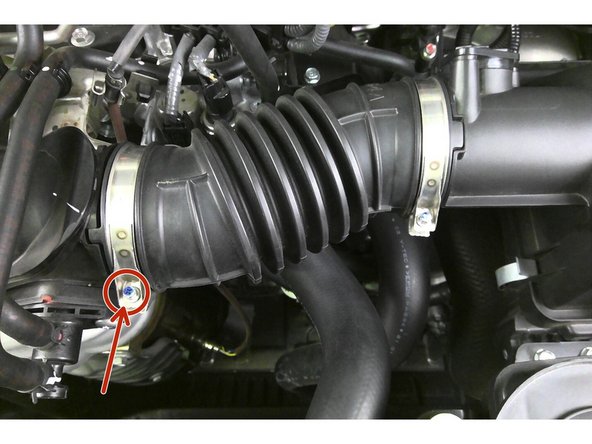
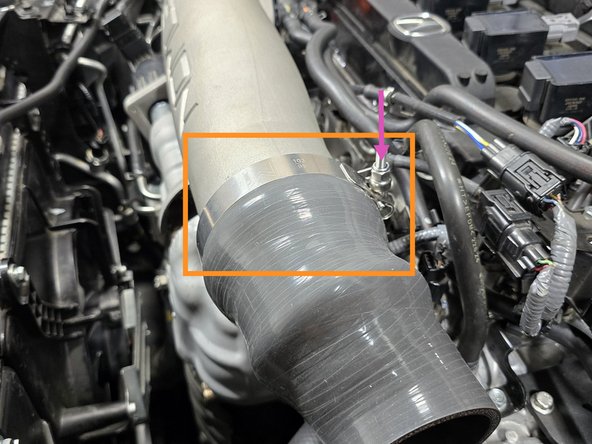
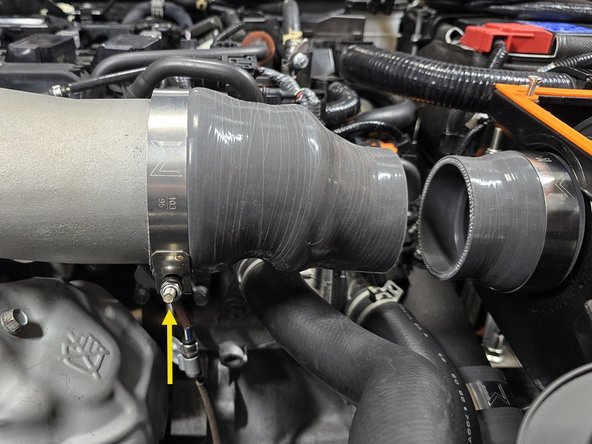
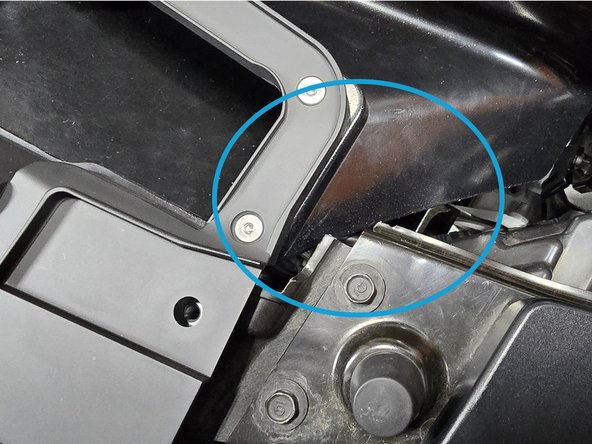
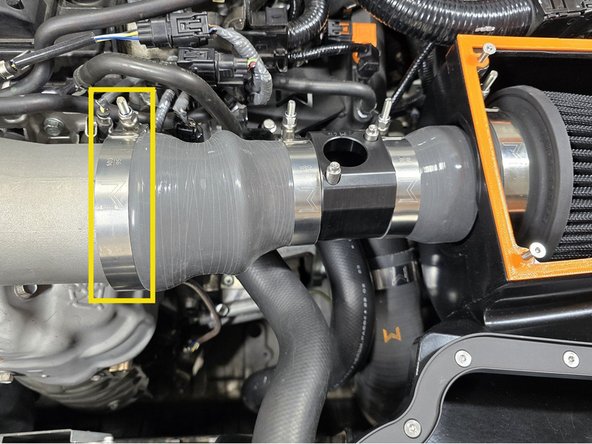
Use a 5.5mm socket and 3/8" ratchet or a small Phillips screwdriver to loosen the clamp circled in red
-
Tube should be able to freely pull off the turbo inlet pipe
-
-
-
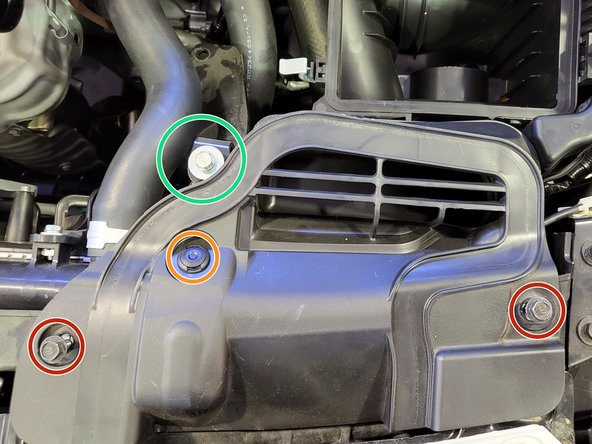
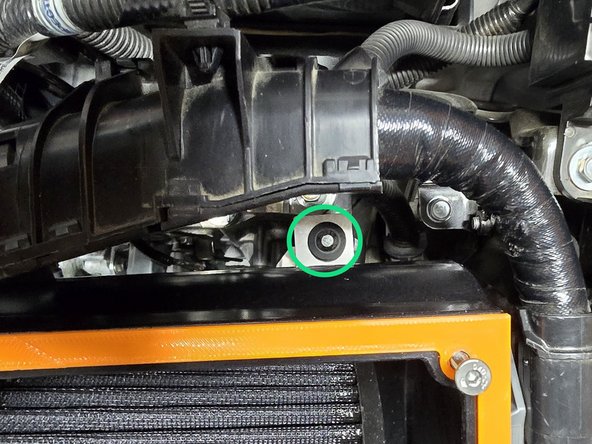
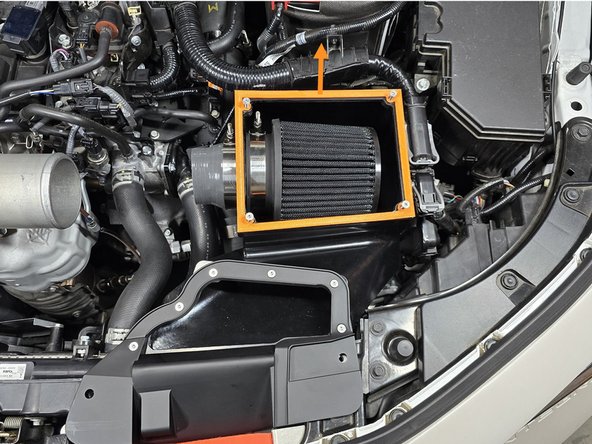
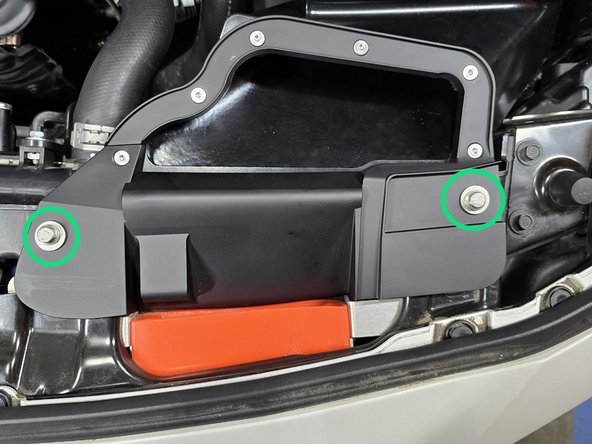
Use a 3/8" drive ratchet and a 10mm socket to remove two (2) bolts that holds the intake duct
-
Image shows airbox lid removed but that is not necessary
-
Use a panel clip tool to remove one (1) clip
-
Plastic clip breaks very easily. Use Caution
-
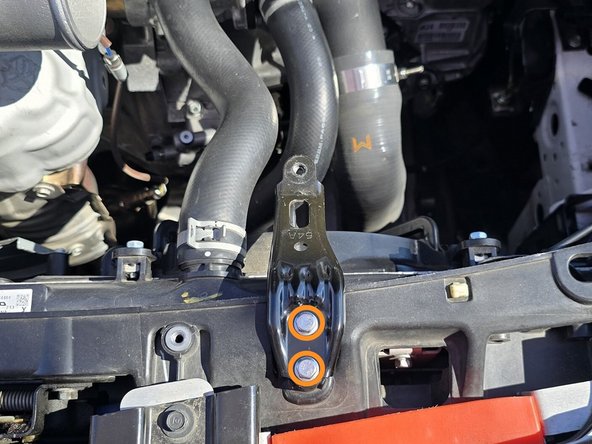
Use a 3/8" drive ratchet and a 10mm socket to remove the bolt to intake bracket as shown
-
-
-
Intake shown without lid and filter for clarity
-
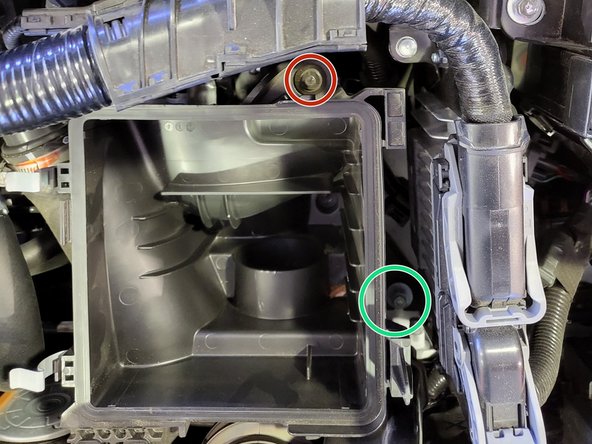
Use a 3/8" rachet, a long extension, and a 10mm socket to remove lower intake bolt as shown
-
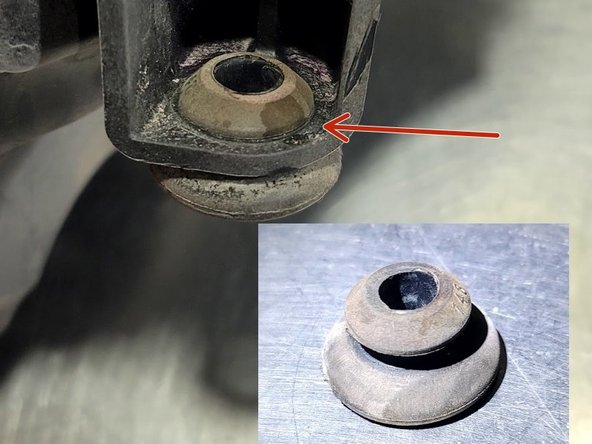
Wiggle the airbox and pull it up at the same time to loosen the airbox from the rubber bushing
-
This can be a PITA and you can get hurt when it breaks loose. Use Caution
-
Once you free the intake assembly from the bushing mount, it will easily come out of the car
-
Set the bushing aside for later use
-
-
-
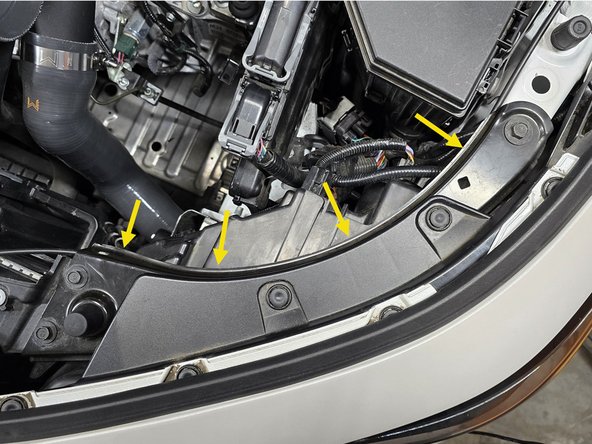
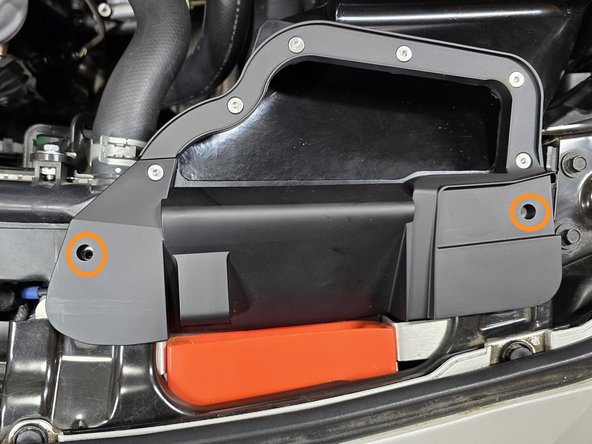
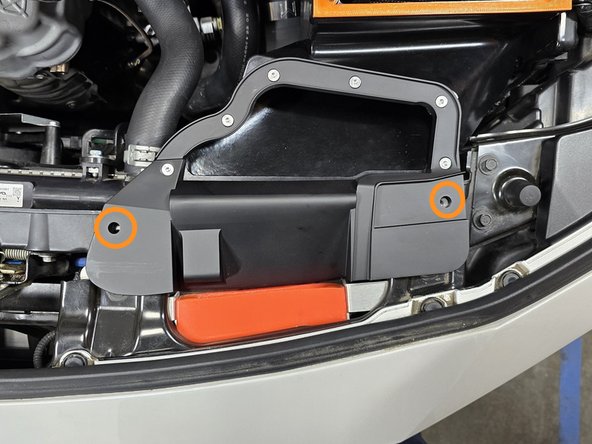
Use a 3/8" drive ratchet and a 10mm socket to remove two (2) bolts that hold the intake bracket in place
-
Use caution when pulling the second bolt, once it's loose the bracket will drop straight into the engine bay!
-
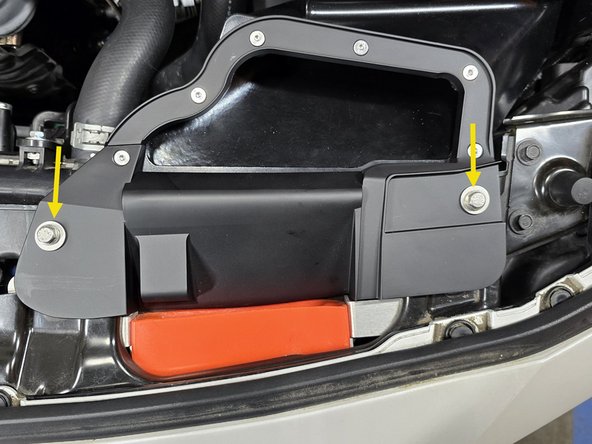
Remove the bracket from the engine bay
-
-
-
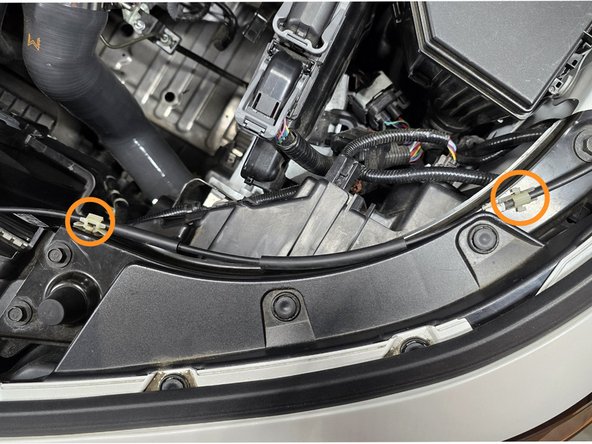
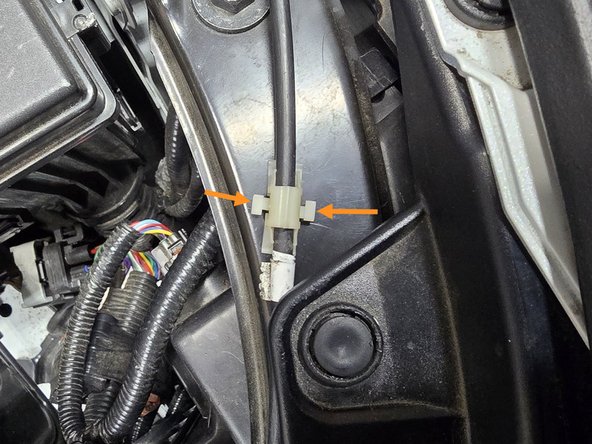
Using you hand or a pair of pliers pinch the sides of the plastic clips holding the hood latch wire in place and lift to remove them
-
Tuck the wire under the headlight mounting plate as shown
-
-
-
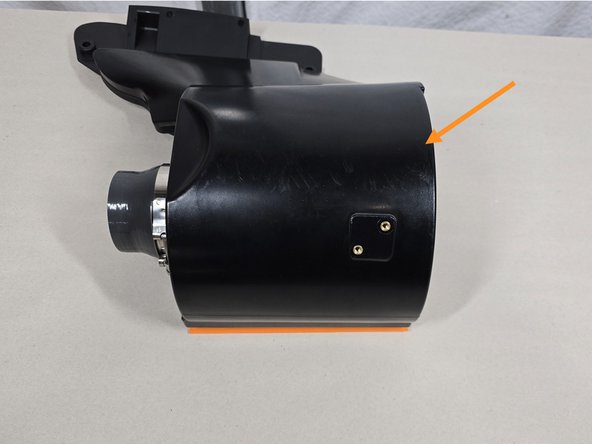
Place your airbox in the orientation shown
-
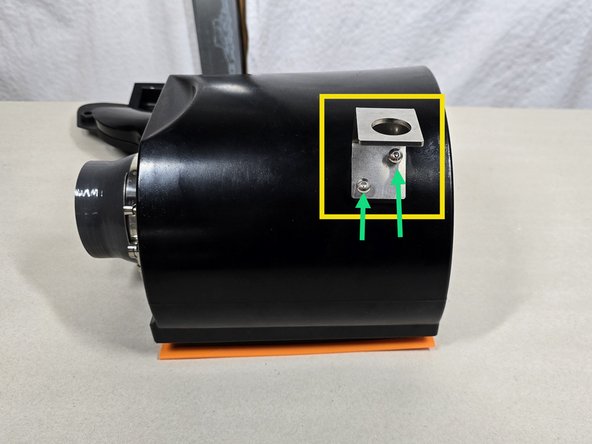
Using the provided two (2) short M5 cap screws mount the lower bracket in the orientation shown
-
Using a 3mm hex bit, tighten the M5 cap screws until snug
-
-
-
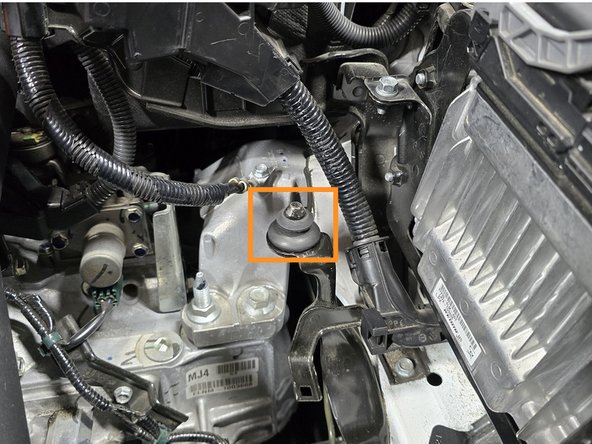
Install previously removed bushing as shown
-
Place airbox in engine bay as shown
-
Press airbox down to mount the lower bracket over the bushing as shown
-
-
-
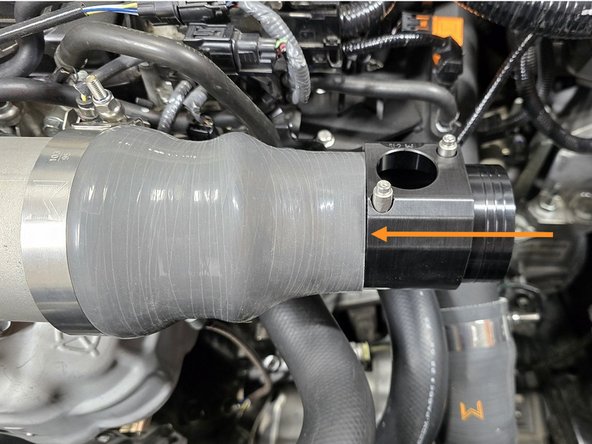
This is shown with the 27WON TIP (Turbo Inlet Pipe). The process is similar for the OE TIP with the difference being the TIP silicone and the T-bolt clamp to secure it
-
Failure to align the silicone correctly will cause the intake not to fit well
-
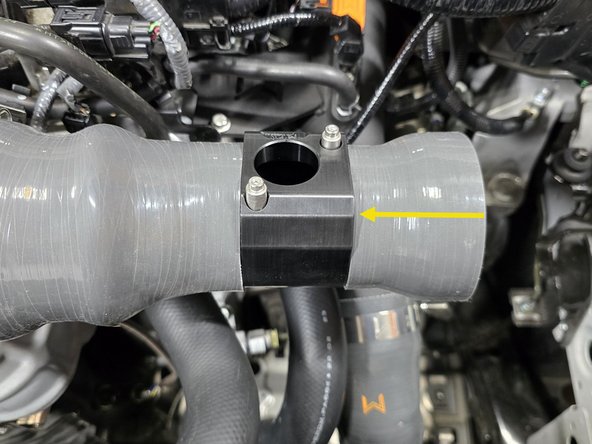
Verify the airbox mounting holes can be aligned as shown
-
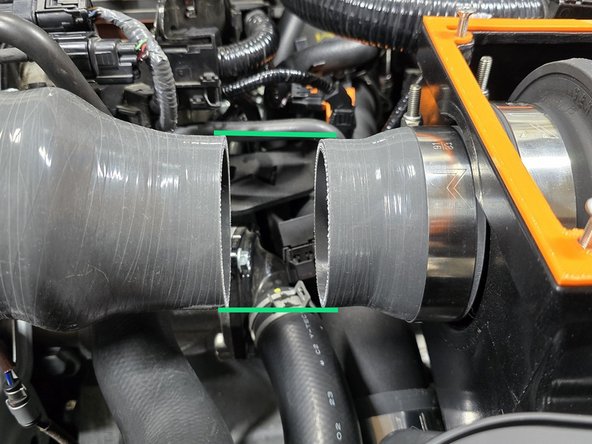
Place provided TIP silicone onto the TIP as shown and push it fully onto the TIP
-
Align TIP silicone with the airbox silicone mounted on the airbox as shown
-
This requires a combination of rotating the silicone as well as wiggling it around to get the correct alignment
-
-
-
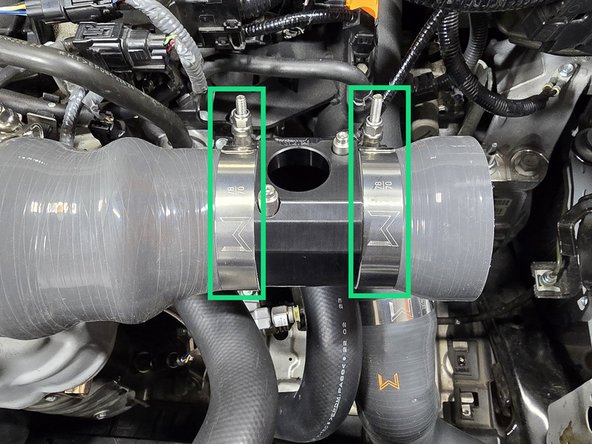
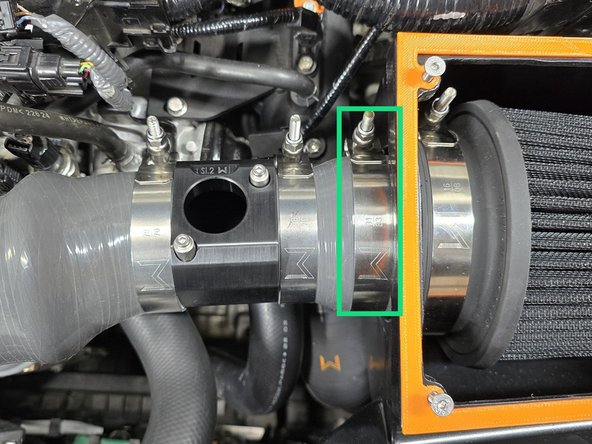
Using the provided 95-103mm T-bolt clamp for 27WON TIP or 70-78mm T-bolt clamp for OE TIP secure the silicone to the TIP without changing it's orientation from the step before
-
Orient the clamp so it will not hit the hood as shown
-
If you can't rotate the clamp enough to avoid hood interference then flip the clamp to be oriented as shown
-
-
-
Firmly lift the back side of the airbox to pop the lower bracket off of the mounting bushing
-
Remove the airbox from the engine bay
-
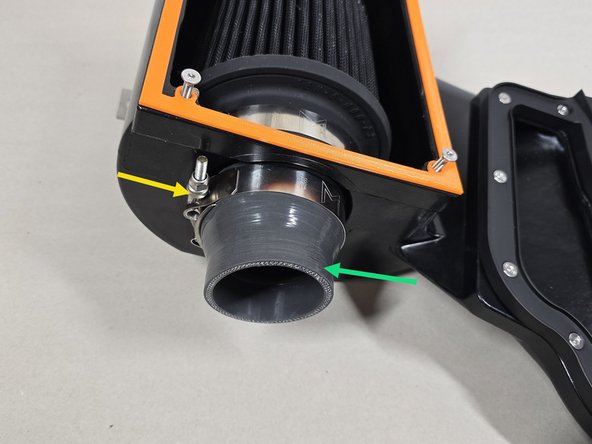
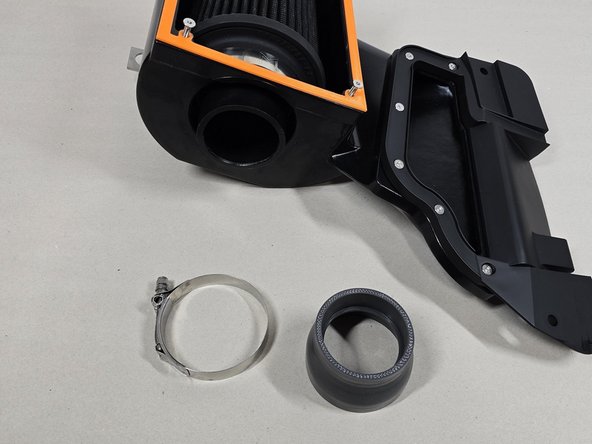
Using a 10mm socket remove the 83-91 T-bolt clamp on the airbox
-
Remove the airbox silicone as shown
-
-
-
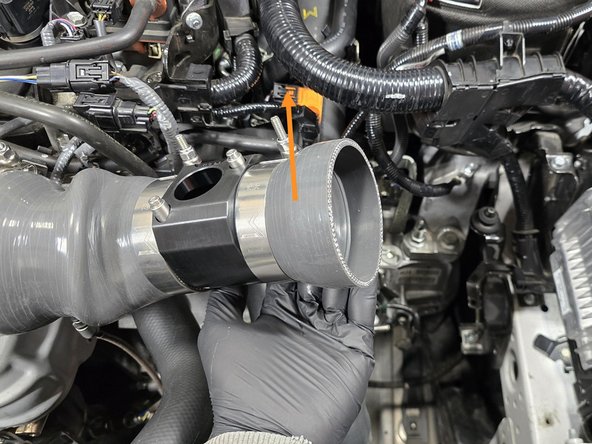
Install MAF housing into the previously mounted TIP silicone in the orientation shown
-
Note the rotation of the MAF housing, this is important to ensure there is no tension on your MAF sensor wire
-
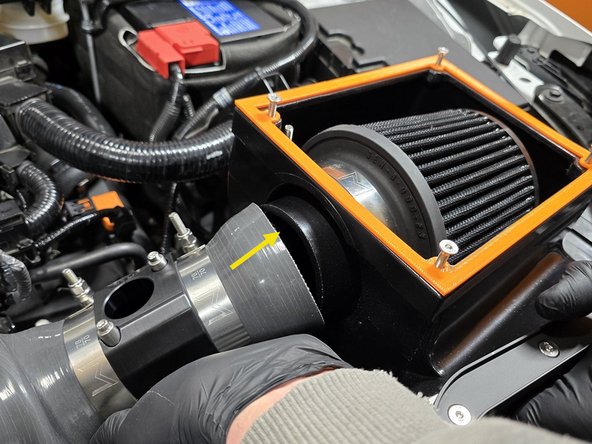
Install airbox silicone onto the MAF housing
-
Using two included 70-78mm T-bolt clamps and a 10mm socket secure the silicone on either side of the MAF housing as shown
-
Make sure the MAF is fully seated in the silicone
-
-
-
While installing the airbox be mindful of the right side of the inlet, this part can easily be damaged by the engine bay if you aren't careful
-
Using your hand lift the silicone stack up as shown to create space for the airbox
-
While lowering the airbox into the engine bay, press the airbox silicone onto the airbox as shown
-
You'll have to do this slowly and carefully to avoid hitting the ECU
-
Press the lower mounting bracket onto the bushing like before
-
-
-
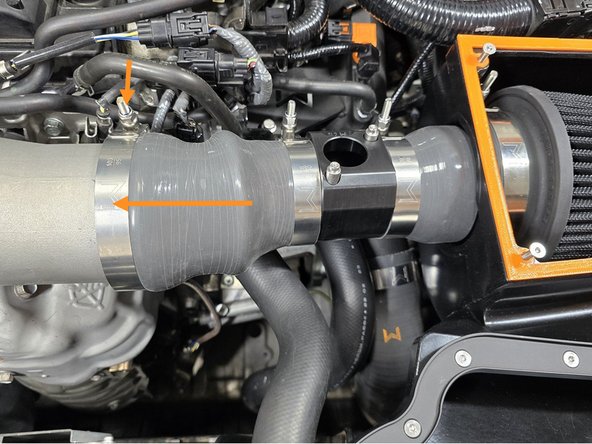
With the airbox in the engine bay, loosen the 95-103 T-bolt clamp on the TIP and push the TIP silicone onto the TIP as far as possible
-
Using a 10mm socket re-tighten the 95-103 T-bolt clamp
-
Use the provided 83-91mm T-bolt clamp secure the silicone stack up onto the airbox as shown
-
-
-
Align the mounting holes on the airbox inlet with the threaded holes as shown
-
You may need to move the airbox towards the passenger side of the car to get these holes to align properly
-
Thread the provided 20mm long M6 bolts and rubber washers into the airbox inlet mounting holes as shown
-
Using a 10mm socket tighten the M6 bolts until snug as shown
-
Do not overtighten these two bolts. The intake should not bind up here
-
-
-
Using a small Phillips screwdriver, remove both screws securing MAF sensor to OE Intake
-
Use care when handling this sensor. It should not be dropped, abused, or otherwise gotten dirty
-
Gently install MAF Sensor in provided MAF housing using the provided socket cap screws and a 3mm hex wrench or bit
-
You should be able to press MAF sensor into the bore by hand. Do so evenly
-
-
-
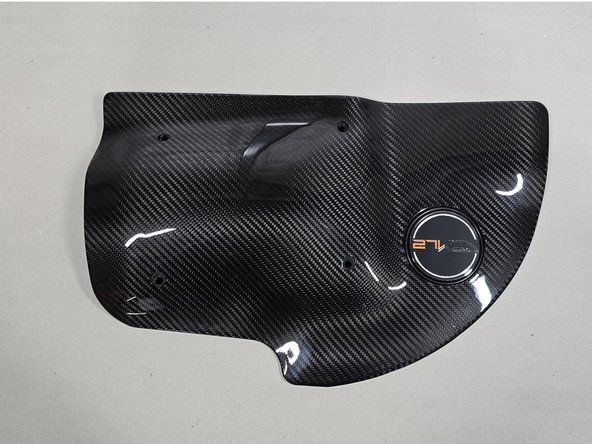
This install process is shown with a painted shroud. The process is similar for a carbon fiber shroud
-
We do recommend exercising much more caution when installing a carbon fiber shroud
-
Be careful with your tools while installing the shroud, it is very easy to scratch your shroud with a tool and is not easy to fix
-
There are lots of sharp edges throughout the engine bay that could also scratch your carbon fiber or chip the edges if you aren't cautious
-
We have provided a lens cloth to wipe down your carbon fiber shroud after install. Use a non-abrasive cleaner as needed
-
-
-
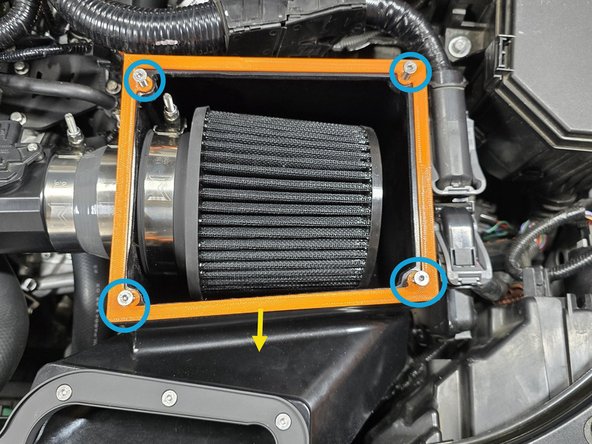
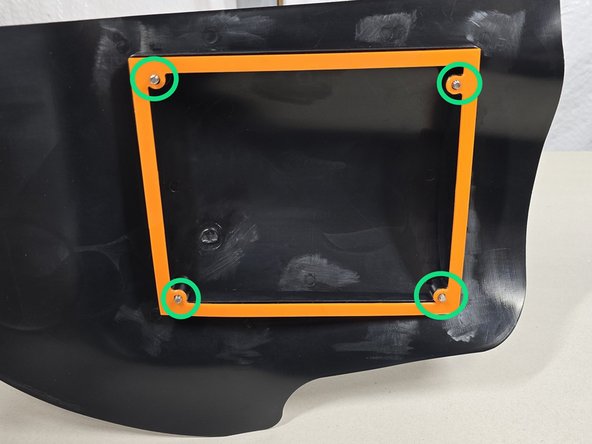
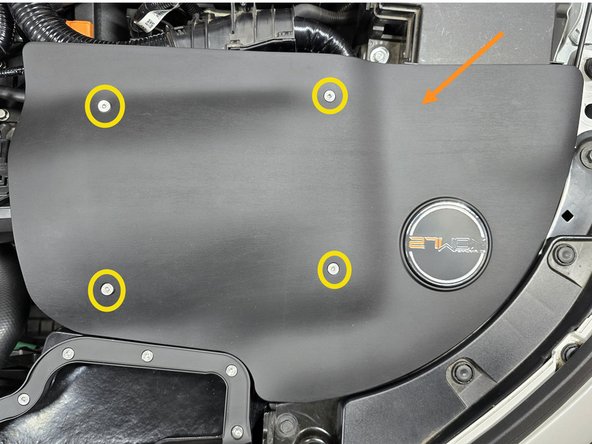
Using a 3mm hex bit remove the four (4) countersink screws from the airbox as shown
-
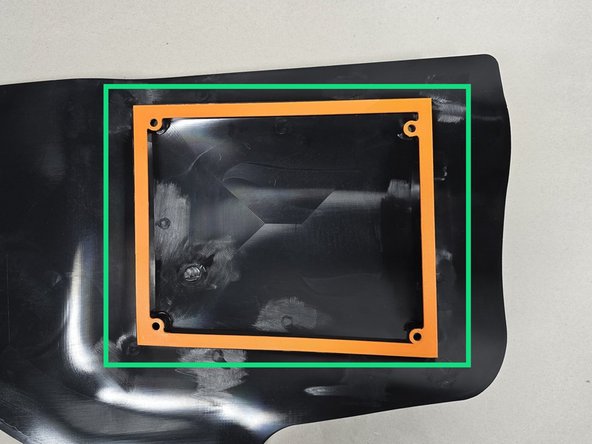
Remove the airbox gasket as shown
-
Line up the gasket on the bottom side of the airbox shroud as shown
-
-
-
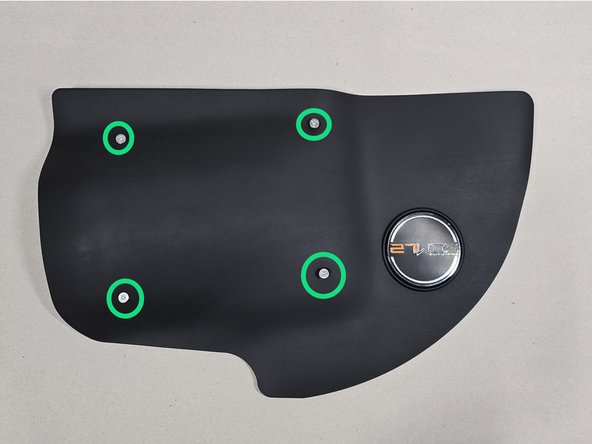
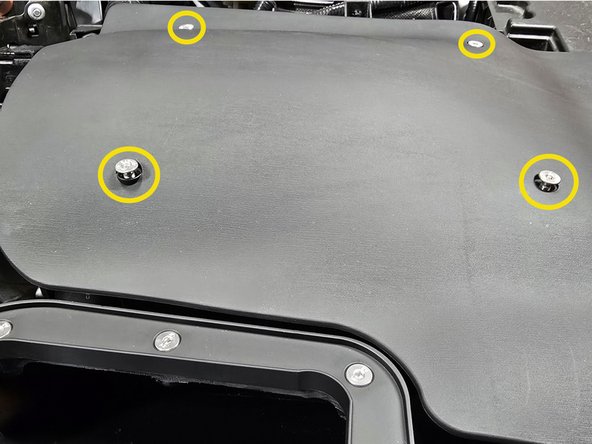
While holding the gasket in place, push the QTY(4) countersink screws through the top of the shroud and the gasket as shown
-
The holes on the gasket should be small enough to hold both the screws and the gasket in place
-
-
-
With the screws and gasket attached place the shroud onto the airbox in the orientation shown
-
Slight pushing to align the holes is ok. You should not have to apply a lot of force to get the shroud to align with the box
-
Hand thread each of the 4 screws a couple of threads, one screw at a time
-
You will likely have to move the shroud and the gasket around to get all 4 holes lined up
-
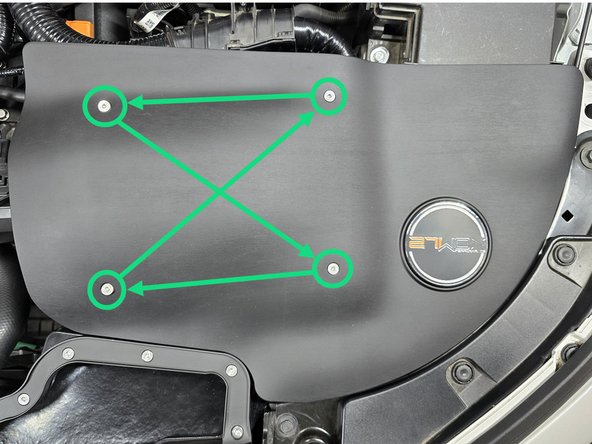
Once all 4 screws are slightly threaded by finger use a 3mm hex bit to tighten the lid down in a star pattern. Do a couple rotations at a time then move to the next screw. Do this until the screws are fully seated
-
You will need to repeat the star pattern multiple times threading each screw a turn or two at a time to ensure the shroud seats properly on the airbox
-
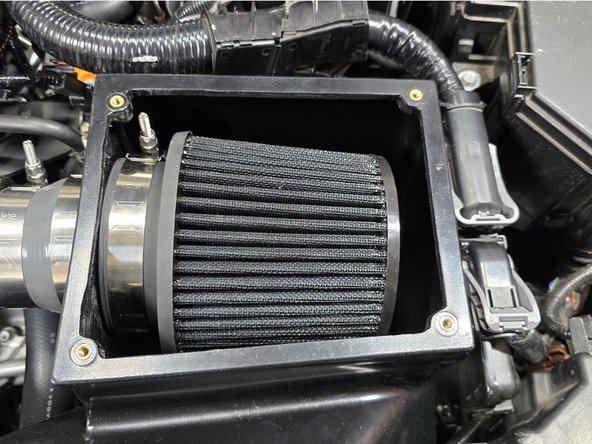
The properly installed shroud should appear as shown
-
-
-
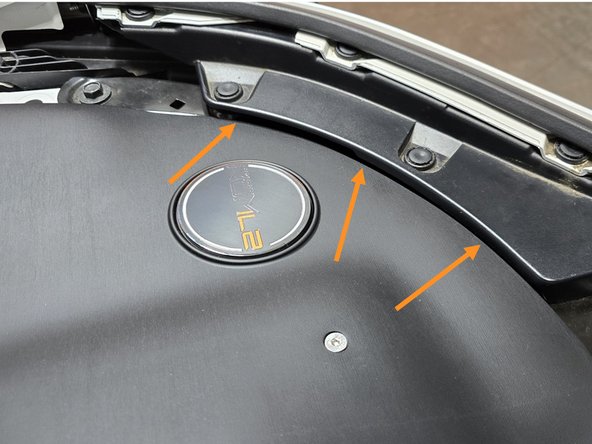
The right side of the shroud should have ~2mm gap along its edge as shown
-
It doesn't cause a problem if the clearance in this area is minimal
-
The back side should sit ~1 cm above wiring loom as shown
-
The shroud may sit on top of the fuse box as shown. This is ok
-
-
-
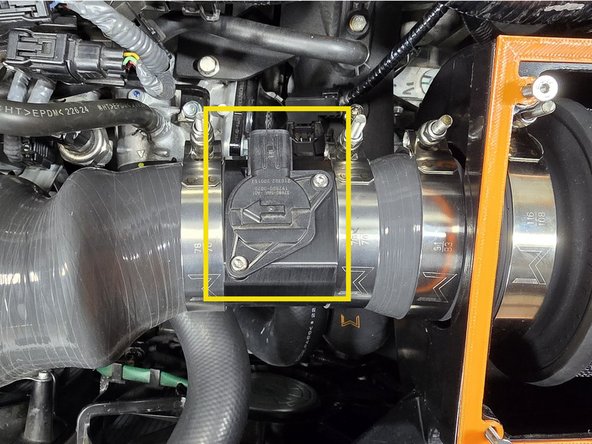
Plug your MAF sensor back in as shown
-
Make sure MAF wiring is not pulled tight. If it is, loosen the clamps and rotate the MAF housing towards the firewall
-
-
-
At the end of this install you will have one extra clamp, this is to ensure you can install your intake whether you have an OE or 27won turbo inlet pipe
-
This intake is designed to be ran with, and without the shroud. If you're craving the sounds of an SRI pop the top off and enjoy!
-
-
-
This completes the installation of your 27WON Hybrid Cold Air Intake
-
We hope you were impressed with your 27WON experience and love your new intake for years to come. Email us at sales@27won.com or call us at 571-271-0271 with any questions or concerns
-
Please Leave a review here: https://store.27won.com/honda-civic-acur...
-
Share your experience using #27WON on Instagram and Facebook
-
We recommend you check our video on cleaning the air filter at https://youtu.be/nE7diTeI4Gw
-