
Introduction
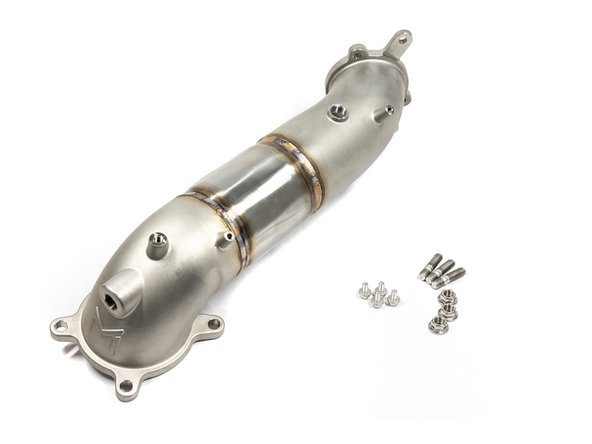
In this installation guide we have provided step by step instructions to remove the OEM exhaust and install the 27WON Performance Exhaust.
Advisory:
- Working under the vehicle requires a safe and sturdy location for the vehicle to sit on jackstands.
- The exhaust piping will be hot after recent vehicle operation. Allow the vehicle to cool or use a fan to cool the exhaust piping before working on the vehicle.
Tools
- 3/8" Ratchet
- 6" Extension
- 12" Extension
- 8mm Socket
- 10mm Socket - Deep
- 12mm Socket - Deep
- 14mm Socket - Deep
- 15mm Socket-Deep
- 17mm Socket - Deep
- 17mm Wrench × 2
- 3/8" Torque Wrench
- Flathead Screwdriver
- Phillips Screwdriver
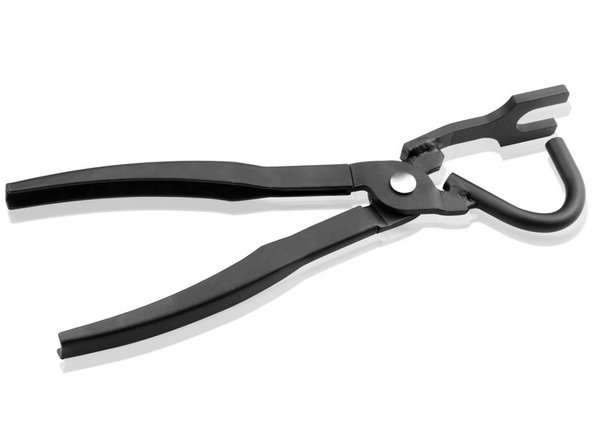
- Tongue and Groove Adjustable Pliers
- Optional: Exhaust Pliers
- Bungee Cord
- Hydraulic Jack
- Jack Stand × 4
- Cleaner Spray or Equivalent Lubricant
-
-
First and foremost; THANK YOU for becoming a part of the 27WON Family. We hope to REDEFINE your experience of the aftermarket with the highest level Parts, Customer Service, Packaging, & Support
-
These instructions were written with a 2023 Civic Type-R
-
Downpipe removal is optional. There are separate instructions for the downpipe
-
-
-
Jack up your car and place your jack stands in the appropriate mounting spots
-
You can find this in your owners manual
-
Make sure you have supported your car properly. If done improperly, this could lead to serious injury
-
-
-
The following instructions are shown with no bubble wrap or cardboard for clarity of the installation process
-
We recommend leaving as much protective bubble wrap/cardboard on the exhaust as possible during install to protect against scratches and dings during the process
-
Cut holes in the bubble wrap to expose the flanges, hanger rods, and fastening locations
-
-
-
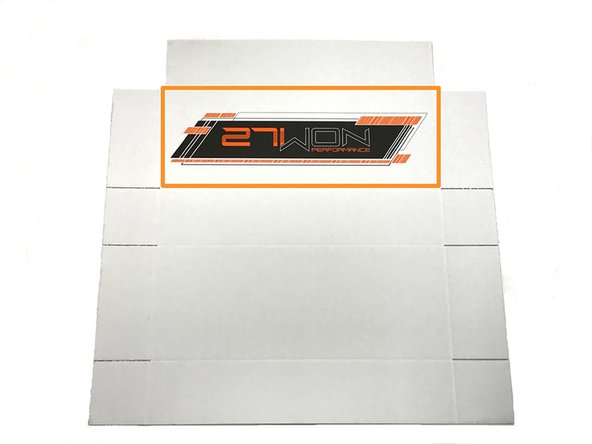
The 27WON packaging is not only designed to get your performance parts to your doorstep safely, but to also provide you with an awesome garage banner and/or comfy cardboard mat to lay on under your car for installation
-
You can cut out the banner as shown with the orange square
-
Or you can use the entire unfolded box as a mat to lay under your vehicle
-
Remove the staples from the box as they don't feel great on your backside...
-
-
-
If you purchased your exhaust with the turbo back option then now is a great time to proceed with installation of the downpipe
-
There is some overlap with these instructions, particularly around removal of the skid tray
-
We think the easiest path is to come back to these instructions at step 28 of the downpipe instructions and resume from this step
-
FK8-6-209 Downpipe Install instructions
-
-
-
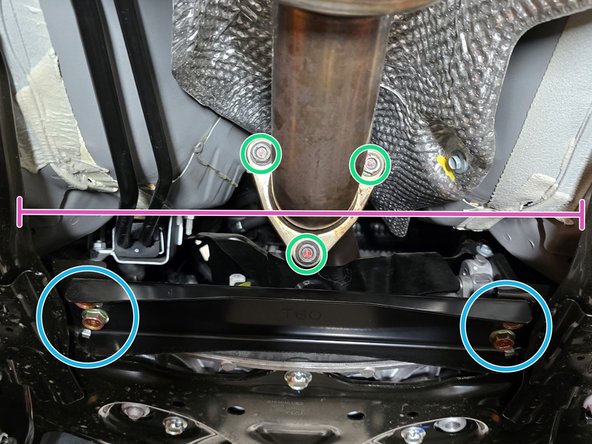
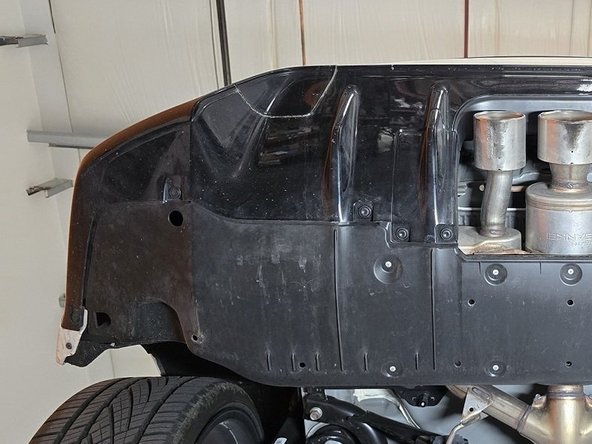
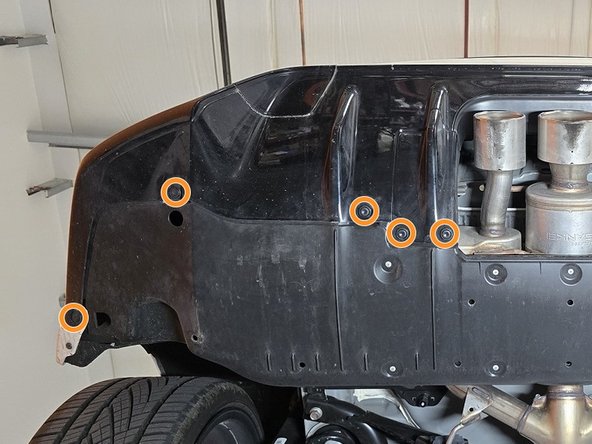
Locate the Skidtray
-
11th Gen Si shown here. The process is the same
-
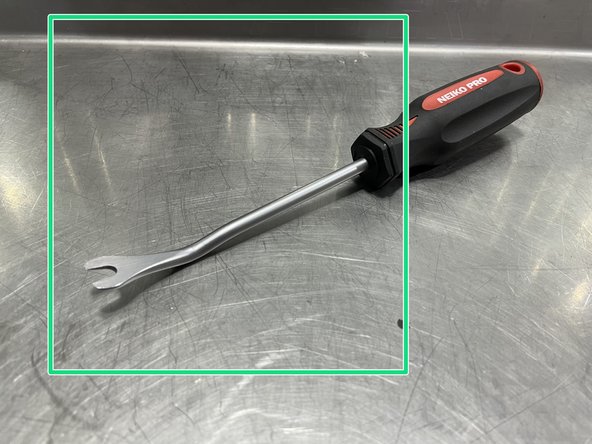
We recommend using a prying tool like the one shown by the green square
-
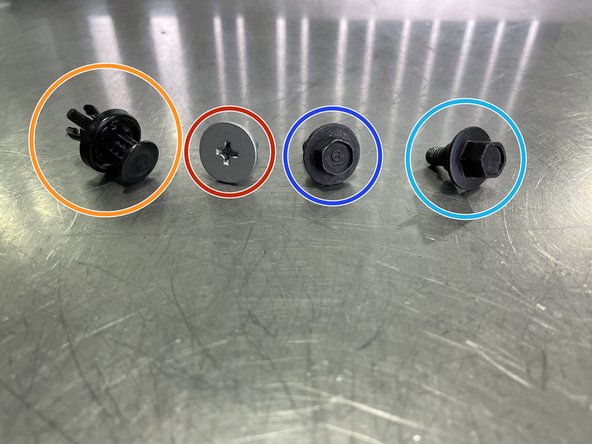
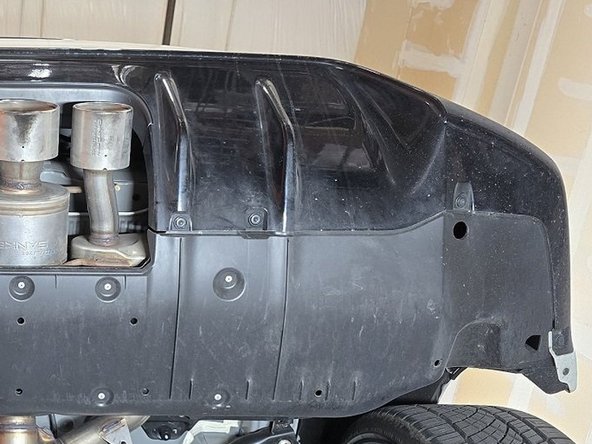
Use a flathead screwdriver or a prying tool to remove the fourteen (14) plastic push-clips circled in orange. Orange arrows identify the eight (8) additional push-clips described in the next step that are removed last
-
Use a #2 Philips head screw driver to remove the two (2) Philips pan head screws shown in red circles
-
Use a 10mm socket and wrench to remove the two (2) short head shoulder bolts shown in dark blue circles
-
Use a 10mm socket & ratchet to remove the four (4) tall head shoulder bolts shown in light blue circles
-
-
-
Use a large flat head screw driver or prying tool to remove the four (4) push-clips from each front wheel well
-
-
-
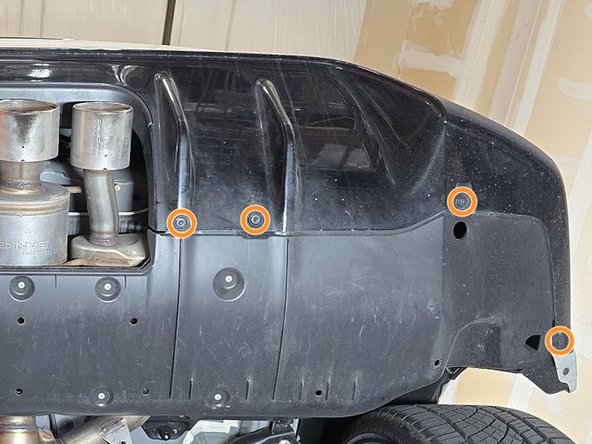
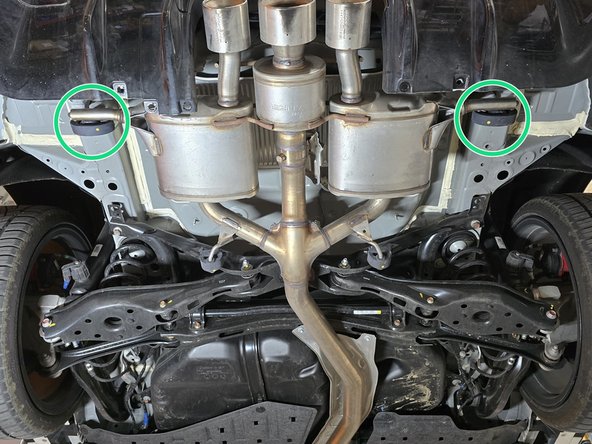
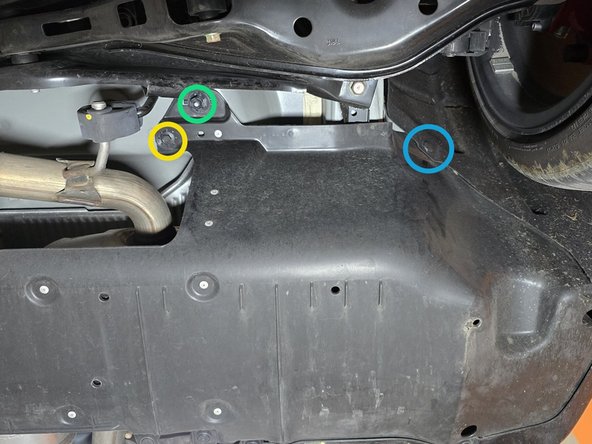
Locate rear diffuser
-
If installing the exhaust on an Integra Type S you can skip to Step 10
-
Use a flathead screwdriver or a prying tool to remove the nine (9) plastic push-clips circled in orange
-
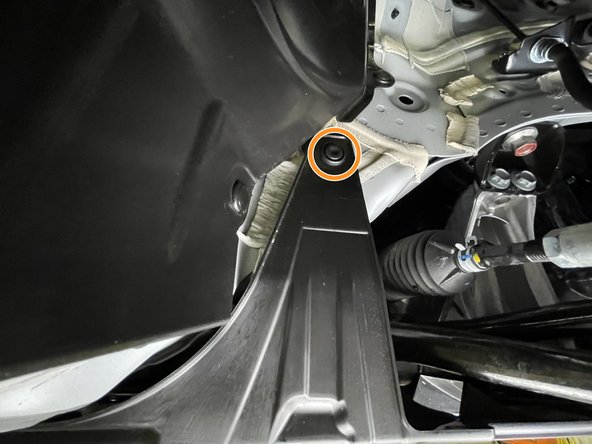
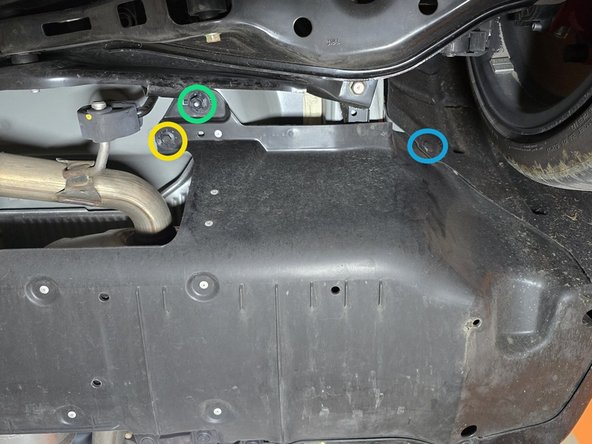
Use a 10mm socket and wrench to remove the short head shoulder bolt shown in a yellow circle
-
Repeat this on the other side of the exhaust
-
Use a 17mm socket and wrench to remove the plastic nut in a green circle
-
Repeat this on the other side of the exhaust
-
Use a flathead screwdriver or a prying tool to remove the two (2) plastic push-clips circled in blue, one in each wheel well
-
-
-
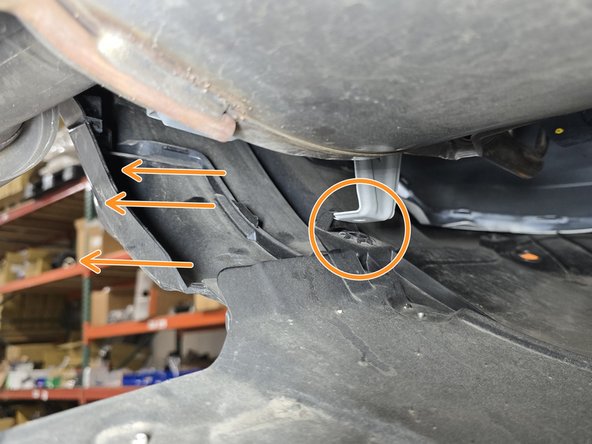
On the topside of the diffuser where the 10mm shoulder bolts mounted, there are brackets that hook into the diffuser. Push the diffuser towards the rear of the car to release it from these mounting tabs
-
There is one mounting bracket on each side of the exhaust
-
You may need to gently wiggle the diffuser back and forth to free it from the various overlaps with the bumper, be cautious of scratching your paint!
-
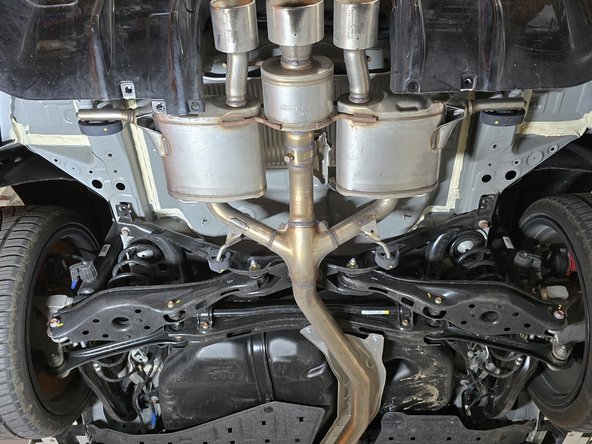
With the diffuser removed the exhaust should be exposed as shown
-
-
-
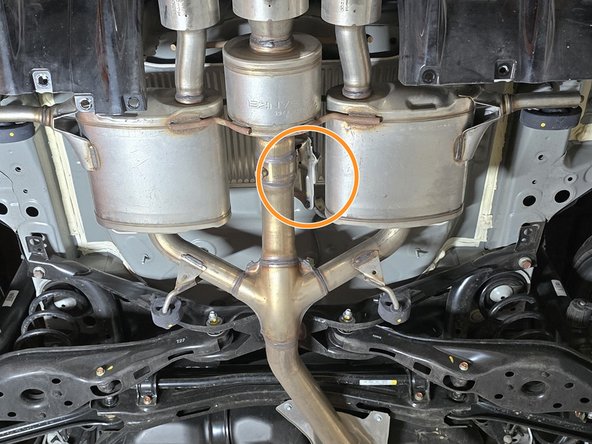
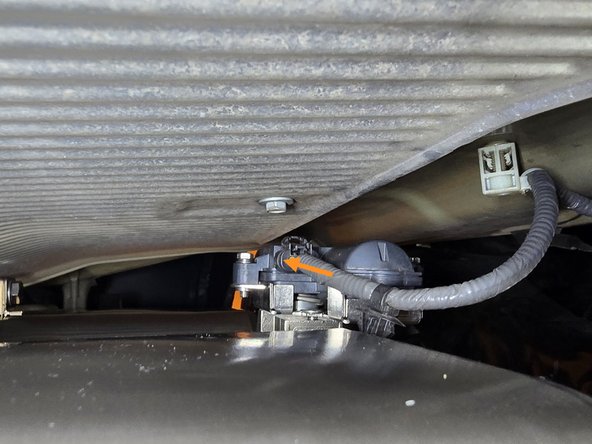
First image is shown for reference of valve motor location
-
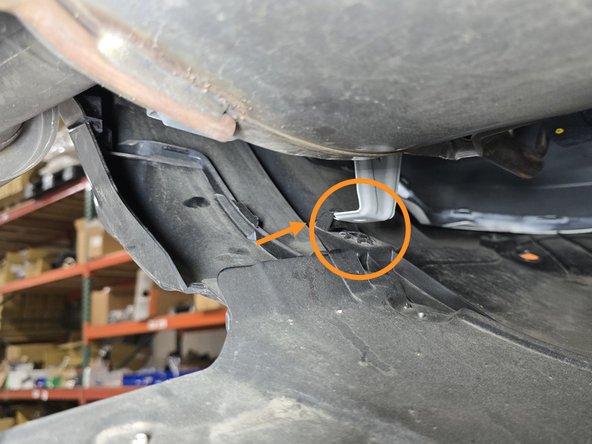
Using needle nose pliers squeeze the plastic clip as shown and push through to free the wire from the metal bracket
-
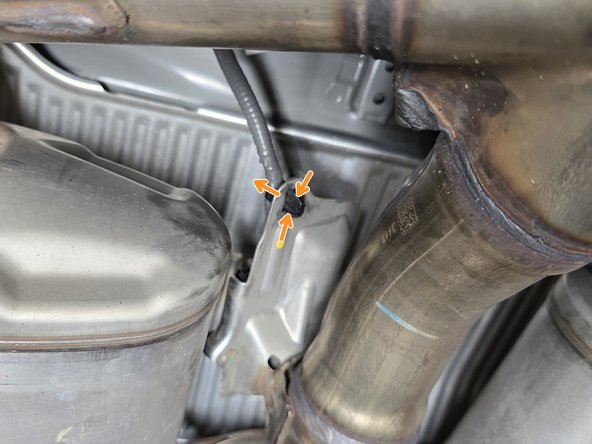
Following the wire to the top of the exhaust to the valve motor, use your hand to press the release tab on the top of the plug and pull it free from the motor
-
This plug can be stiff! Wiggling the whole plug back and forth while holding the release tab can make removing the plug much easier
-
This step can be performed after the exhaust is lowered a bit from the car but it will require a helper to support the exhaust
-
-
-
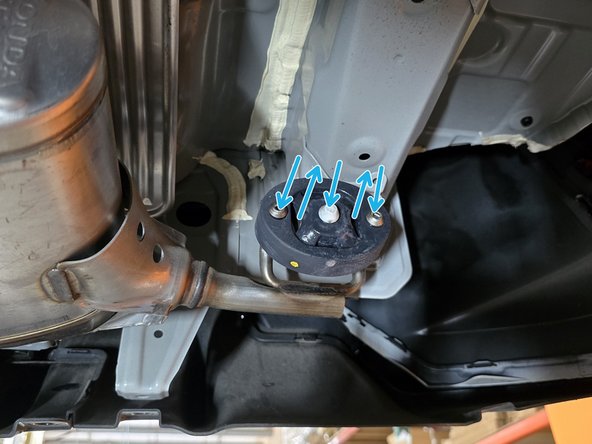
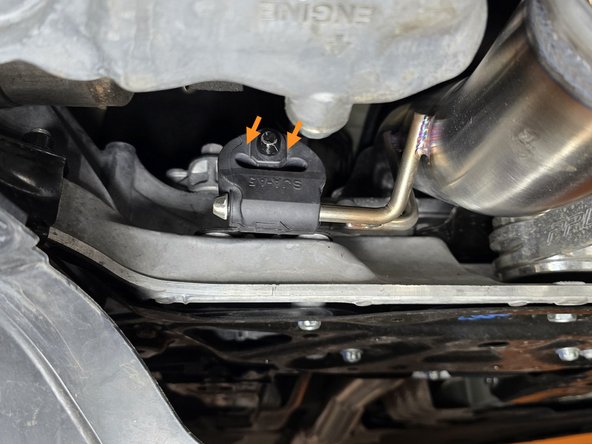
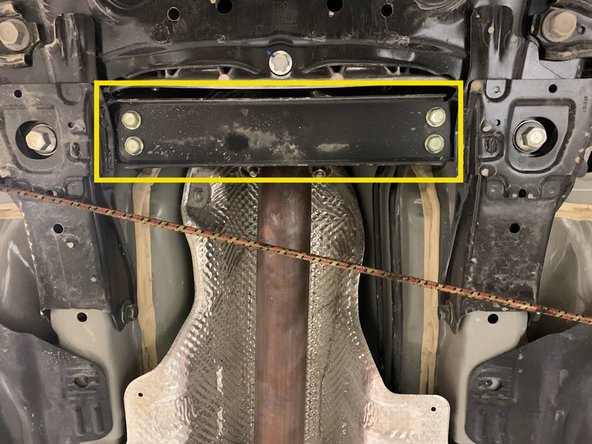
Remove (4) bolts shown and set bracket aside
-
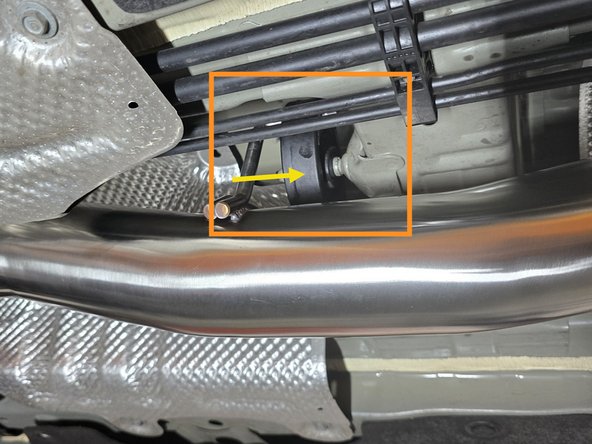
Support where the exhaust meets the front pipe with a bungee cord
-
Using a 14mm socket, remove the (3) bolts connecting the exhaust to the front pipe
-
-
-
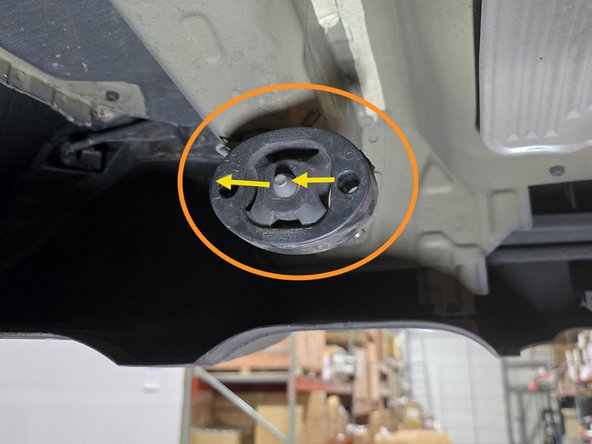
We'll show each hanger in the next steps. Hangers can be very difficult to get off. Here are a few ways to approach this
-
Spray hanger as shown with lubricant. We like glass cleaner
-
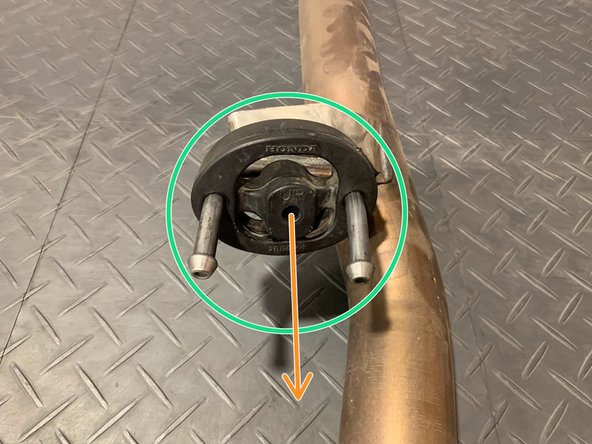
Either, using Tongue & Groove Pliers and pry the metal hanger from the rubber bushing/hanger
-
Or, the easiest way is to use a exhaust pliers. You can get these on Amazon for around $20
-
-
-
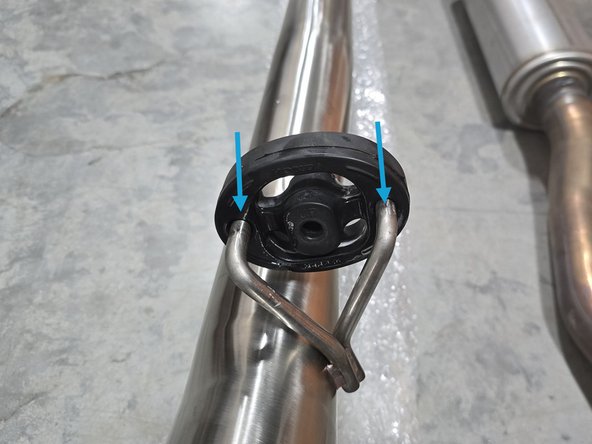
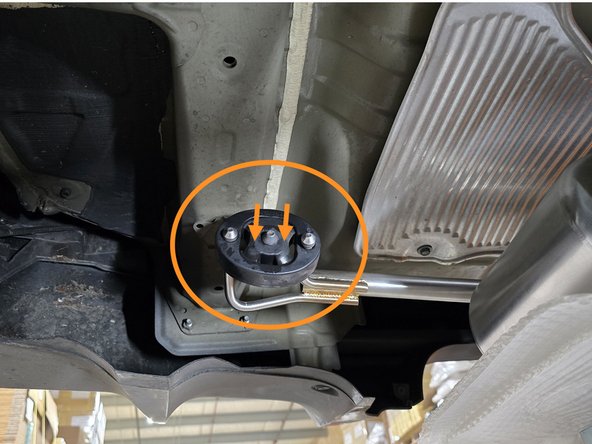
Using a spray cleaner, lubricate the front hangers and rubber support
-
Use tongue & groove pliers to press the metal hangers out of the rubber hanger. Remove the hangers of the exhaust from the rubber supports as shown
-
Use tongue & groove pliers to press the rubber hanger off of the metal support
-
-
-
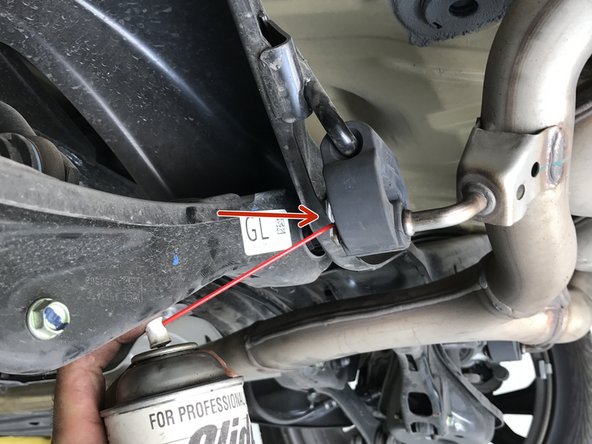
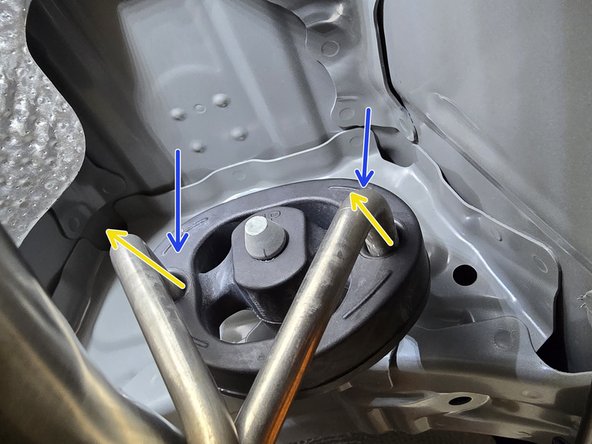
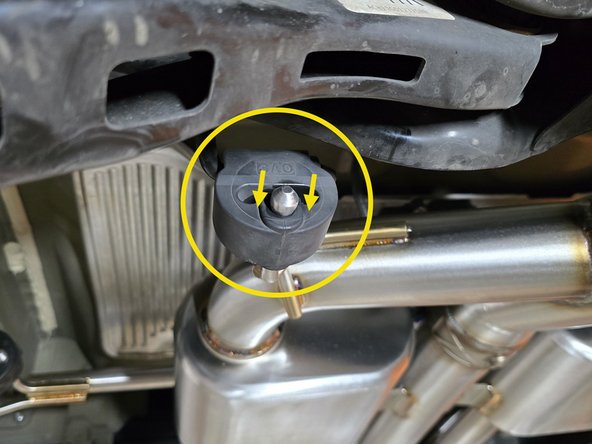
Use a spray cleaner to lubricate the rear hangers and rubber supports
-
Shown is the drivers side rear hanger, repeat this for the passenger side
-
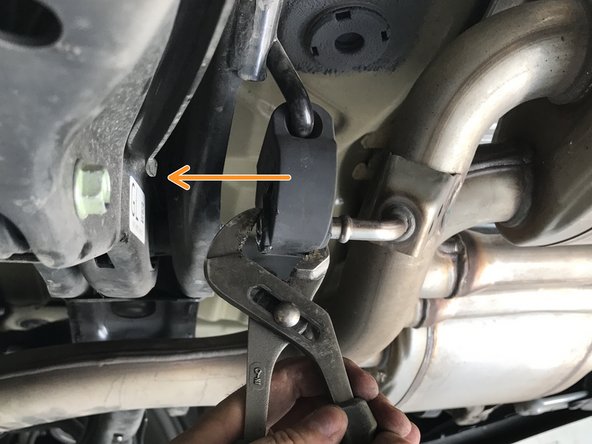
Use tongue & groove pliers to press the rod out of the rubber hanger, remove the hangers of the exhaust from the rubber supports as shown
-
-
-
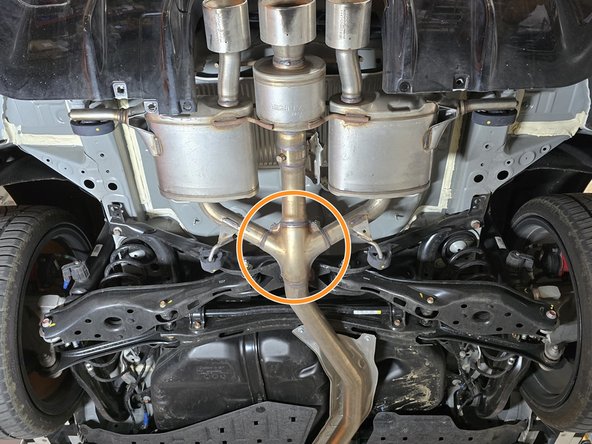
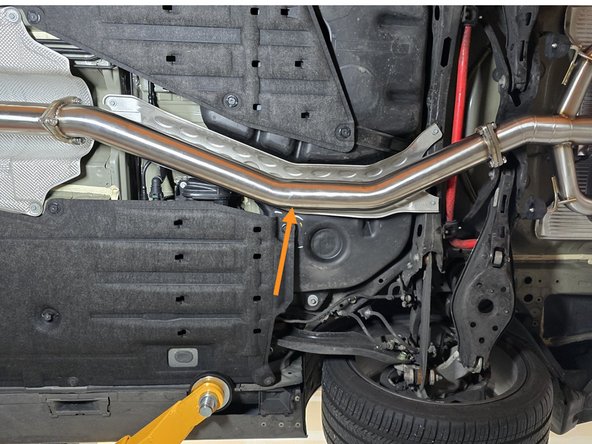
Using a transmission jack, floor jack, or a friend support the OE exhaust in the marked area
-
-
-
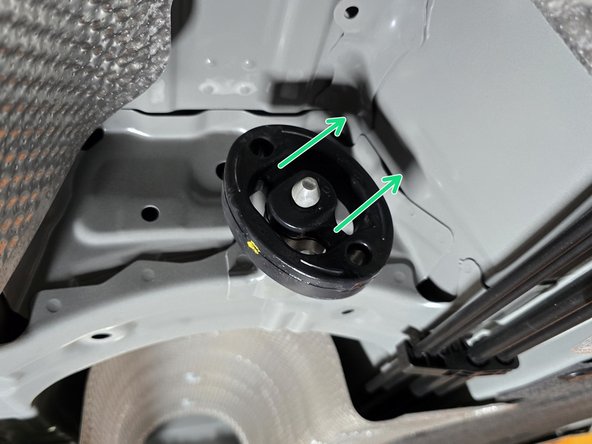
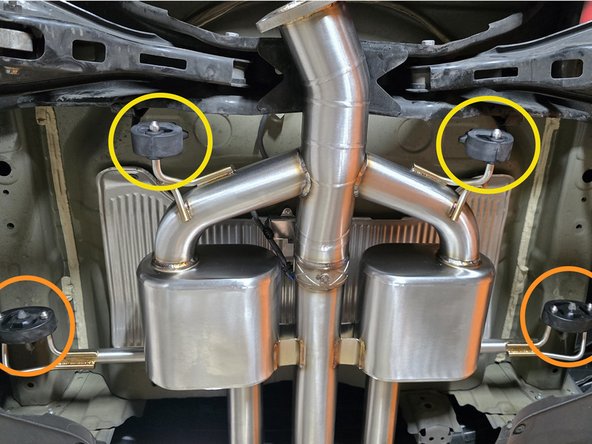
Using a spray cleaner, lubricate the remaining rear hangers and rubber supports
-
Use tongue & groove pliers to press the rod out of the rubber hanger, remove the hangers of the exhaust from the rubber supports as shown
-
The easiest way to do this is to remove either the left or right most rod from the bushing on each side then rotate the bushings so the exhaust hangs a bit lower. From the lowered position remove the other left/right rod from the bushing. The hanger will remain on the car via the center bushing
-
If the exhaust is unsupported it will fall and possibly become damaged. If not done yet, make sure you support the OE exhaust
-
-
-
With the exhaust unbolted and removed from the hanger supports, remove from the car and set aside
-
-
-
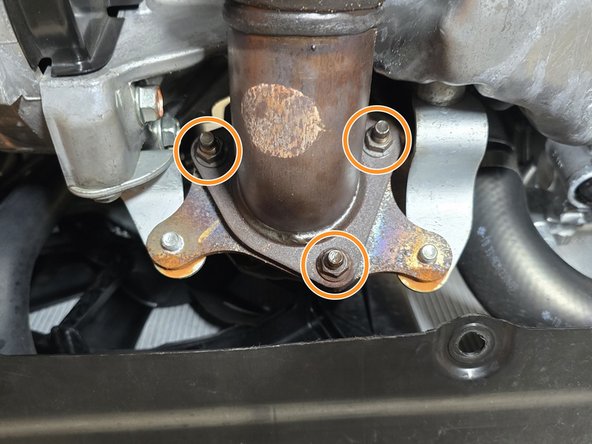
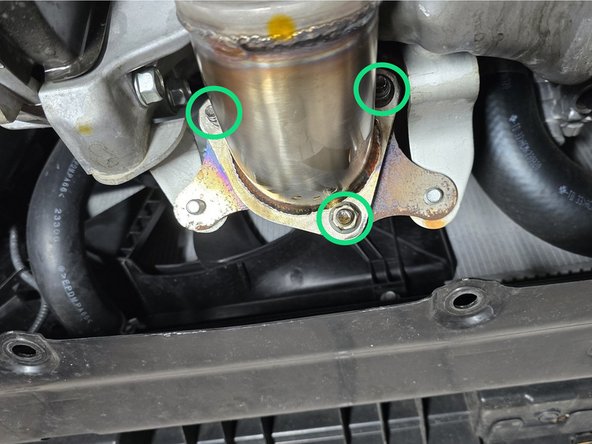
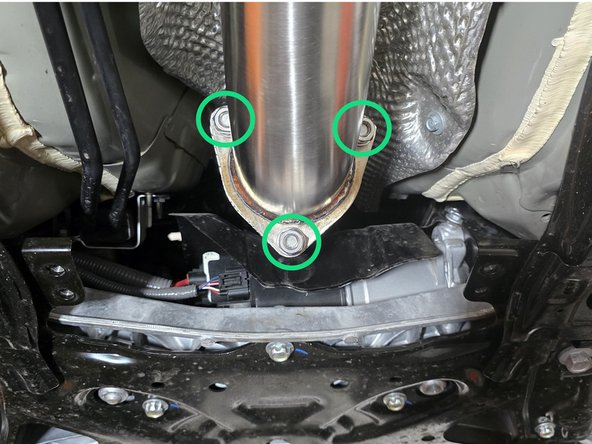
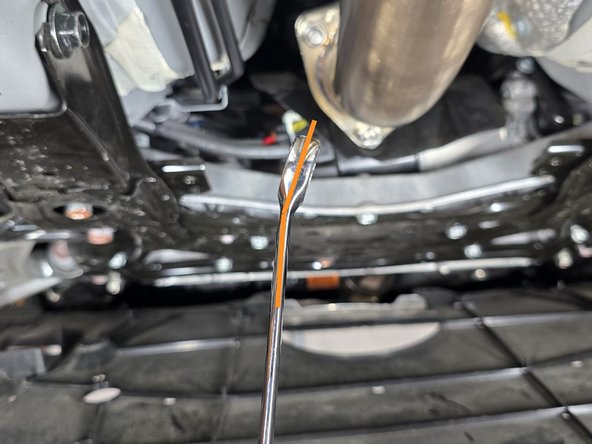
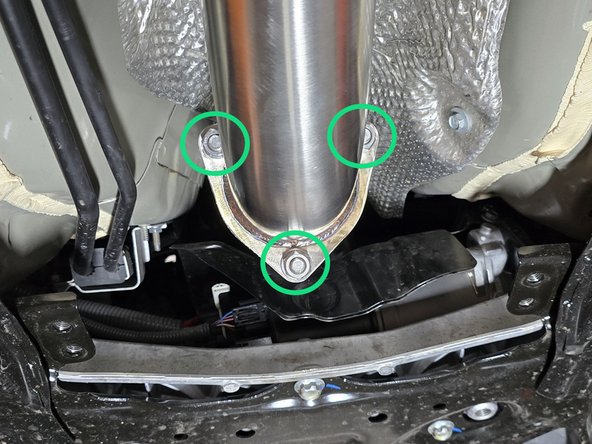
If you have the 27WON Down Pipe installed, use a 15mm socket to remove the (3) nuts holding the front pipe to the down pipe
-
If you have the OE Down Pipe installed, use a 14mm socket to remove the (3) nuts holding the front pipe to the down pipe
-
Using a spray cleaner, lubricate the remaining rear hanger and rubber supports
-
Use tongue & groove pliers to press the rod out of the rubber hanger, remove the hanger of the exhaust from the rubber support as shown
-
-
-
With the front pipe unbolted, remove the front pipe from the car and set aside
-
-
-
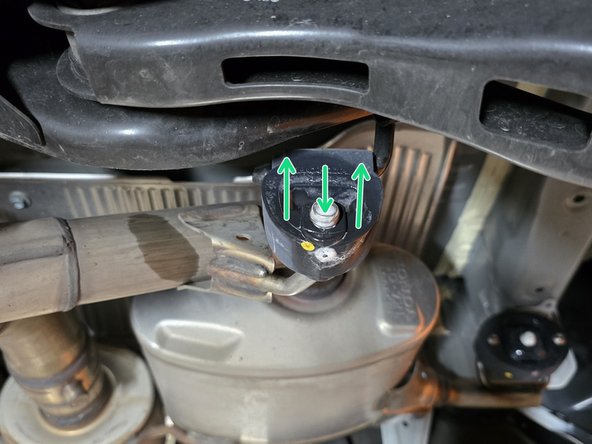
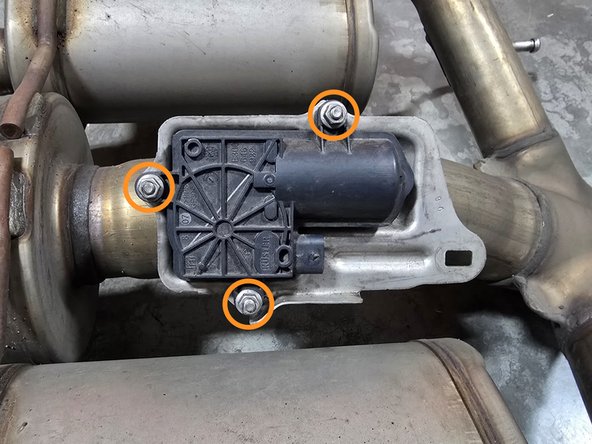
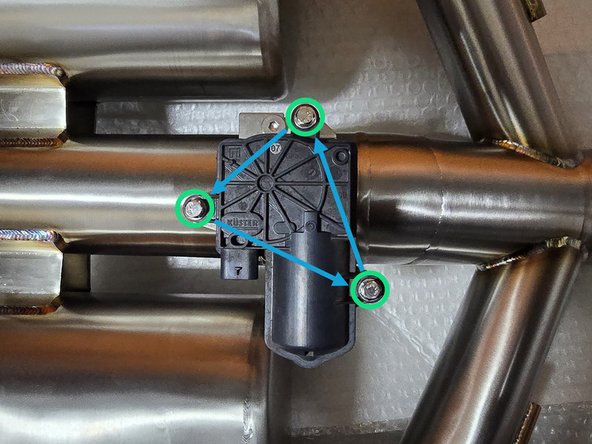
Use a 8mm socket to remove the (3) nuts securing the OE valve motor
-
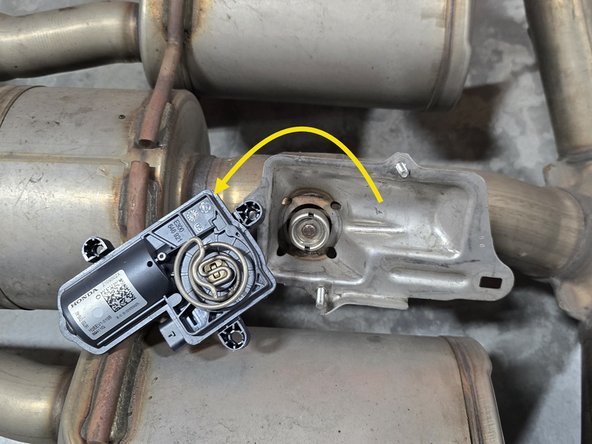
Remove the OE valve motor as shown
-
Using your hand, remove the (3) 8mm bolts from the 27Won mounting bracket
-
-
-
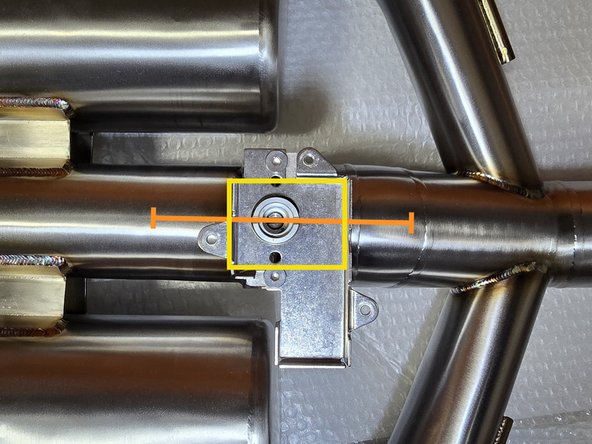
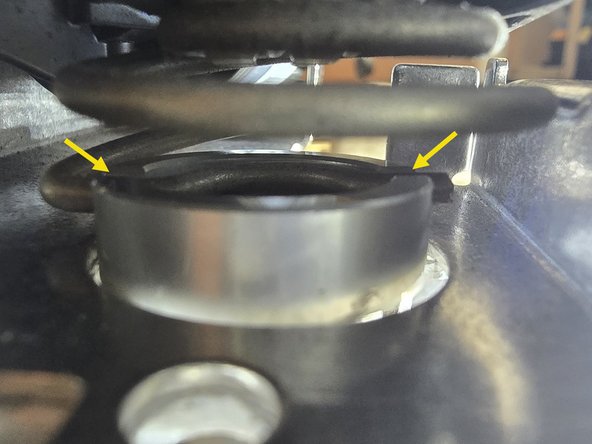
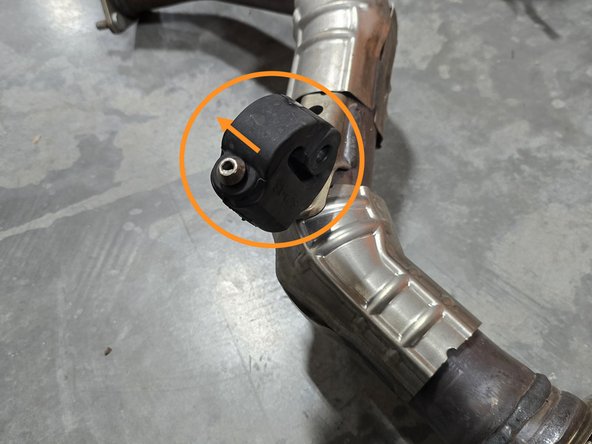
Verify the notches on the mounting cylinder are parallel to the center pipe as shown
-
Mounting cylinder may have more slots than is shown
-
The spring on the bottom of the valve motor should slot into the mounting cylinder as shown
-
With the motor spring slotted into the mounting cylinder, the motor assembly may need to be rotated a bit to line up the mounting holes, this is normal and is not an issue
-
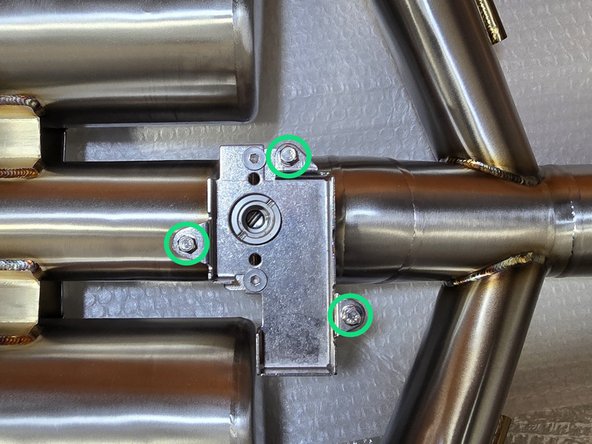
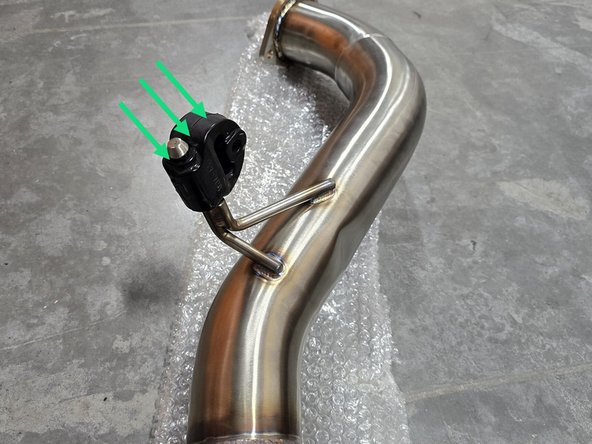
Hand thread the 8mm mounting bolts as shown
-
Using an 8mm socket tighten the mounting bolts in a circle, a few threads at a time until snug to ensure nothing binds up
-
-
-
We recommend doing this before the exhaust is fully installed to verify motor operation but it is optional
-
Lift the axle back up high enough to plug in the valve motor and plug it in
-
The first time you plug in the valve motor, it should actuate and open the exhaust valve, making an audible "clunk"
-
-
-
Using a spray cleaner, lubricate the front pipe hanger and remove it from the OE front pipe using a hanger removal tool
-
Reinstall the hanger on the 27WON front pipe
-
-
-
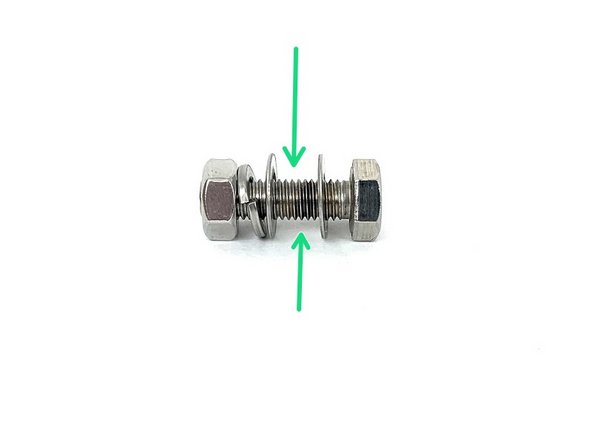
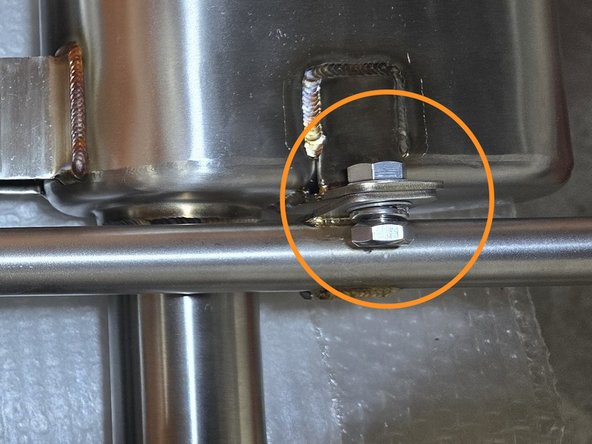
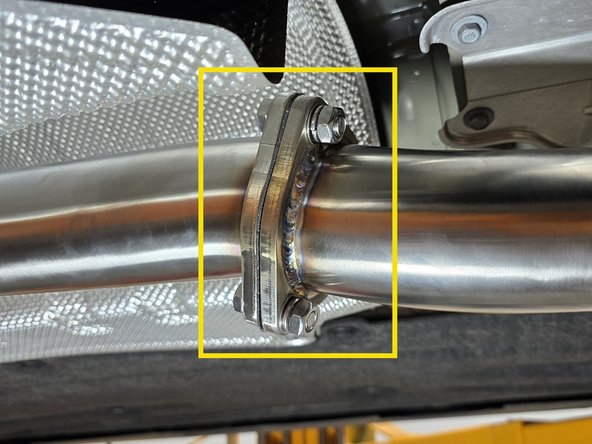
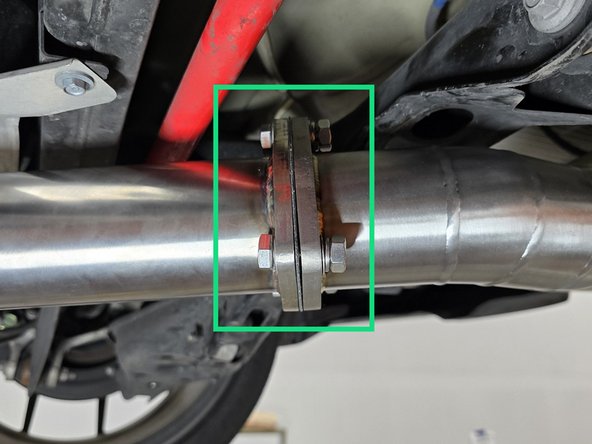
Make sure the exhaust flanges go where the green arrow is indicating when installing your hardware in all flanges in your 27WON exhaust system
-
-
-
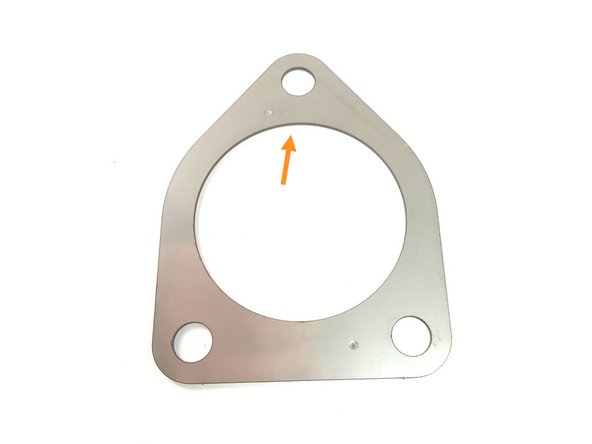
Locate the provided 2&1 MLS gasket for front-pipe to downpipe installation
-
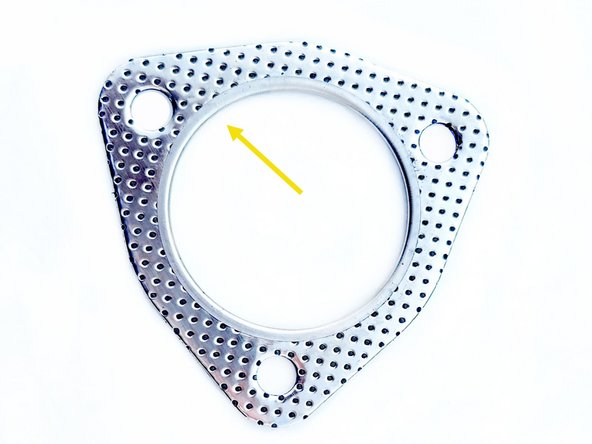
Locate a provided "tri-bolt" gasket for front-pipe to mid pipe installation
-
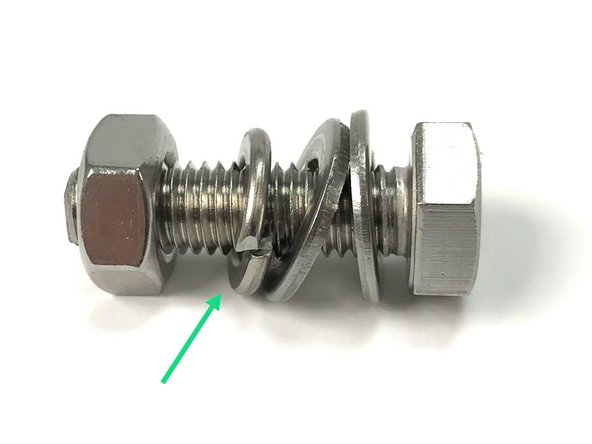
Locate QTY=3 provided 35mm length assembled M10 bolts
-
-
-
Guide the 27WON front pipe into the car
-
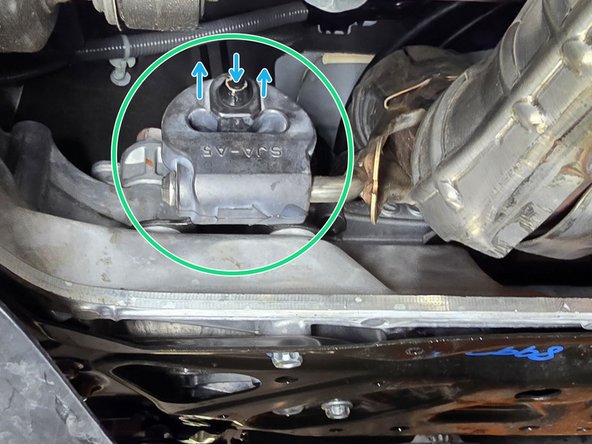
Push the exhaust hanger over the stud as shown
-
If you have the 27WON Down Pipe installed, use a 15mm socket to loosely reinstall the (3) nuts that hold the front pipe to the down pipe
-
If you have the OE Down Pipe installed, use a 14mm socket to loosely reinstall the (3) nuts that hold the front pipe to the down pipe
-
To ensure the exhaust fits properly, we recommend you do not fully tighten anything until the entire exhaust is hanging from the car
-
-
-
Using a spray cleaner, lubricate the front hanger and rubber support as shown
-
Use tongue & groove pliers to press the rod out of the rubber hanger, remove the rubber support off the OE exhaust hangers as shown
-
Reinstall the rubber support on the 27WON forward mid-pipe hangers
-
-
-
Using a spray cleaner, lubricate the rubber hanger
-
Reinsert the front hanger to the chassis hanger as shown
-
Using assembled hardware align the front pipe and forward midpipe and secure as shown
-
Only thread the nuts onto the bolts a few threads, just enough to hold the pipes together
-
-
-
Using the shorter 20mm provided hardware loosely attach the hanger bar to the axle back section of the exhaust as shown
-
Note the orientation of the hanger bar tabs and the hangers themselves, this is extremely important
-
-
-
Using a spray cleaner, lubricate the hanger
-
Use tongue & groove pliers to press the rod out of the rubber hanger, remove the hangers from the studs on the chassis as shown
-
Repeat this step on the other hanger
-
Reinstall the hangers onto the hanger bar as shown
-
Repeat this step on the other hanger
-
-
-
Using the same location as before, support the back of your 27WON exhaust with a friend or jack
-
Install hangers onto both chassis studs as shown
-
Press the forward exhaust hangers onto the axle back studs as shown
-
Axle back should appear as shown
-
-
-
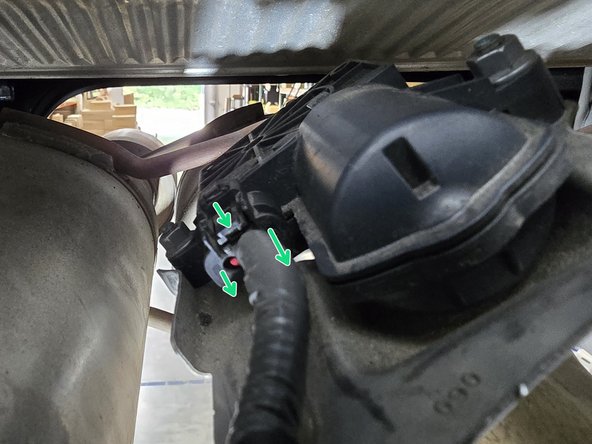
Reaching above the hanging axle back section, plug the valve motor back in with your hand as shown
-
-
-
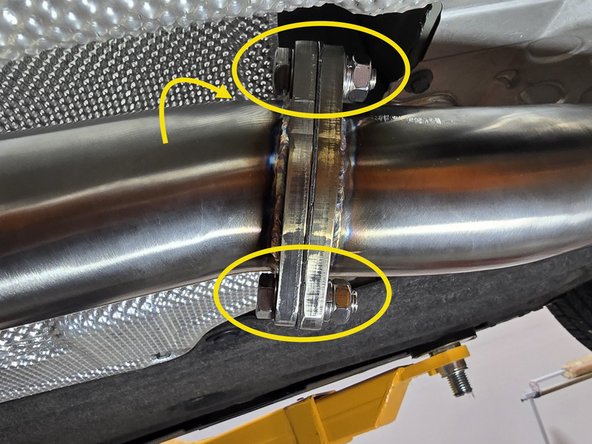
Using provided 35mm hardware install the rearward midpipe in the orientation shown
-
We recommend you have a jack, or a friend support the mid pipe while connecting the flanges
-
Using gasket and provided hardware, Loosely connect the forward mid pipe and the rearward mid pipe
-
Repeat this step for the axle back flange as well
-
-
-
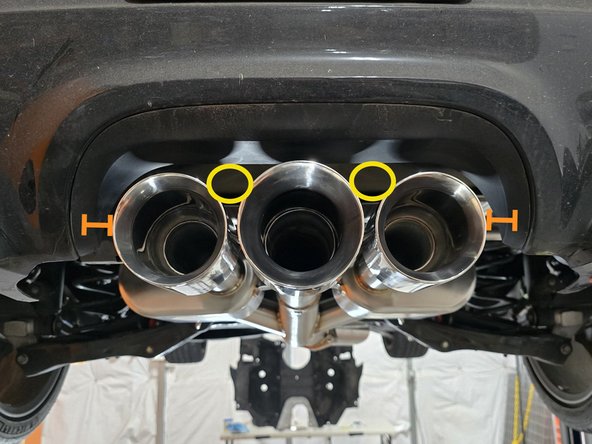
Stand back from the car and verify that the tips are centered and have around 1 inch inch clearance from the bumper on both sides
-
If the tips are sitting high, there may be a rubber hanger that is upside-down. Verify that all hangers are oriented correctly
-
Make sure aluminum heat shield is not touching hanger bar. This could cause NVH. Bend heat shield away if necessary
-
Once tips are centered, use a 17mm socket, a 12 inch extension, and a 17mm wrench to tighten the hardware securing the hanger bar
-
Hardware should be torqued to 25~30 ft lbs
-
Check again that exhaust tips are positioned properly
-
-
-
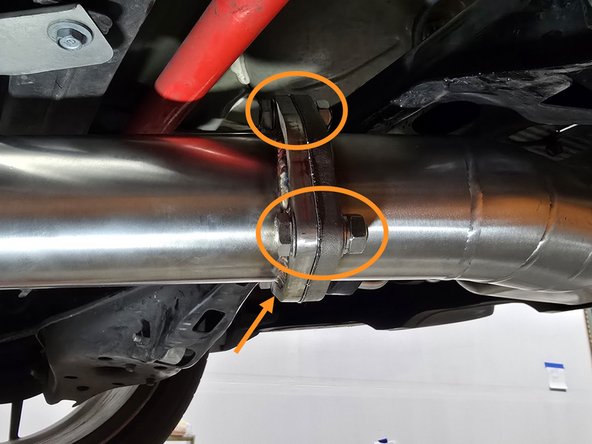
All exhaust hardware should be torqued to 25-30 ft lbs
-
Perfect alignment of the flanges is recommended. Even 1mm of misalignment can cause a big fitment issue at the rear of the car
-
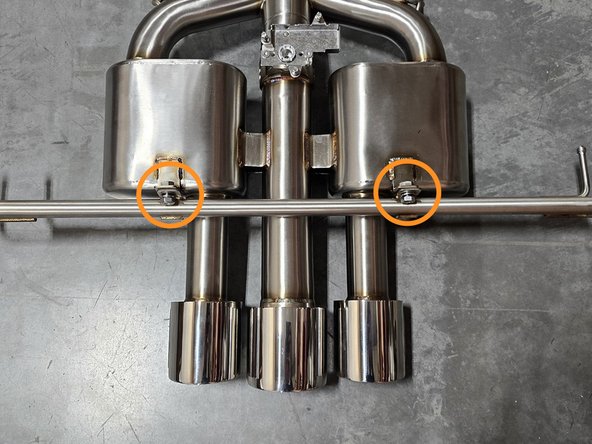
Using two 17mm wrenches tighten down the hardware connecting the rear mid pipe and the axle back section
-
Using a 6 inch extension, a 17mm socket, and a 17mm wrench tighten down the hardware connecting the front and rear mid pipes
-
-
-
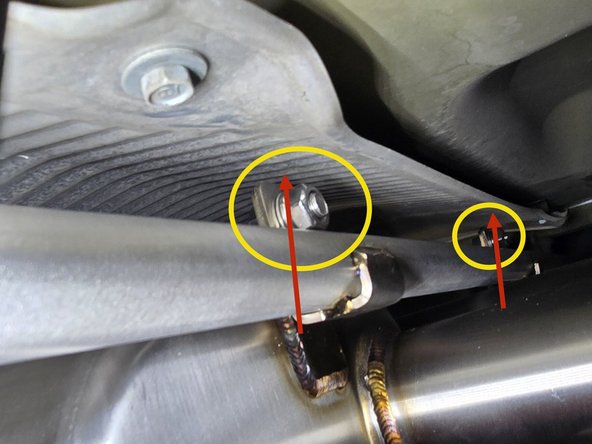
To make this as painless as possible, you will need a 17mm wrench with a bent end as shown
-
With the chassis brace removed, and a bent end wrench you can easily get a wrench on the back side of the exhaust hardware as shown
-
Using a 6 inch extension, and a 17mm socket tighten down the hardware connecting the front pipe and mid pipe as shown
-
-
-
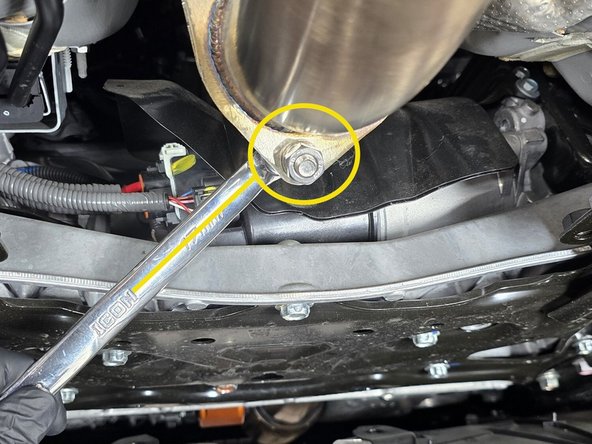
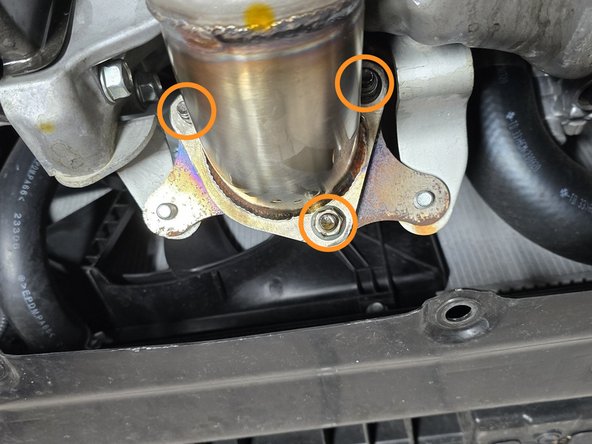
If you have the 27WON Down Pipe installed, use a 15mm socket to tighten the (3) nuts holding the front pipe to the down pipe
-
If you have the OE Down Pipe installed, use a 14mm socket to tighten the (3) nuts holding the front pipe to the down pipe
-
Using a 14mm socket reinstall the chassis brace as shown
-
-
-
If installing the exhaust on an Integra Type S you can skip to step 40
-
Push the diffuser over the mounting hooks as shown to hang it from the rear bumper
-
Repeat this step for the other side
-
You will need to gently wiggle the diffuser back and forth to reinstall it into the various overlaps with the bumper, be cautious of scratching your paint!
-
The correctly hung diffuser tucked into the bumper should appear as show
-
-
-
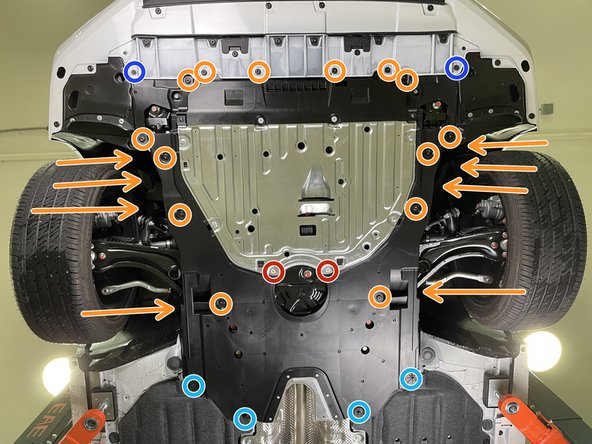
Reinstall the nine (9) plastic push-clips circled in orange
-
Use a 10mm socket and wrench to install the short head shoulder bolt shown in a yellow circle
-
Repeat this on the other side of the exhaust
-
Use a 17mm socket and wrench to lightly install the plastic nut in a green circle
-
Plastic nuts are extremely easy to strip out when using a tool, exercise extreme caution to avoid this
-
Repeat this on the other side of the exhaust
-
Reinstall the two (2) plastic push-clips circled in blue, one in each wheel well
-
-
-
Reinsert the (4) push pins into the mounting spots as shown
-
Repeat this step on the other side
-
-
-
Reinstall the fourteen (14) plastic push-clips circled in orange
-
Using a Philips head screw driver, reinstall the two (2) Philips pan head screws shown in red circles
-
Using a 10mm socket & ratchet reinstall the four (4) tall head shoulder bolts shown in light blue circles
-
Using a 10mm socket and ratchet, reinstall the two (2) short head shoulder bolts shown in dark blue circles
-
-
-
Start the vehicle to check for leaks or rattles. If none, then take a spin around the block for further verification. If you do find a leak or rattle, please inspect the exhaust further
-
A leak could be caused by a loose flange bolt, improperly used gasket, or if debris is stuck between the gasket and flange
-
A rattle could be caused by misaligned pipe or a rubber hanger being orientated incorrectly
-
If you have exhausted all investigation then give us a call and we would be happy to help and resolve the issue with you
-
-
-
Exhaust may smoke for the first 30 minutes or so of use. This is normal
-
Exhaust sound will settle a bit during the first 100 miles of use. This is normal
-
Your Honda has a cold start system which causes louder exhaust for around 15 seconds when you start your car cold
-
-
-
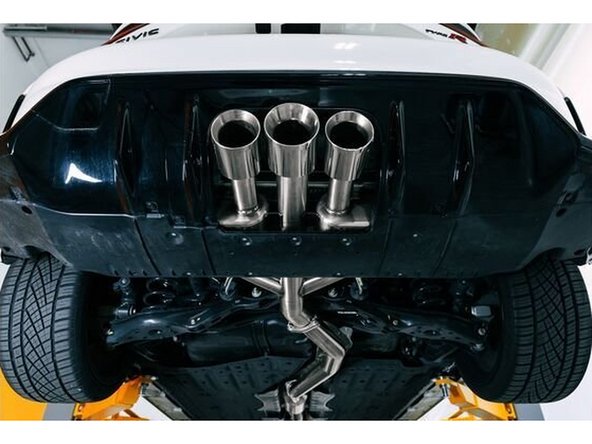
This completes the installation of your 27WON Performance Exhaust
-
We hope you were impressed with your 27WON experience and love your new exhaust system for years to come. Email us at sales@27won.com or call us at 571-271-0271 with any questions or concerns
-
Please leave a review here: https://store.27won.com/2023-honda-civic...
-
Stay Connected with the latest developments with the 27WON Monthly Newsletter: https://store.27won.com/27won-newsletter...
-
See the latest Products and Tech Videos from 27WON with a quick Subscribe: https://www.youtube.com/27won
-
Share your experience using #27WON on Instagram and Facebook
-


Cancel: I did not complete this guide.
One other person completed this guide.