Introduction
In this installation guide we have provided step by step instructions on how to install the provided 27WON Exhaust Silencer into your 27WON Performance Exhaust
Advisory:
- Working under the vehicle requires a safe and sturdy location for the vehicle to sit on jackstands
- Use the hydraulic jack to raise the vehicle and the jack stands to support the vehicle in the OE recommended locations
- The exhaust piping will be hot after recent vehicle operation. Allow the vehicle to cool or use a fan to cool the exhaust piping before working on the vehicle
-
-
First and foremost; THANK YOU for becoming a part of the 27WON Family. We hope to REDEFINE your experience of the aftermarket with the highest level Parts, Customer Service, Packaging, & Support.
-
This guide describes removal and reinstallation of the axle-back exhaust section as well as silencer installation. An exhaust silencer can help reduce NVH caused by exhaust resonance and flow/sound abnormalities
-
-
-
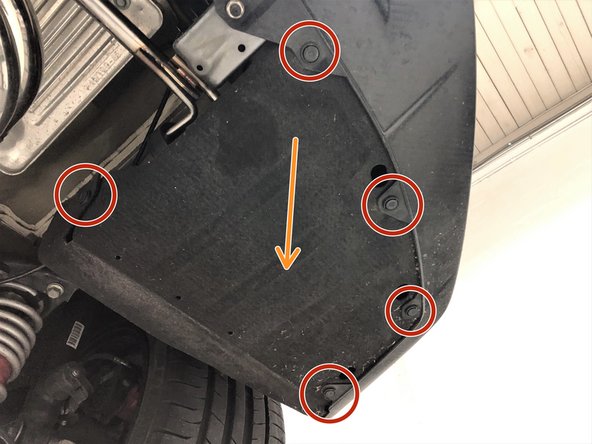
At the rear passenger side of the vehicle, remove the five push clips that hold the rear bumper fender liner to the rear bumper
-
Pull the rear bumper fender liner downward to gain access to the rearmost exhaust hangers
-
Repeat these steps on the other side of the vehicle
-
-
-
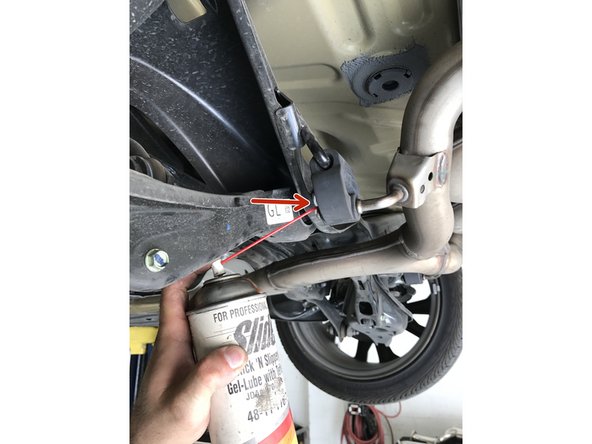
This step and the next are meant to show you how to remove a rubber hanger - Parts are not being removed from the vehicle at this time
-
Exhaust hangers can be difficult to remove without lubricant
-
Apply small amount of silicone spray lubricant to end of hanger rod
-
-
-
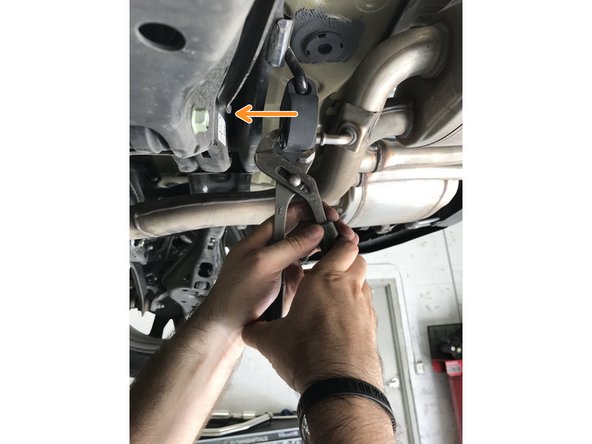
Use Exhaust Hanger Pliers or Tongue & Groove pliers to press the rod out of the rubber hanger
-
Hook the lower jaw to the edge of the rubber hanger. Hook the end of the upper jaw on the end of the rod to push the rod out of the hanger
-
-
-
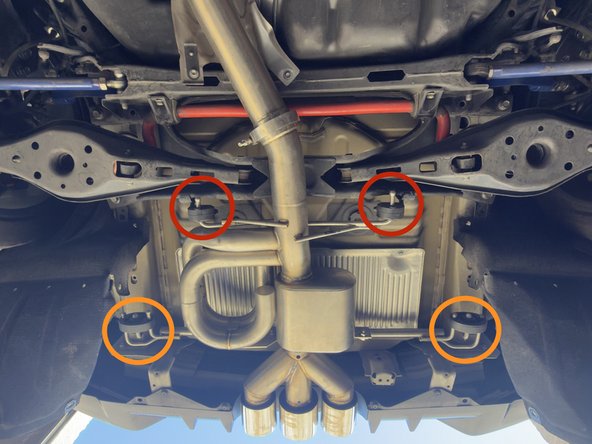
Forward single rod rubber hangers
-
Rearward dual rod rubber hangers
-
-
-
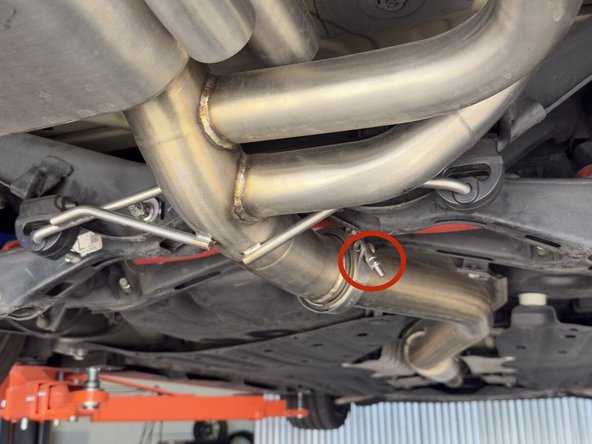
Locate v-band clamp connecting muffler section to rearward mid-pipe. Use a 3/8” ratchet and 10mm socket to loosen and then remove clamp. Set aside
-
-
-
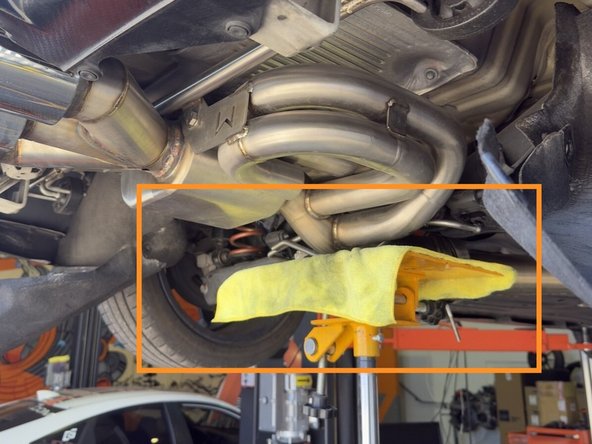
Support muffler section with a transmission jack as shown here. If working without a lift, support muffler section with something sturdy to keep it from falling to the ground when the hangers are removed next
-
-
-
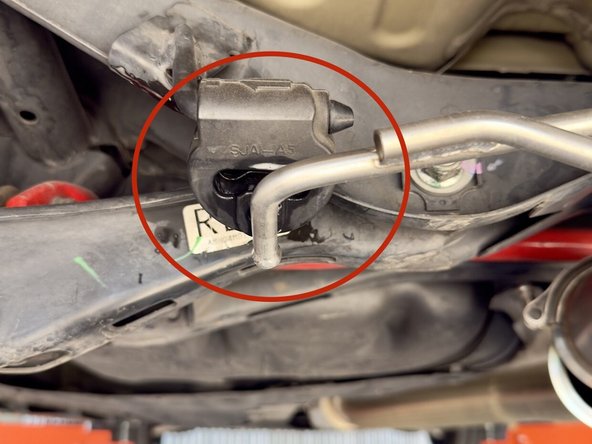
Pull the single rod hanger completely off the hanger rod and pivot out of the way as shown
-
Complete for both passenger and driver sides
-
-
-
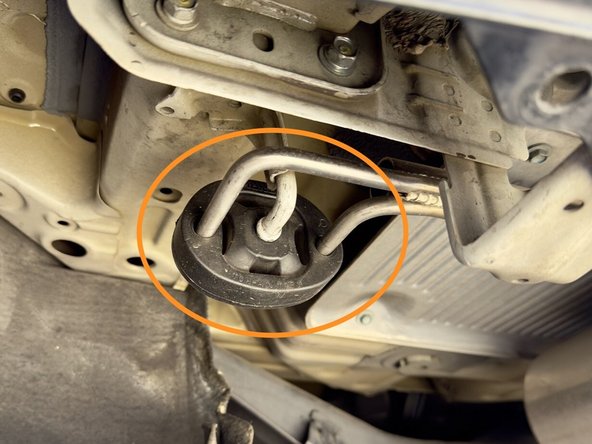
Pull the dual rod rubber hangers off the exhaust hanger rods; the rubber hangers will stay on the vehicle
-
Lower the exhaust to the ground and remove from under vehicle. The hangar bar can be left installed to the muffler section
-
-
-
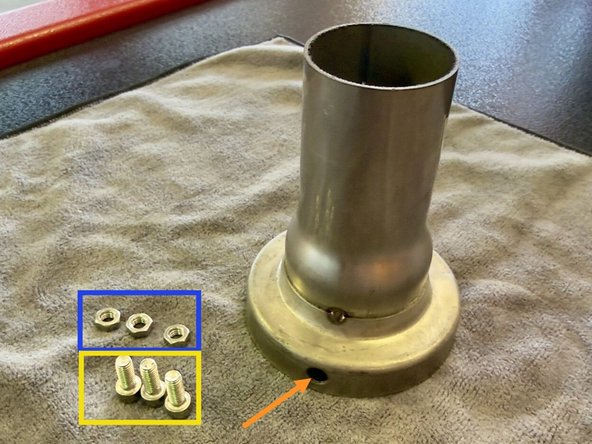
(3) 4mm Allen Head bolts
-
(3) 8mm nuts
-
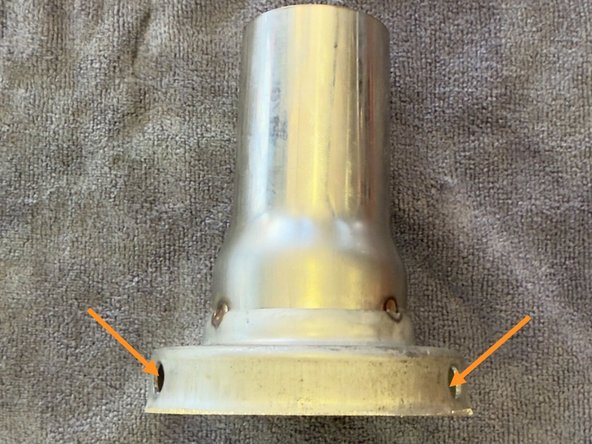
Mounting locations. Note, there are three total
-
-
-
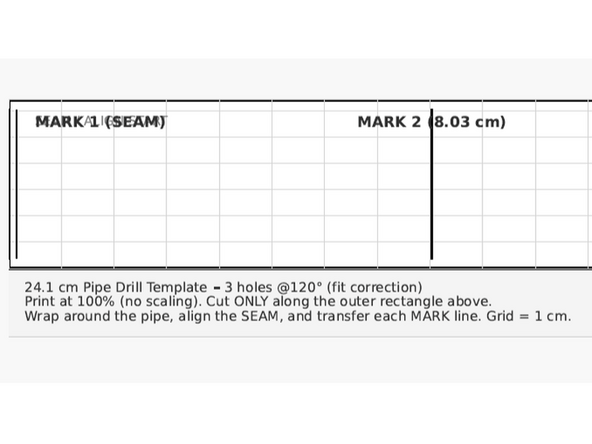
A template is provided to mark the location of the holes needed to secure the exhaust silencer to the muffler middle pipe
-
Download your drill template here: https://store.27won.com/_27Won/27Won-1-P... FK8 Exhaust Silencer Drill Template.pdf
-
After printing the template, measure the distance between the lines to make sure the scale is right
-
-
-
The silencer can be installed with one bolt. For a more sturdy install we'll demonstrate all three here
-
Place muffler on a sturdy surface as you will be drilling (up to) three holes for installation of the silencer
-
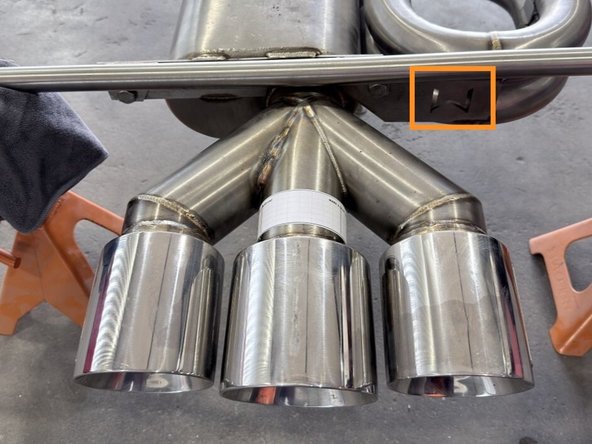
The exhaust has been flipped and you will start by working on the bottom side i.e. the side of the exhaust that faces down when on the vehicle. Note the orientation of the 'W" logo
-
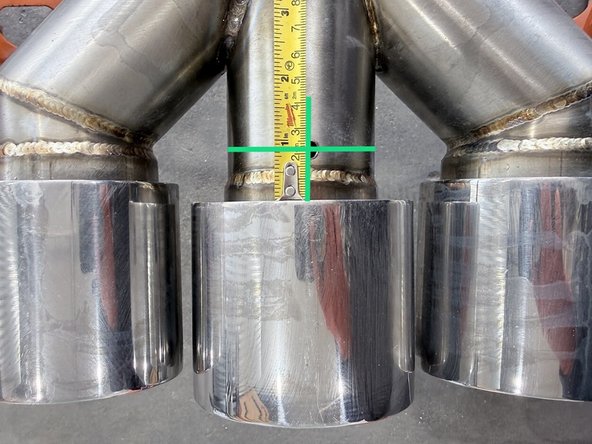
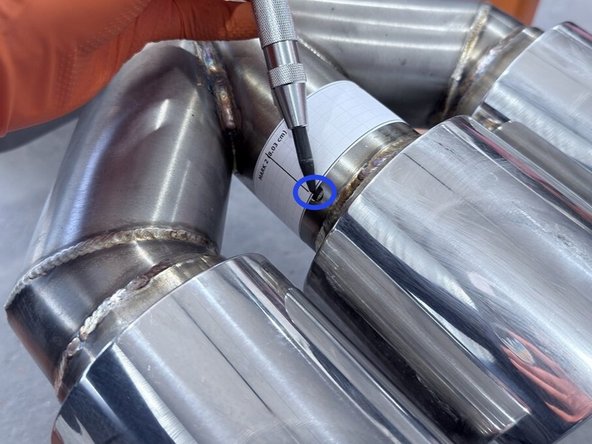
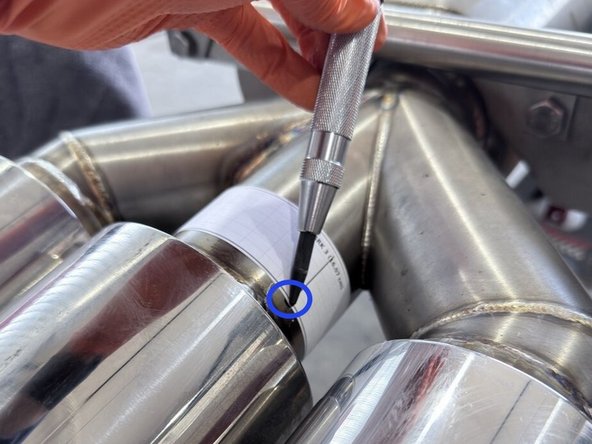
Using a ruler or tape measure, measure out between the 1 inch and 2cm mark directly from the center tip back. Mark location using a punch or nail/hammer to make a little dent for drill target
-
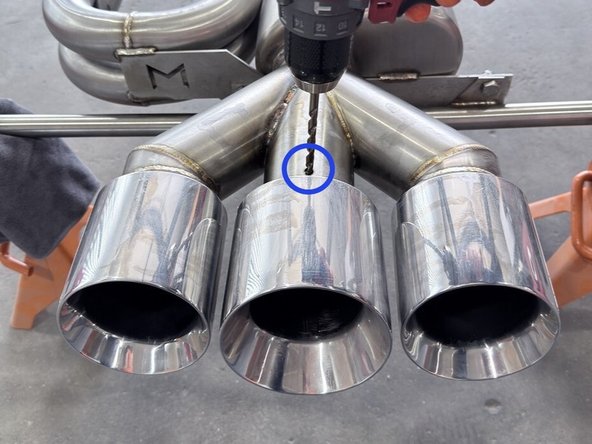
Drilling into Stainless Steel is difficult. Take care to not damage the exhaust. Use Stainless Steel appropriate drill bits (Cobalt) and use slowest speed on your drill
-
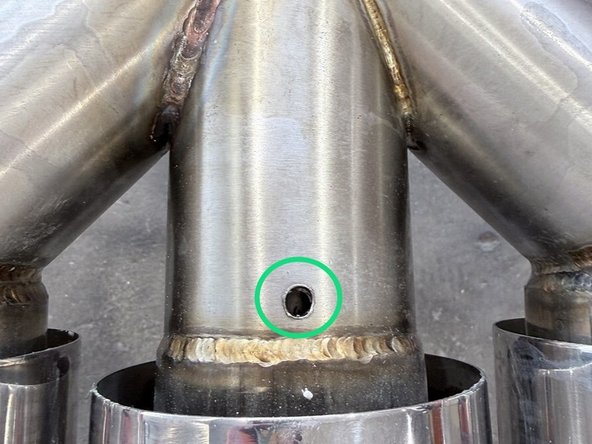
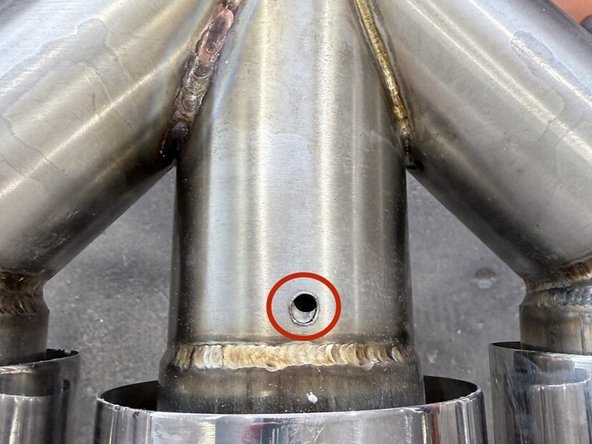
Start by drilling a pilot hole using a 5/64" drill bit (or even smaller if needed). Follow up with a 1/4" bit for the final hole dimension
-
-
-
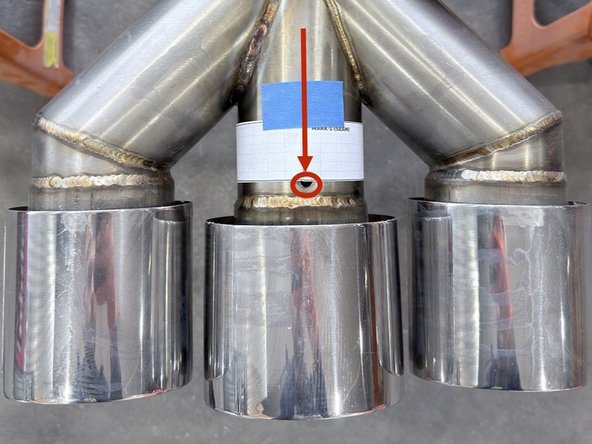
Apply the included template to the exhaust piping aligning the first hole you made to the location "Mark 1" by wrapping around as shown and securing with blue tape
-
Flip the Muffler section over to the opposite side for access to mark & drill final holes. "W' logo will now be facing up
-
-
-
Mark the location of the final two holes and drill
-
-
-
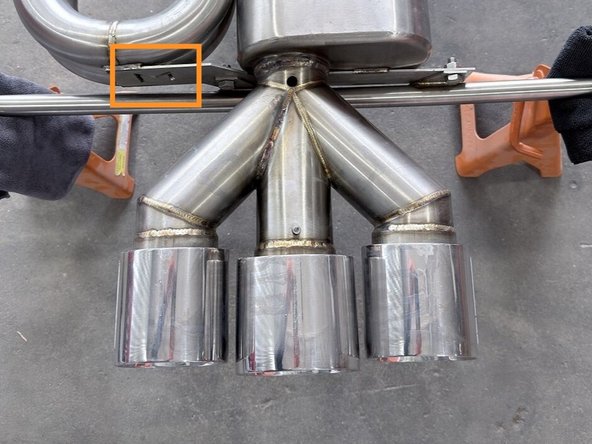
Test fit exhaust silencer into muffler by placing it into the center tip as shown until the top mounting hole on silencer lines up with the hole just drilled
-
Top down view. Shown here is the exhaust silencer mounting hole lined up correctly with the silencer
-
Shown not lined up correctly
-
-
-
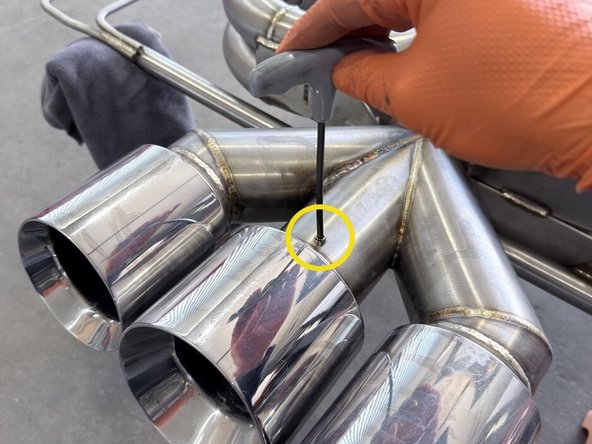
Insert first Allen head bolt into newly created top hole and into the silencer
-
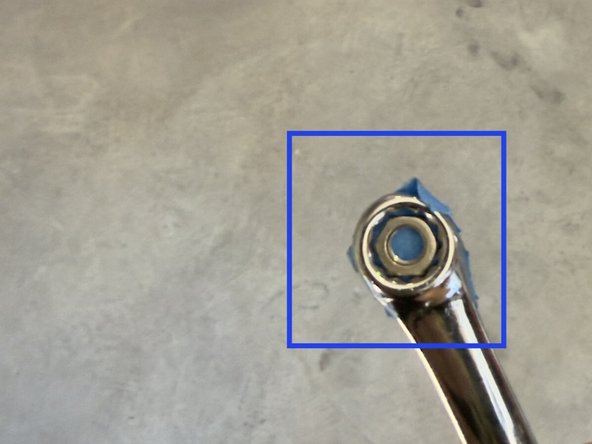
Setup your fastening nut as shown. A small piece of blue tape mounted to the backside of your wrench will help secure your nut while you tighten
-
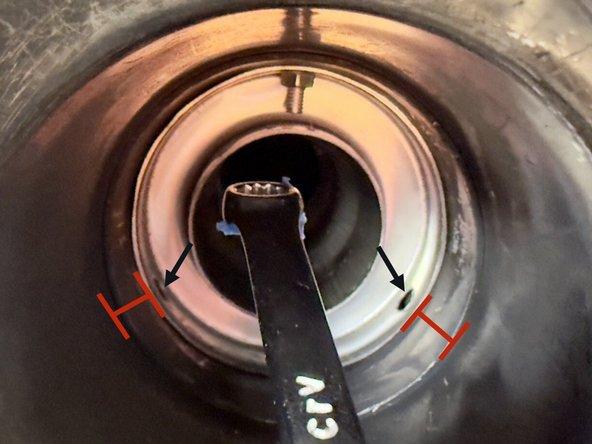
Guide wrench into exhaust tip and align with top Allen bolt. Tighten just enough for the nut to catch on the Allen bolt. Remove wrench and repeat with second and third Allen bolts.
-
Take care to make sure exhaust silencer is flush and spaced evenly
-
Now, tighten each Allen bolt until snug using open ended side of wrench. Snug is defined as until resistance is felt and then another 1/4 turn.
-
-
-
Reinstall muffler section by reversing removal steps shown earlier in this guide.
-
-
-
This completes the installation of your 27WON Exhaust Silencer
-