Introduction
In this installation guide we have provided step by step instructions to remove the OEM shift knob and install the 27WON Performance Leather Shift Knob into your 11th Gen Civic Si.
Advisory:
- Verify Parking Brake is on during installation as you may knock the vehicle out of gear
Tools
Parts
-
-
First and foremost; THANK YOU for becoming a part of the 27WON Family. We hope to REDEFINE your experience of the aftermarket with the highest level Parts, Customer Service, Packaging, & Support
-
The following instructions were written on 2022 Civic Si for 2022+ Civics
-
For 10th Gen Civic you can find the instructions here: PDF or Web
-
-
-
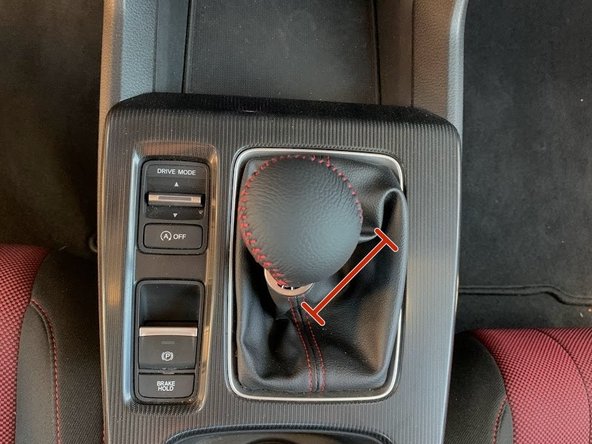
Locate the silver ring at the top of the shift boot as shown
-
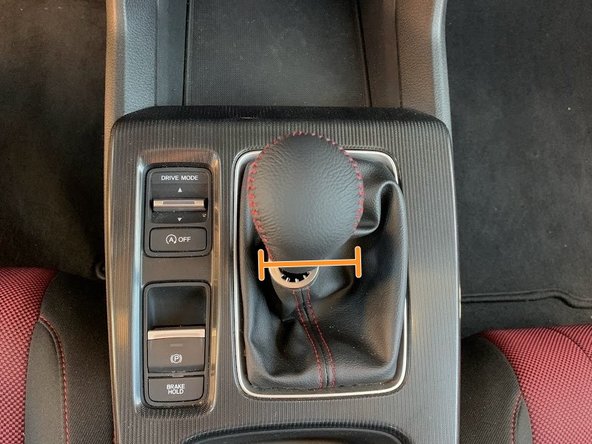
Press down on the silver ring to pop the silver ring and shift boot off the bottom of the shift knob
-
You will need to press firmly on the ring
-
DO NOT PULL FROM THE SHIFT BOOT! This may result in a tear
-
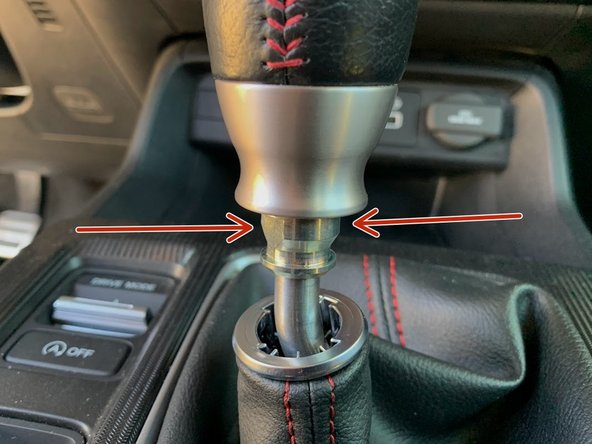
Push the shift boot down until you can see the entire OEM locking nut
-
-
-
Locate the two flat spots on the OEM locking nut
-
While holding the shift knob, use a 14mm wrench to loosen the locking nut
-
-
-
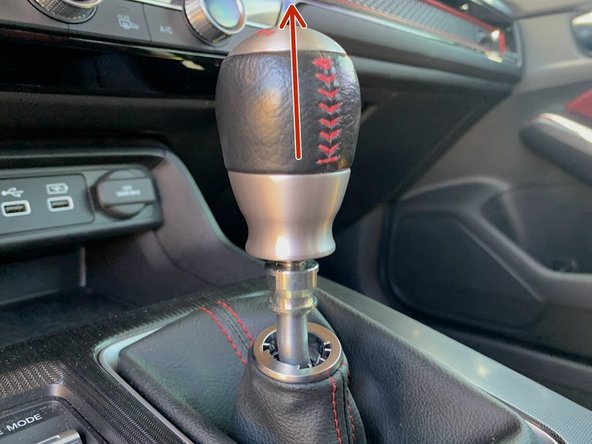
Unthread the OEM shift knob and set it aside
-
Thread the OEM locking nut down until it bottoms out
-
-
-
Place provided stainless steel washer on top of OEM locking nut. In this way it will sit in between the shift knob and the locking nut
-
Hand thread the 27WON shift knob onto the shifter rod until it bottoms out on the OEM locking nut and washer
-
Unthread the shift knob until orientated as shown
-
Shift knob orientation incorrectly set as shown
-
Shift knob orientation correctly set as shown
-
Locate the flat spots on the locking nut then use the 14mm wrench to tighten
-
While holding the shift knob in place use the wrench to tighten the OEM locking nut up against the shift knob
-
Tighten the locking nut until the shift knob cannot rotate by hand
-
-
-
Locate the silver ring on the shift boot as shown
-
Press the silver ring up onto the OEM locking nut
-
The silver ring should snap into place on the OEM locking nut as shown
-
-
-
Approximately every 6 months use a cleaner and conditioner intended for genuine leather to keep your 27WON shift knob looking great
-
-
-
This completes the installation of your 27WON Performance Leather Shift Knob
-
We hope you were impressed with your 27WON experience and love your new Shift Knob for years to come. Email us at sales@27won.com or call us at 571-271-0271 with any questions or concerns
-
Please Leave a review here: https://store.27won.com/honda-civic-leat...
-
Stay Connected with the latest developments with the 27WON Monthly Newsletter: https://store.27won.com/27won-newsletter...
-
See the latest Products and Tech Videos from 27WON with a quick Subscribe: https://www.youtube.com/channel/UCF7uI0N...
-
Share your experience using #27WON on Instagram and Facebook
-