Introduction
In this installation guide we have provided step by step instructions to remove the OEM turbo Bypass Valve and install the 27WON Bypass Valve on a 2018 Civic Si equipped with 27WON Turbo Inlet Pipe. Other 2016 - 2021 Civic 1.5T models will be similar. OE Turbo Inlet Pipe will be similar
Advisory:
- The exhaust piping, turbocharger, and cooling system will be hot after recent vehicle operation. Allow the vehicle to cool or use a fan to cool the exhaust components before working on the vehicle.
-
-
First and foremost; THANK YOU for becoming a part of the 27WON Family. We hope to REDEFINE your experience of the aftermarket with the highest level Parts, Customer Service, Packaging, & Support
-
-
-
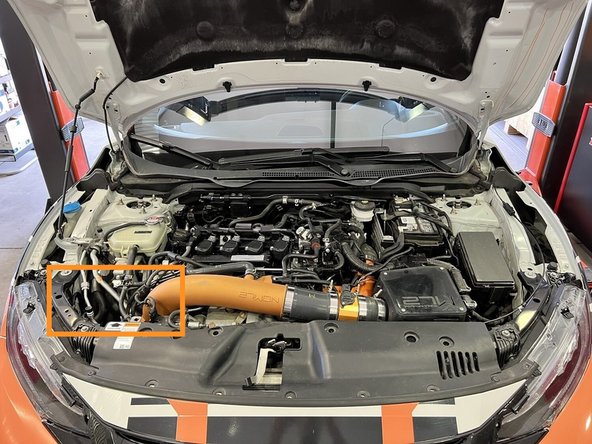
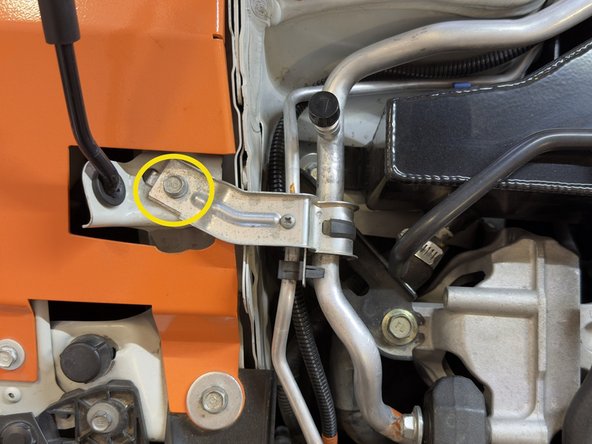
Open the hood to access the OEM Bypass Valve
-
Installation shown with 27WON Turbo Inlet Pipe (TIP). OE TIP will be similar
-
-
-
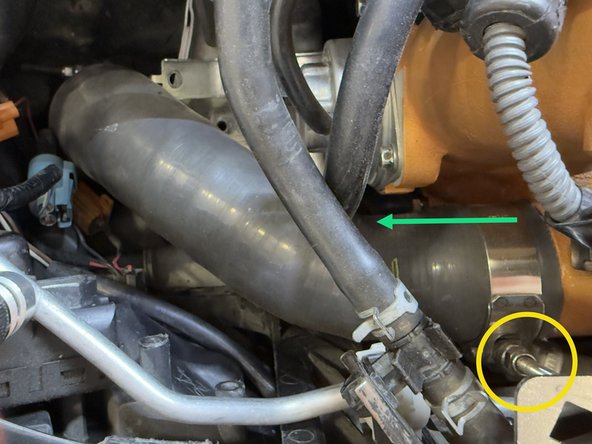
Removal of the Cold Side Boost Tube from the Turbo Inlet Pipe will free up space for Bypass Valve removal & reinstallation. Installation can be completed without removing this Boost Tube, but space will be tight
-
Using an 10mm socket and ratchet, loosen the bolt securing clamp around Boost Tube. 27WON Boost Tube shown. OEM will be similar
-
Slide Boost Tube off the Turbo Inlet Pipe leaving clamp loosely attached to the end
-
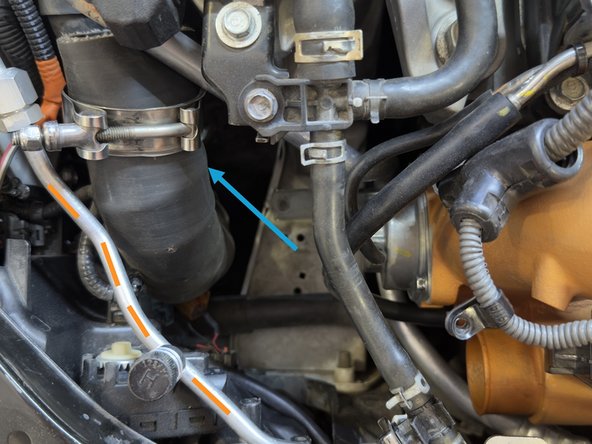
Tuck the Boost Tube up and out of the way as shown
-
The 27WON Boost Tube is reinforced so it will take a bit of muscle to tuck out of the way. OEM Boost Tubes are easier to maneuver (if equipped)
-
-
-
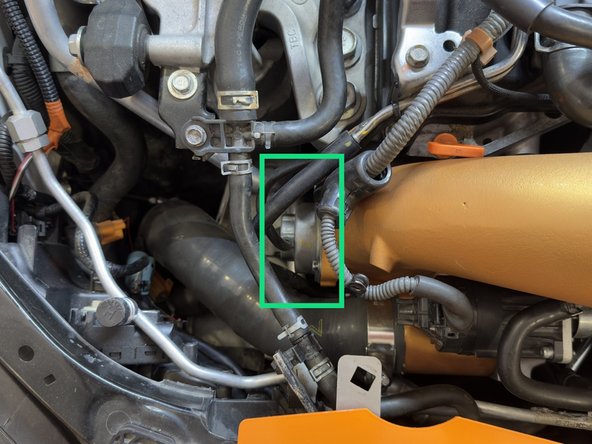
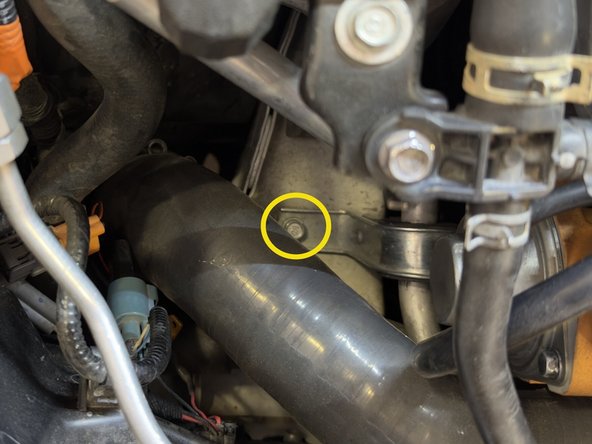
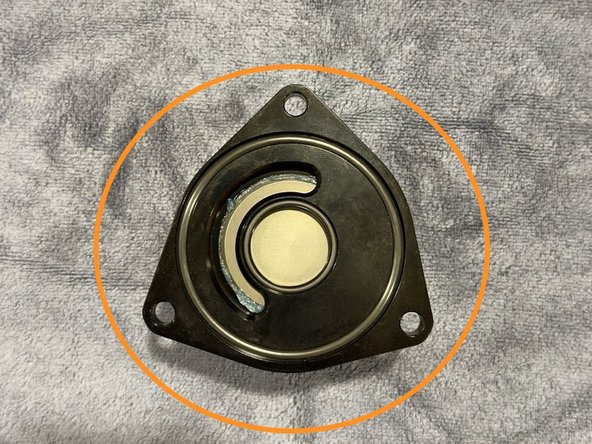
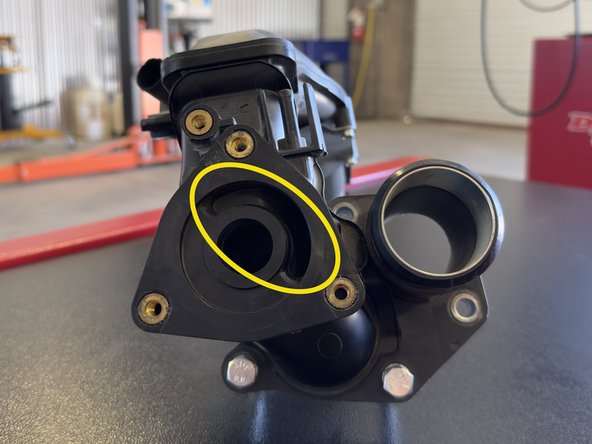
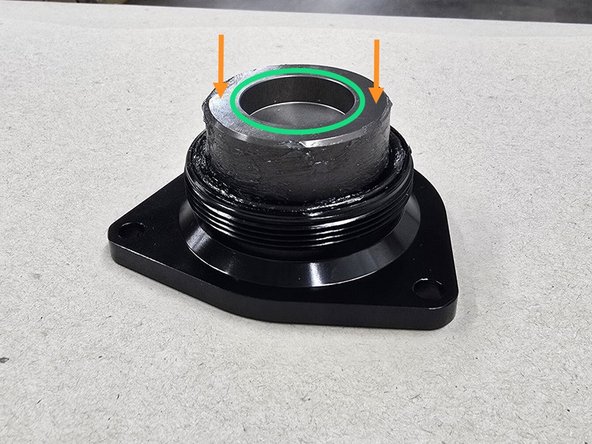
Locate OEM Bypass Valve
-
Installation shown here with 27WON Turbo Inlet Pipe. OEM and other Aftermarket Turbo Inlet Pipes steps will be similar
-
Optional: Loosen upper bracket for factory A/C line using 10mm socket and ratchet
-
Optional: Loosen lower bracket for factory A/C line using 10mm socket, 10" extension and ratchet
-
-
-
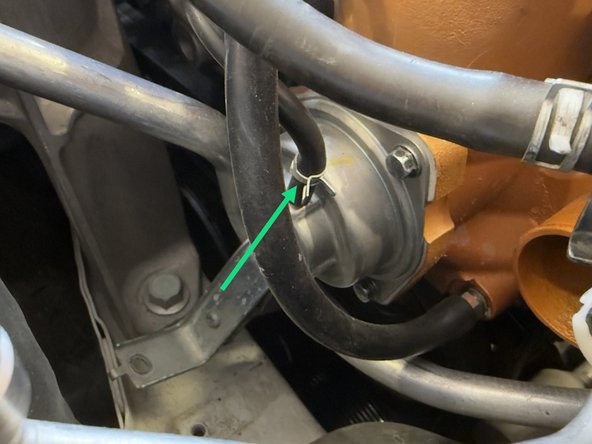
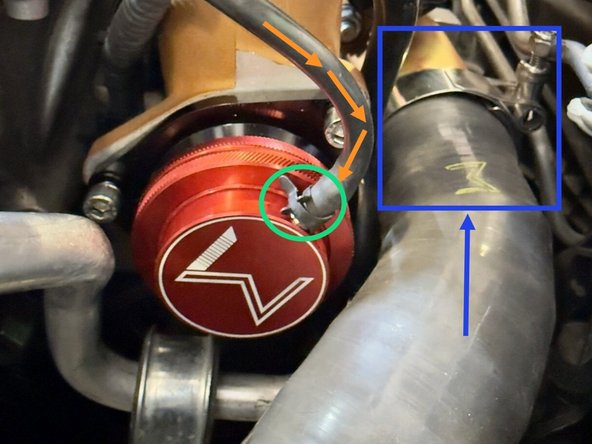
Using pliers, remove spring clamp from vacuum line leading to the BPV by sliding it up. Then disconnect the line from the OEM BPV by pulling up on it
-
Note the orientation of the BPV nipple. The 27WON BPV will need the nipple facing the same way once installed
-
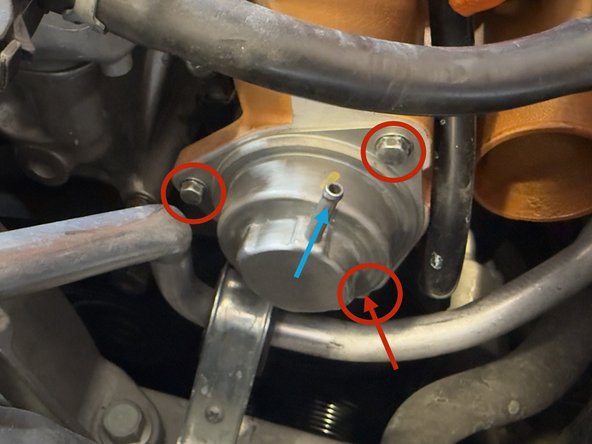
Use 1/4" ratchet, 3" extension and 8mm socket to remove the (3) bolts shown then remove OEM Bypass Valve
-
Note the proximity of the factory A/C line here. A 8mm ratcheting wrench may be used in place of the 8mm socket to reach these bolts
-
-
-
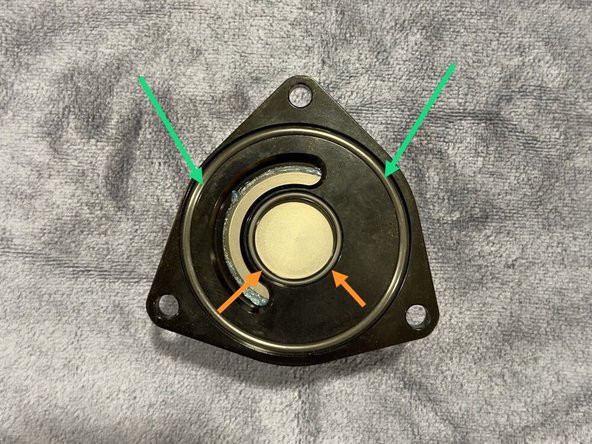
Top-side
-
Nipple
-
Bottom-side
-
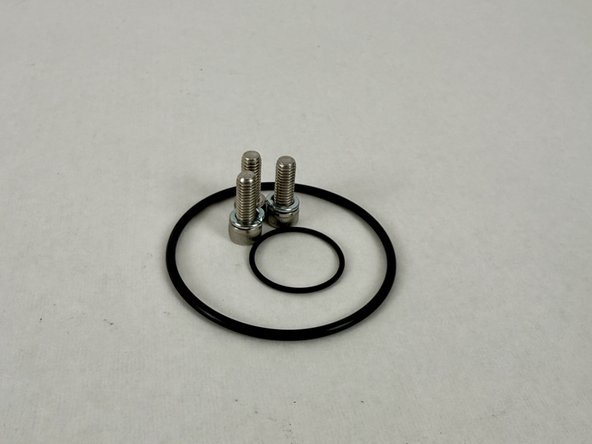
O-rings & Mounting Hardware
-
-
-
Apply a small amount of supplied lubricant or engine oil to both O-rings prior to installation
-
Insert large O-ring into groove on bottom-side and press down firmly to secure
-
Insert small O-ring into groove on bottom-side and press down firmly to secure
-
-
-
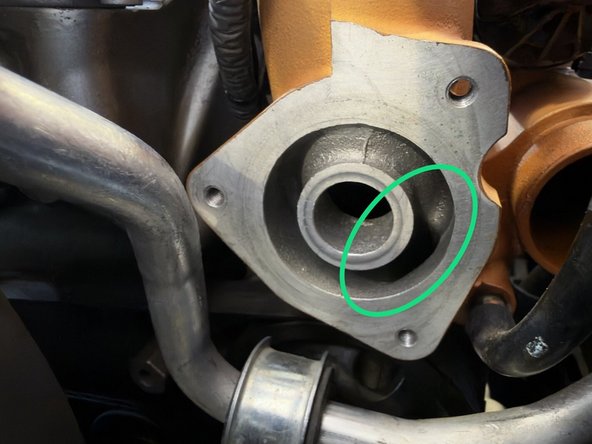
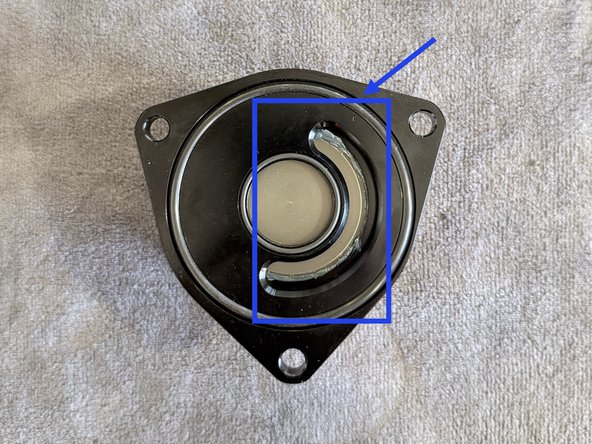
Note the location of the Bypass Valve openings on the face of the Turbo Inlet. These must align with the 27WON BPV during installation
-
27WON Turbo Inlet Pipe shown
-
OEM Turbo Inlet Pipe shown
-
27WON Bypass Valve opening
-
-
-
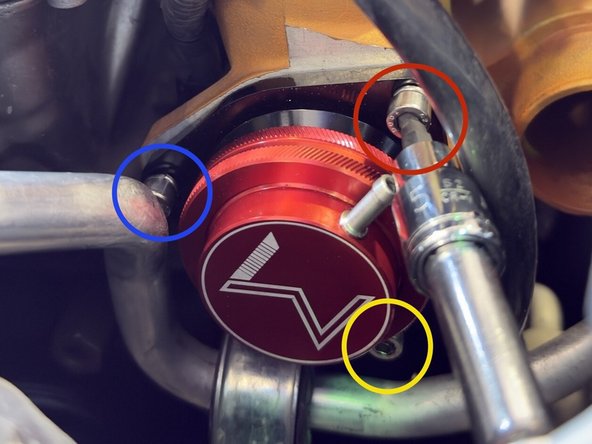
Using a 5mm ball end hex socket and 3” extension, guide the first fastener through the BPV mounting hole and thread onto Turbo Inlet Pipe. Leave finger tight
-
Move counterclockwise and thread 2nd fastener until finger tight
-
The last mounting hole is underneath. Using your fingers, hand thread this remaining fastener. Leave finger tight
-
Torque all three mounting bolts to 7-9 ft-lbs with ratchet
-
-
-
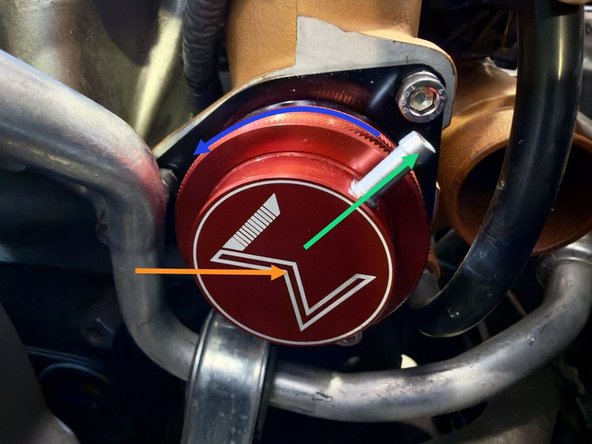
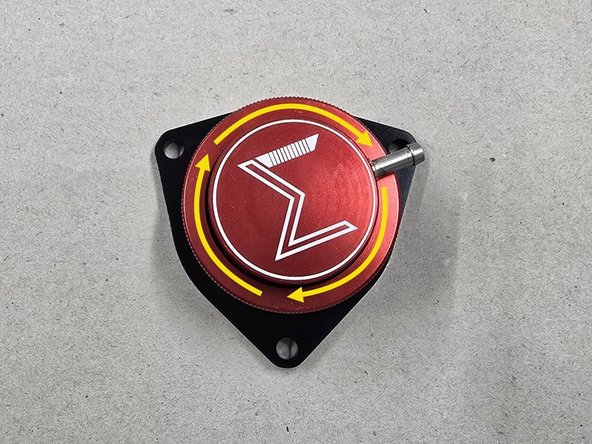
Confirm BPV fitting is pointed in direction as shown. Adjust if needed
-
To adjust nipple position loosen the knurled ring 1-2 turns
-
Once loose, rotate the top portion "W" until proper alignment is achieved. Hold top "W" portion in place while rotating knurled ring in opposite direction to tighten
-
-
-
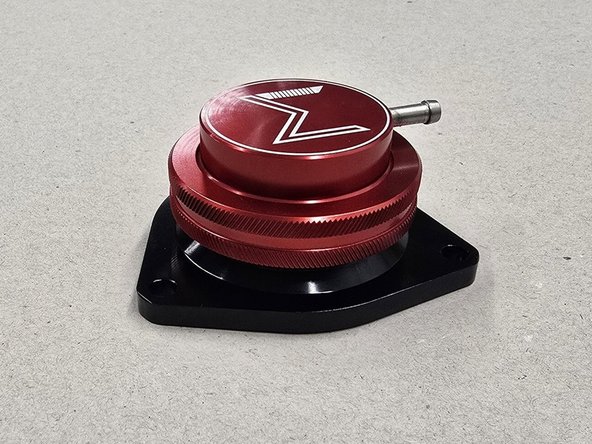
Re-attach vacuum line onto your new 27WON BPV
-
Using a set of pliers, slide down spring clamp to secure line to BPV
-
Re-attach Cold Side Boost Tube by first sliding it back onto the Turbo Inlet pipe opening, then tightening the 10mm nut
-
Now is the time to reinstall both the upper and lower A/C bracket bolts if you removed them earlier
-
-
-
The 27WON BPV is designed to provide OE like boost control and trouble free operation. Periodic service is necessary. If the valve is not serviced it may cease to perform correctly. This could shorten the life of your turbocharger. See instructions at the end of this guide for BPV service
-
BPV service should happen around every third oil change (12,000-15,000 miles). Spare lubrication is included for this
-
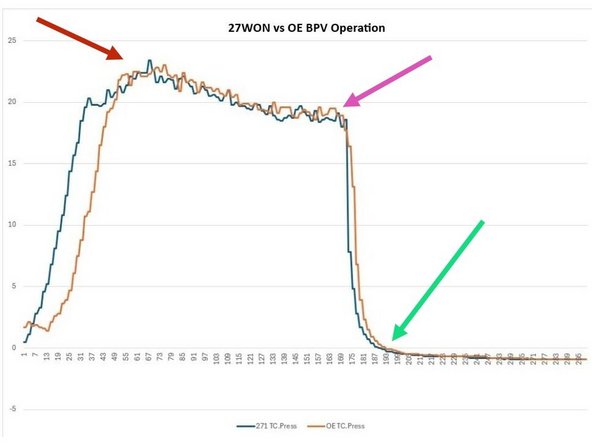
This chart shows good BPV operation for both the OE BPV and the 27WON BPV. Your boost control should look something like this
-
Notice there is not a spike in boost pressure as the turbocharger spools up
-
Notice there is not a spike in pressure when letting off throttle
-
Notice the time to go from purple arrow to green arrow. This is time to vent TC pressure. You see 27WON and OE are very similar
-
-
-
Improper BPV operation can trigger CEL
-
P2261: Turbocharger BPV Issue. This may trigger for reasons not related to BPV. Check boost control using the example on the previous step to make sure your BPV is working properly. OE BPV can throw this code when the rubber seal tears
-
A properly functioning BPV will make some noises when it vents. With an OE intake you might not hear these. With an open filter intake you'll hear all the noises. A "Psssst" or "whooshing" sound is normal
-
If your turbocharger is not able to vent quick enough (for various reasons) it can make an audible noise. This 'flutter' or 'choo choo' sound is from compressor surge. This can reduce the life of the turbocharger. If you hear this noise, check out your entire boost control system including BPV
-
Watch this video https://www.youtube.com/watch?v=2QaajARc... at around 15-17s there is an example of compressor surge from the throttle plate closing
-
-
-
This completes the installation of your 27WON BPV
-
We hope you were impressed with your 27WON experience and love your new shrouds for years to come. Email us at sales@27won.com or call us at 571-271-0271 with any questions or concerns
-
Please Leave a review here: https://store.27won.com/1-5t-10th-and-11...?
-
Share your experience using #27WON on Instagram and Facebook
-
Continue to the next steps for cleaning and lubrication of BPV
-
-
-
The 27WON BPV will require maintenance three oil changes or so depending your driving conditions
-
If you are constantly driving in dusty environments we recommending bumping your maintenance up about every other oil change
-
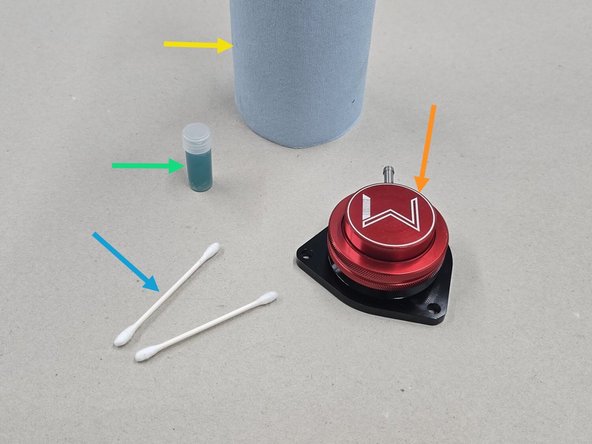
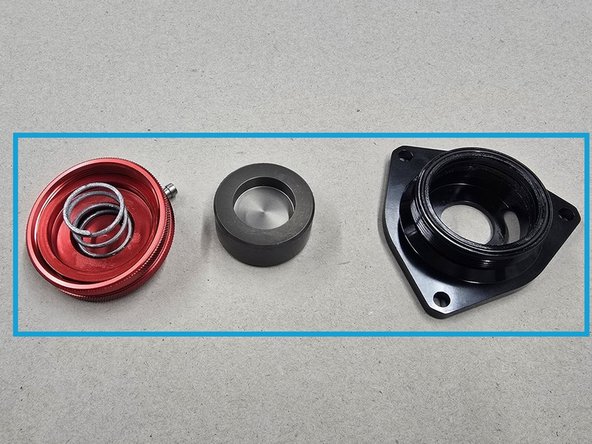
To perform maintenance properly, you will need the following items
-
27WON BPV removed from your vehicle
-
Clean paper towels / shop towels
-
Provided vial of high temp grease
-
A couple of Q-tips, or another instrument for applying the grease
-
-
-
11th Gen BPV shown here. 10th Gen BPV is similar
-
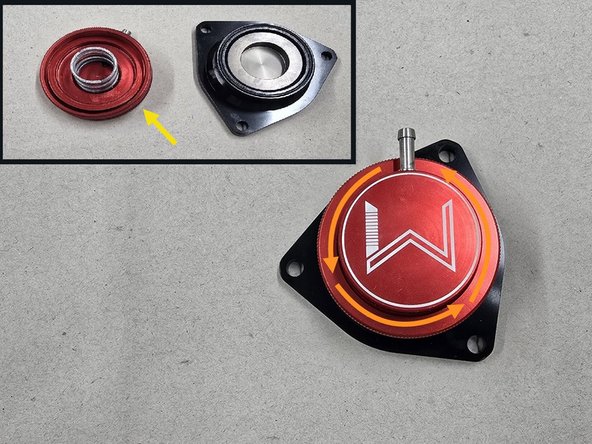
Twist the knurled ring on the BPV counter clockwise to loosen the BPV cap as shown
-
Remove the cap and set it to the side
-
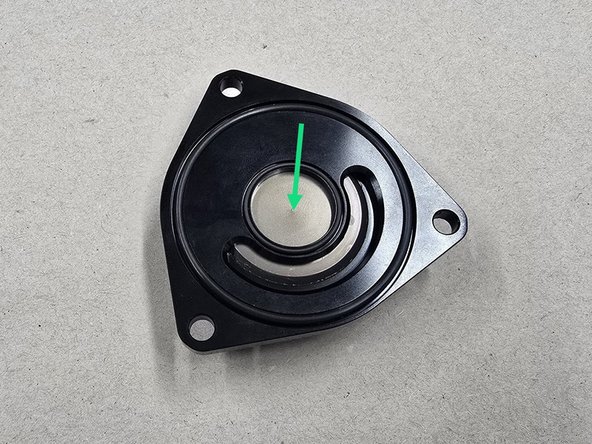
Flip the BPV over and press on the center of the internal piston as shown
-
It is important to press as close to the center as possible. If the piston is pressed off to one side it can become crooked and stuck inside of the BPV
-
With the BPV fully disassembled, wipe all of the parts clean with shop towels
-
You can use a cleaning solution here if your BPV is especially dirty, just make sure any solution is fully wiped out before you apply grease to the internal components
-
-
-
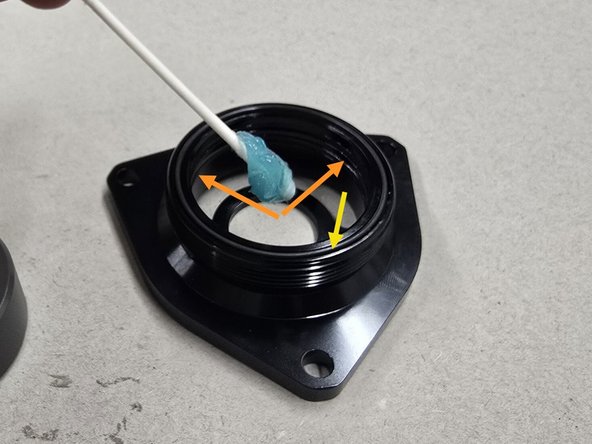
With the components all clean, generously apply the provided grease as shown:
-
Inside of BPV body
-
BPV upper o-ring
-
BPV piston
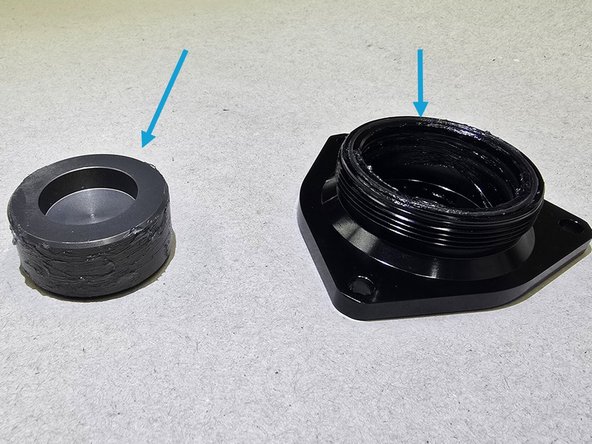
-
Properly lubed components should appear as shown
-
-
-
Insert the piston back into the BPV body in the orientation shown
-
Just as when it came out, the piston will need to pressed in as even as possible
-
Place the BPV cap back onto the body as shown
-
Ensure the BPV spring sits inside of the piston indent circled in green
-
Hand tighten the knurled ring onto the BPV body as shown
-
Use your finger to push the piston from the bottom a few times. The piston should return smoothly to the closed position
-
Reinstall your 27WON BPV!
-