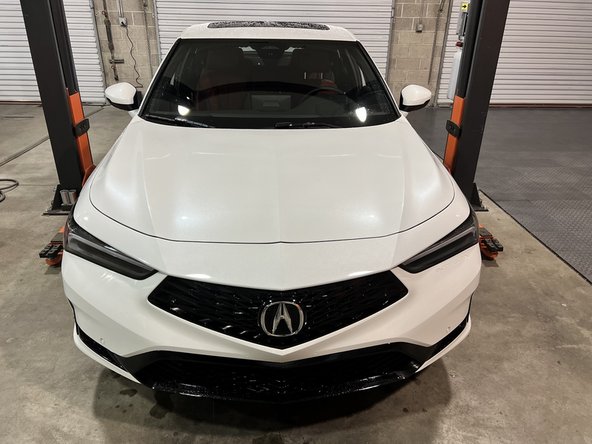
Introduction
In this installation guide, we have provided step-by-step instructions to install the 27WON Intake Snorkel
Advisory:
- Working under the vehicle requires a safe and sturdy location for the vehicle to sit on jackstands
- Install requires removing or trimming OE bumper ducting
- Integra install requires modification of a bumper bracket. Details are in this guide
- Integra install requires removal or relocation of one of the two horns
Tools
-
-
First and foremost; THANK YOU for becoming a part of the 27WON Family. We hope to REDEFINE your experience of the aftermarket with the highest level Parts, Customer Service, Packaging, & Support
-
This guide describes a process to install your new Intake Snorkel
-
This install requires removing or modifying the ducting between the bumper and radiator support
-
For Integra, this install requires modifying the bumper support bracket
-
-
-
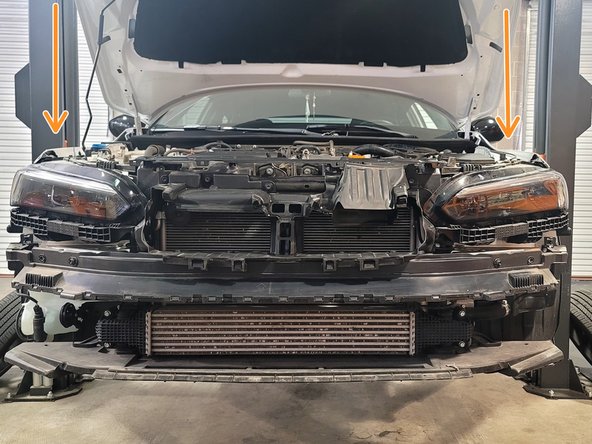
Follow manufacturer recommendations to jack up and support the front of vehicle
-
The passenger side wheel and tire were removed for clarity but are not required for bumper removal
-
-
-
Clear space around the front of the car and underneath to have ample space to remove the front bumper
-
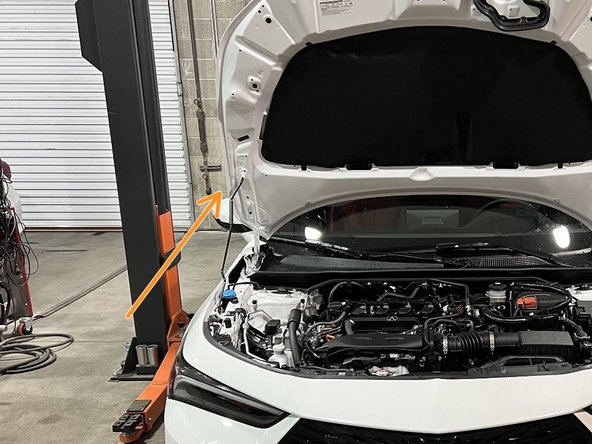
Pop open the hood and support with hood prop in fully up position
-
-
-
FL5 Type R is similar to Integra. Integra shown
-
If you have another Honda Civic, skip to the next step
-
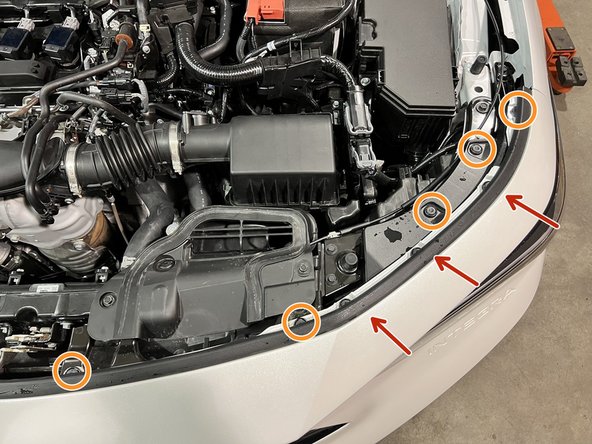
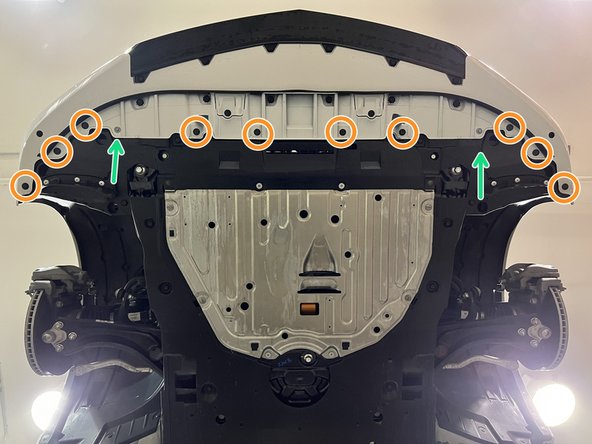
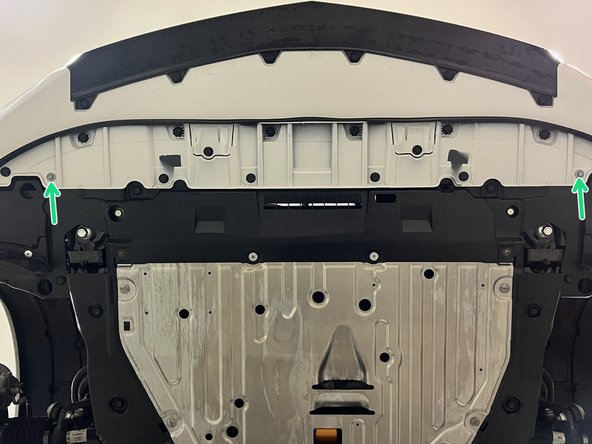
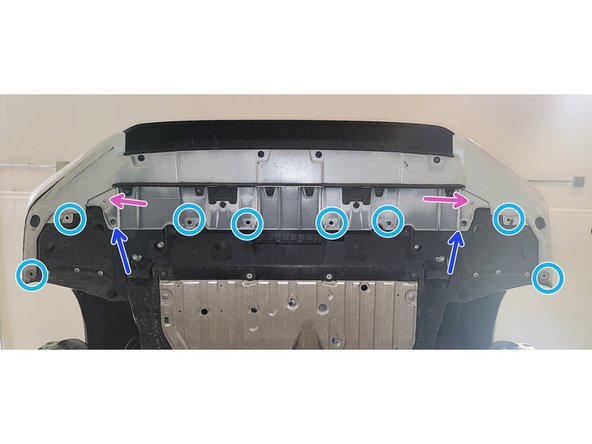
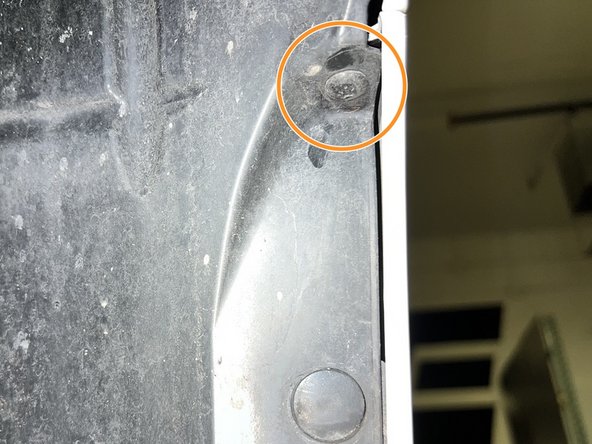
Use a large flathead screwdriver or prying tool to remove the ten (10) push-clips on the top of the bumper
-
These push clips are not removed
-
The 2nd and 3rd images give you a better view of the clips
-
-
-
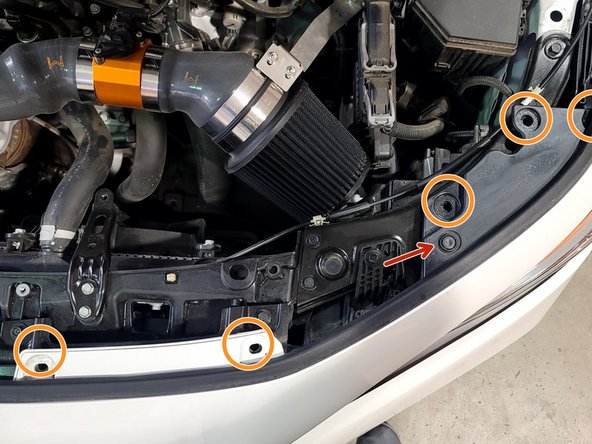
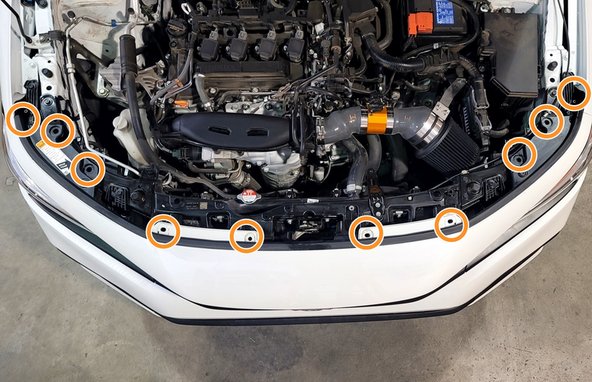
If you have a Acura Integra or CTR, skip to the next step
-
Use a large flathead screwdriver or prying tool to remove the ten (10) push-clips on the top of the bumper
-
These push clips are not removed
-
The 2nd and 3rd images give you a better view of the clips
-
Other Civic trims not shown but process will be similar
-
-
-
The passenger side wheel and tire were removed for clarity but not required for bumper removal. Passenger side shown, Driver side similar
-
If you have a Honda Civic, skip to the next step
-
Integra
-
Remove the dome head screw with Philips screwdriver
-
Remove the flat head screw with Philips screwdriver
-
Remove two (2) push clips with flat head screw driver
-
Repeat above for other fender well
-
-
-
If you have an Acura Intregra, skip to the next step
-
FL5 Type R
-
Remove one push clip with flat head screw driver
-
Remove three (3) flat head screws with Philips screwdriver
-
Civic except Type R
-
Remove two (2) flat head screws with Philips screwdriver
-
Remove one push clip with flat head screw driver
-
Repeat above for other fender well
-
-
-
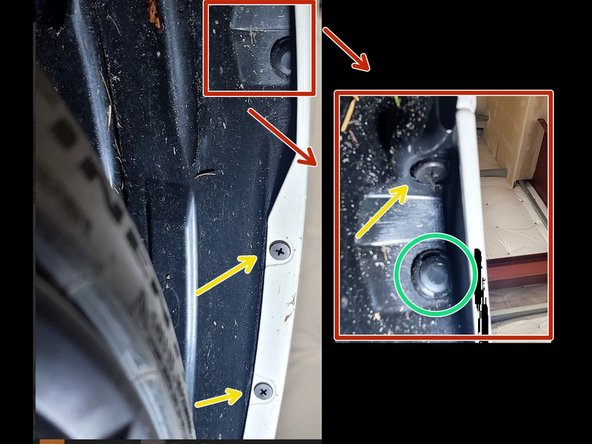
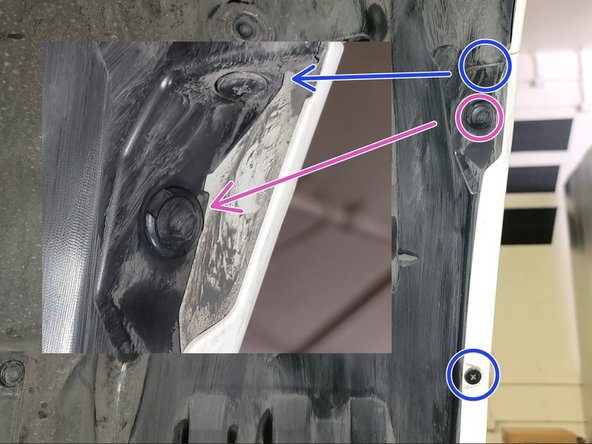
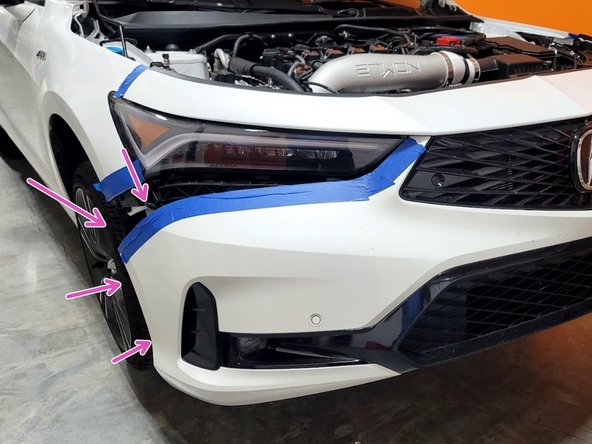
Integra
-
Use a large flathead screwdriver or prying tool to remove the ten (10) push-clips on the bottom of the bumper
-
Use 10mm socket and ratchet to remove two (2) M6 bolts
-
Civic except Type R
-
Use a large flathead screwdriver or prying tool to remove the eight(8) push-clips on the bottom of the bumper
-
Use 10mm socket and ratchet to remove two (2) M6 bolts
-
Use Phillips head screwdriver to remove two (2) screws
-
FL5 Type R. Remove six(6) M6 bolts with 10mm socket. Remove twelve(12) push pins with prying tool. Remove one(1) screw with Phillips screwdriver
-
-
-
Integra shown. Civic Similar
-
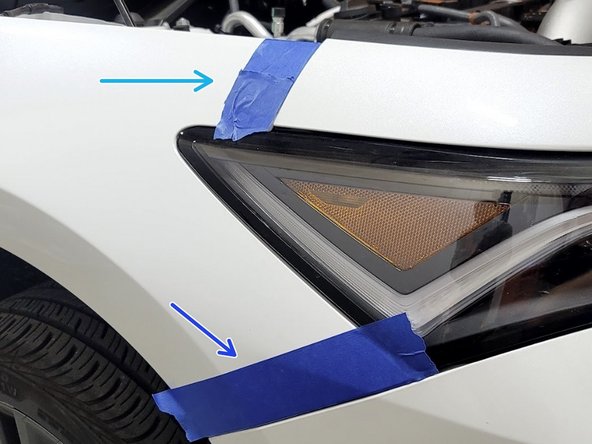
Place a strip of blue Painters tape on the each fender as shown
-
Place a strip of blue Painters tape on the each fender as shown
-
Place a strip of blue Painters tape under each headlight as shown to help prevent any paint scratches from bumper removal
-
-
-
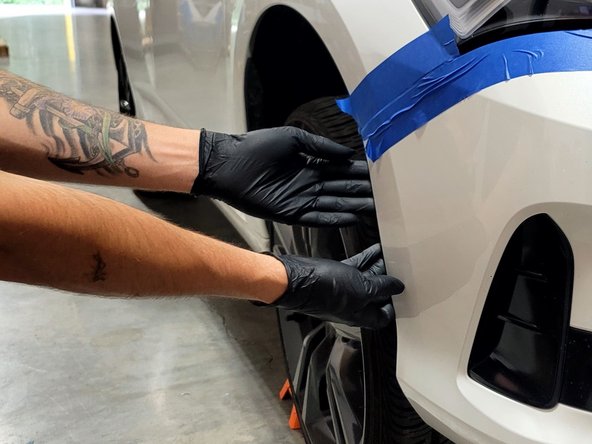
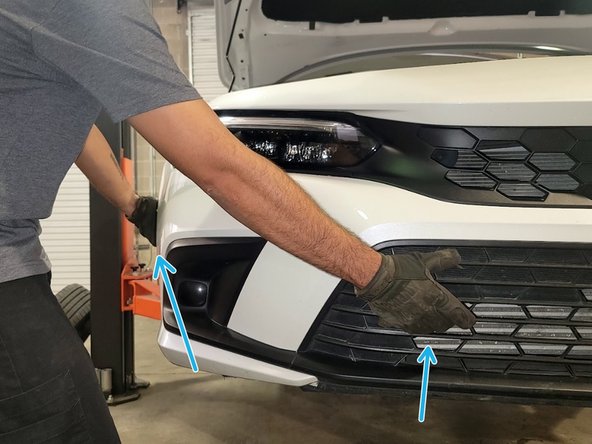
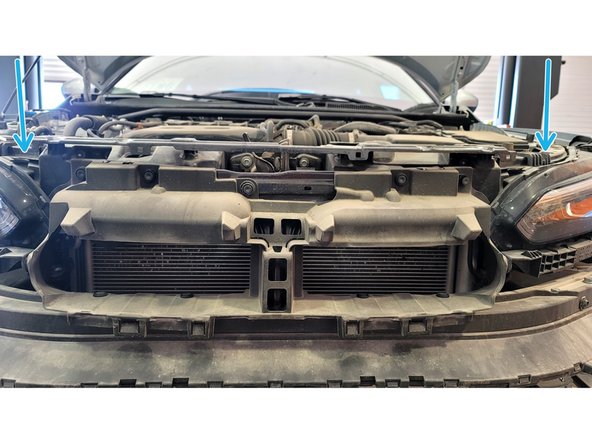
Integra shown. Civic Similar
-
Use a forceful but controlled motion with both hands to pop the bumper out of the three fender clips as shown
-
Fender Clips
-
The bumper will take some force to remove the first time it comes off. This is ok. You will hear a lot of noise as the tabs pop loose. The bumper is not breaking, just separating. The key here will be to use one swift forceful motion as opposed to a bunch of small tugs
-
Do not fully pull the bumper off the car as there is some wiring to unclip later
-
-
-
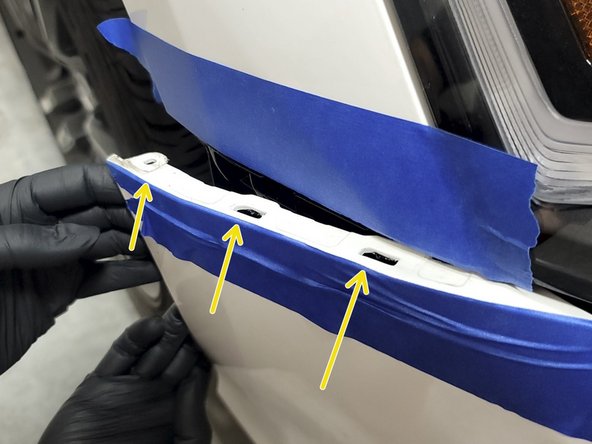
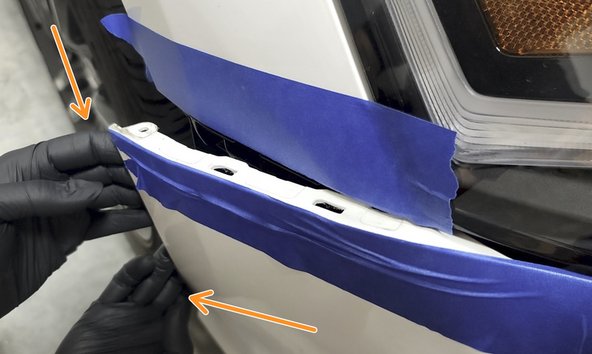
Do not fully pull the bumper off the car as there is some wiring to unclip later
-
INTEGRA: Use a forceful but controlled motion with both hands to pop the bumper out of the four headlight clips as shown
-
Headlight Clips
-
CIVIC: Use a forceful but controlled rocking motion with both hands to pull the bumper out of the five headlight clips. This takes some force the first time
-
Do the same for the Driver side of bumper
-
Bumper could drop to the ground. Have friend hold the passenger side
-
-
-
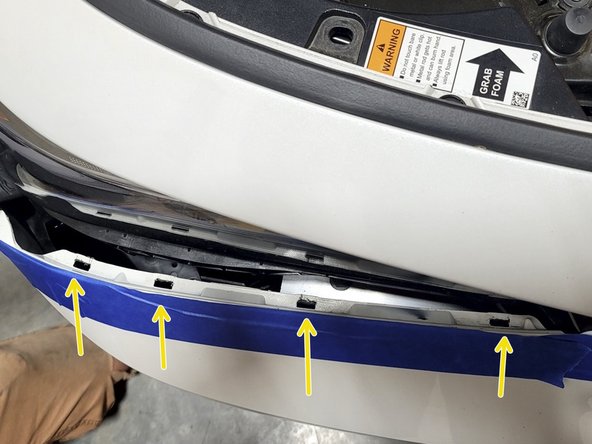
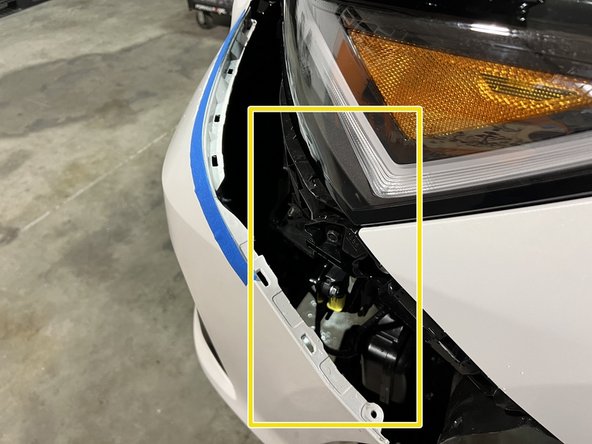
This step is for cars like the Integra that have Honda Sensing Suite and cars equipped with Fog Lights. Skip for other cars
-
Use a Flashlight to see behind the driver side bumper that is loosely hanging off the car
-
Use your hand to unclip the parking sensor pig tail
-
Use your hand to unclip the fog light pig tail
-
Repeat above for Passenger side
-
-
-
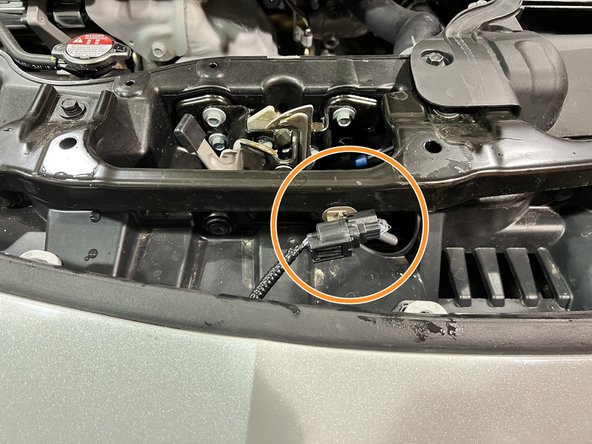
This step is for cars like the Integra that have Honda Sensing Suite. Skip for other cars
-
Use your hand to unclip the forward proximity sensor pig tail
-
-
-
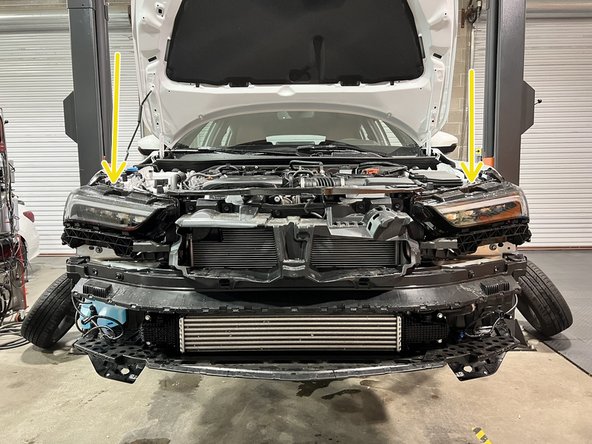
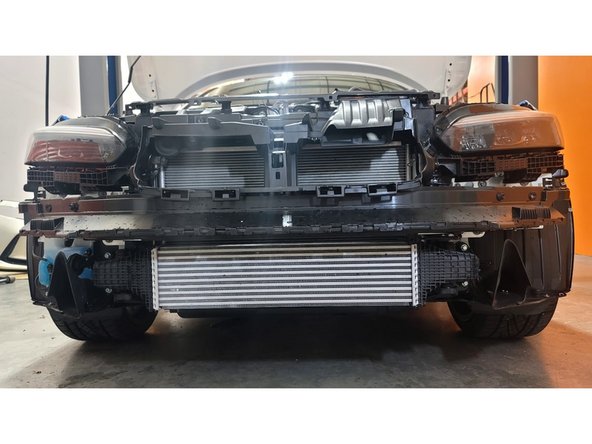
Grab bumper with both hands near hood latch and walk it off the car
-
Set aside bumper in safe place
-
Use caution not to scratch paint on bumper
-
Integra
-
Civic Si
-
Civic EX
-
-
-
FL5 Type R
-
-
-
Skip this step for FL5 Type R install
-
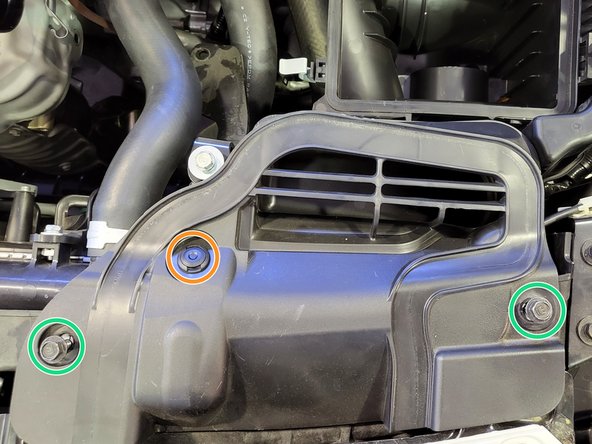
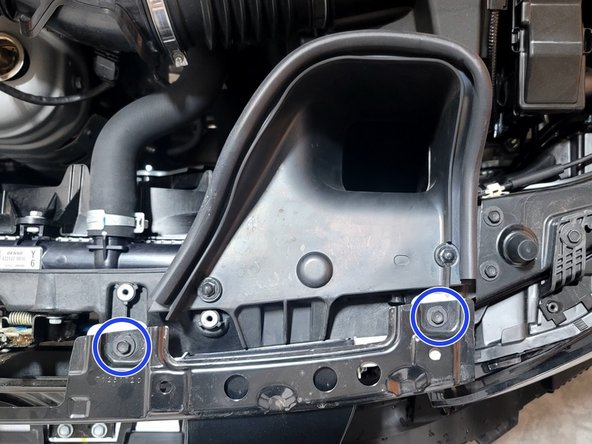
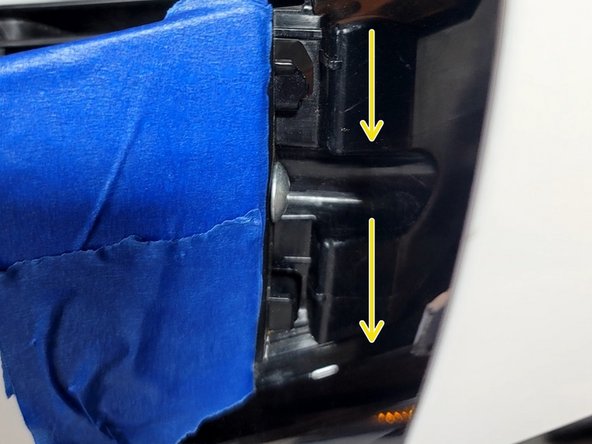
Use a 3/8" drive ratchet and a 10mm socket to remove two (2) bolts that holds the intake duct
-
Use a panel clip tool or flat head screw driver to remove one (1) clip
-
Plastic clip breaks very easily. Use Caution
-
-
-
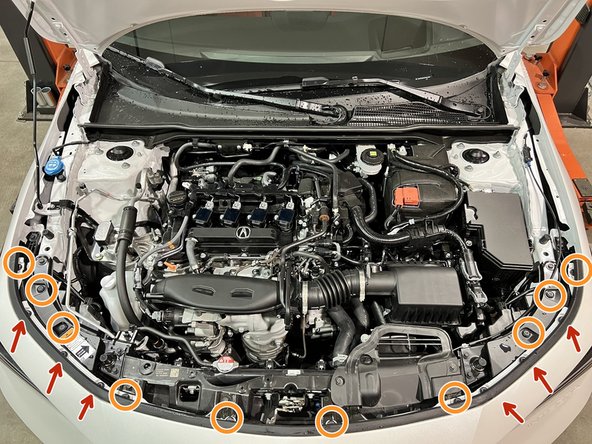
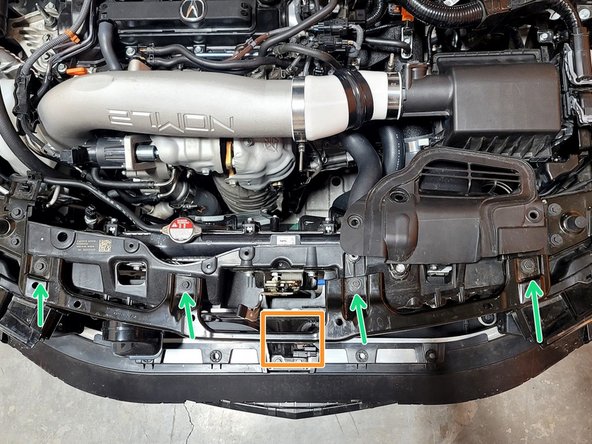
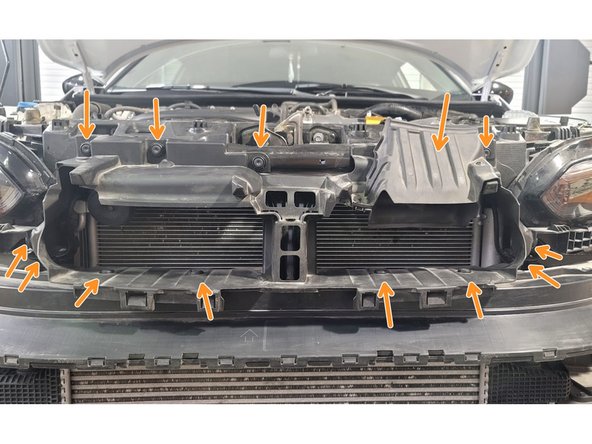
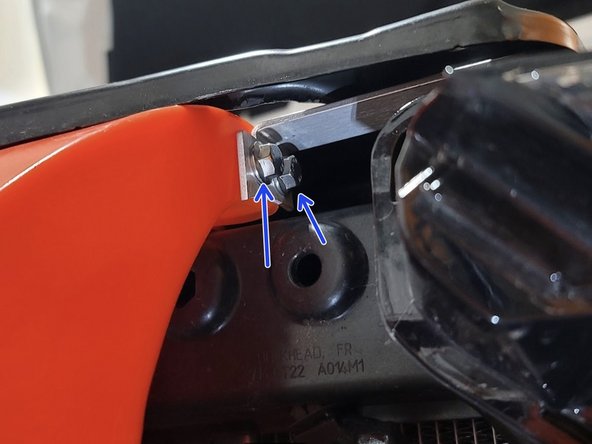
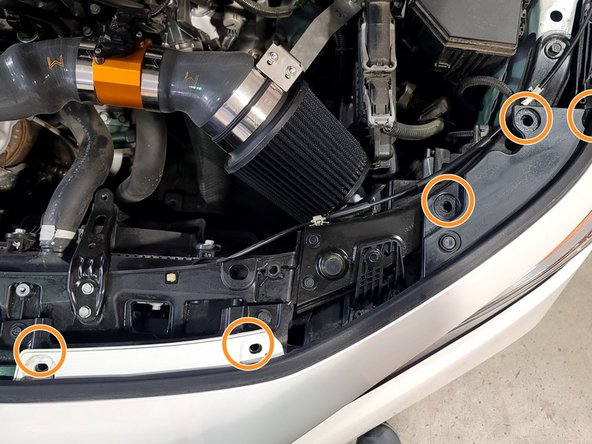
Integra shown. Civic Similar
-
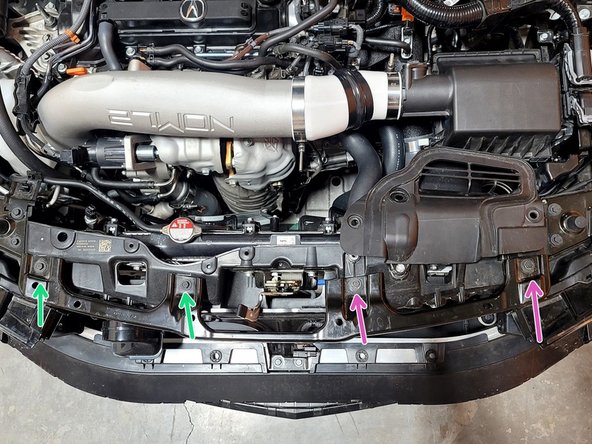
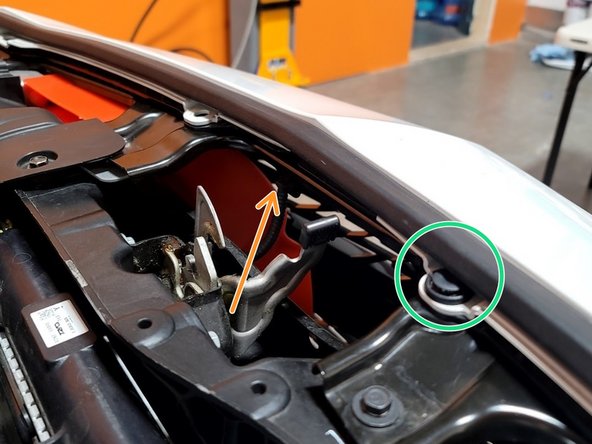
Use a 3/8" drive ratchet and a 10mm socket to remove four (4) bolts that hold the bracket to the radiator mount
-
INTEGRA ONLY: With your fingers, pinch and remove the plug attached to the bracket
-
-
-
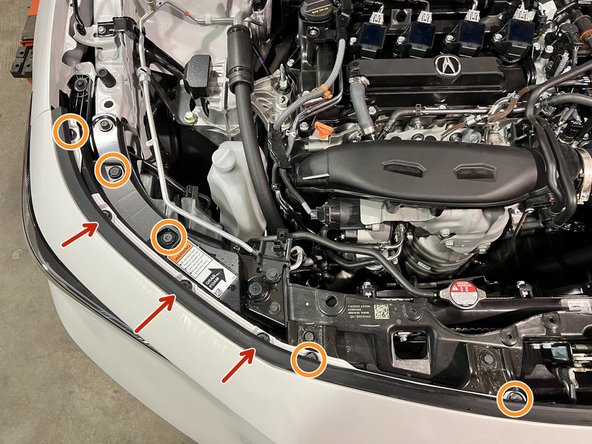
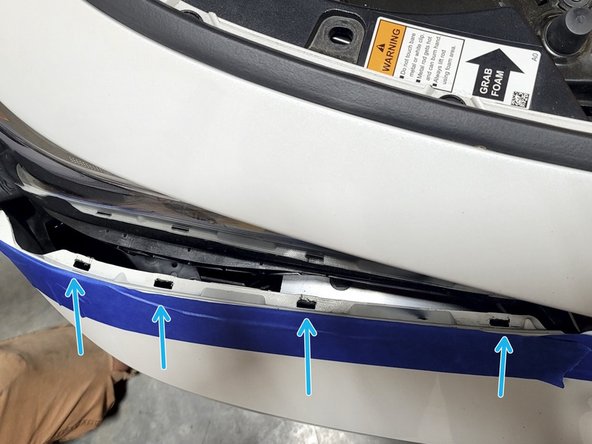
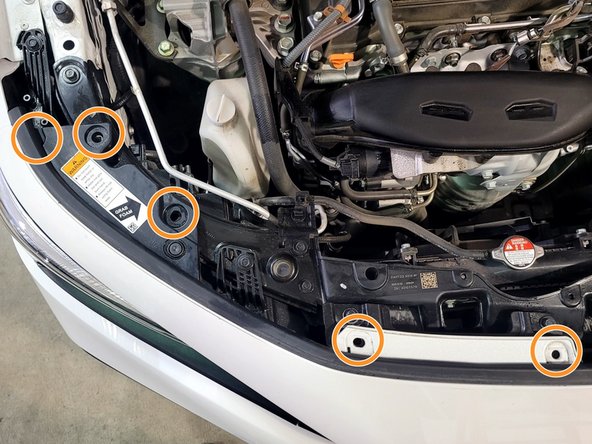
Civic Si shown. Other cars similar
-
Remove the thirteen (13) plastic push clips with a flat head screwdriver or pry tool holding ducting in place
-
-
-
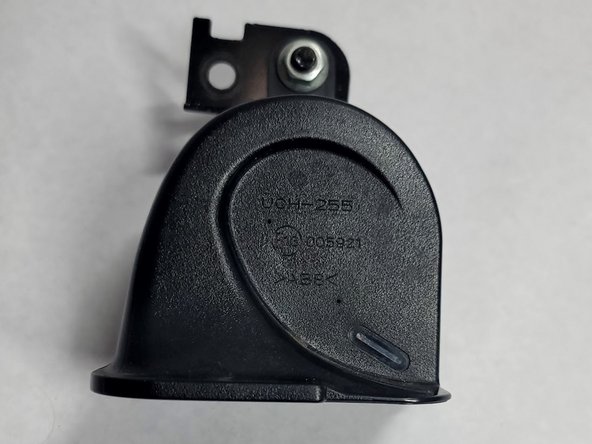
If you have a Honda Civic, skip to the next step
-
One of the two horns is in the way of the Snorkel
-
Remove or Relocate the Driver side horn
-
The other horn will still work
-
-
-
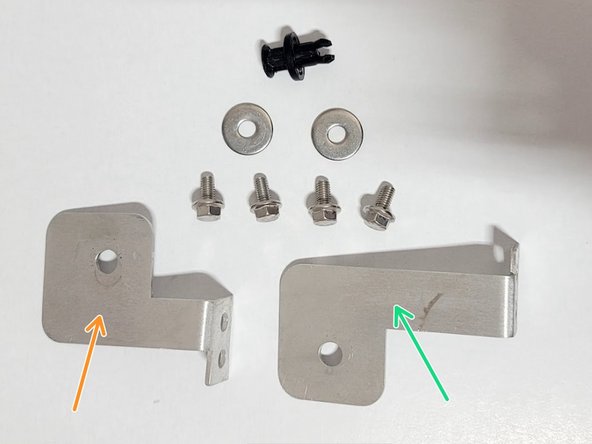
Attach provided left bracket to Snorkel as shown using provided M6 hardware. Let bracket wiggle a bit
-
Attach provided right bracket to Snorkel as shown using provided M6 hardware. Let bracket wiggle a bit
-
-
-
You can either leave the ducting off or trim it
-
If you will leave the ducting off the car, skip to next step
-
Place Snorkel on vehicle as shown without OEM ducting installed to assess clearance needed
-
Trim OEM ducting around the perimeter of where the 27WON Snorkel mounts as shown using a razor blade or similar sharp trimming tool
-
CIVIC EX TRIM: 6 ducting mount points will be lost as shown
-
CIVIC Si TRIM: 6 ducting mount points will be lost as shown
-
INTEGRA and CTR: Similar but not shown
-
-
-
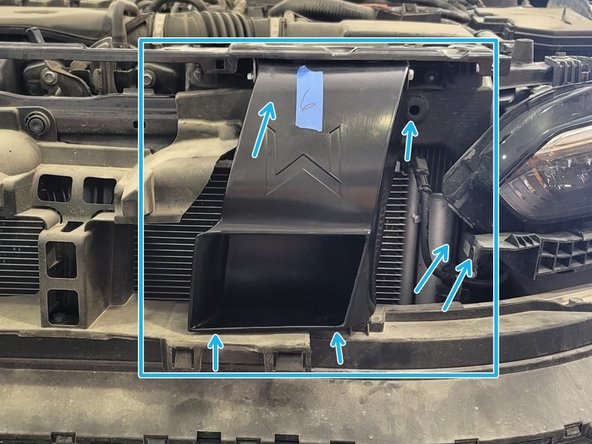
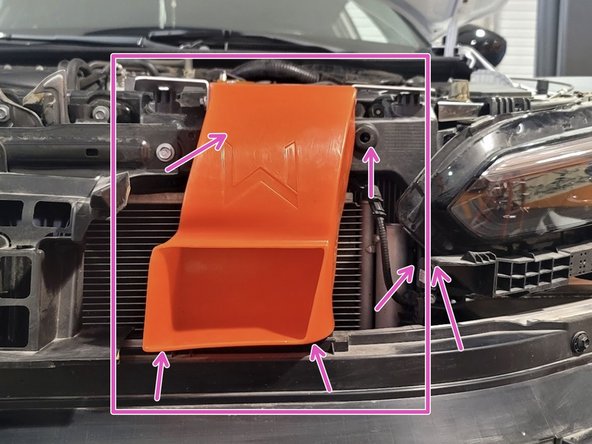
Place Snorkel in car as shown
-
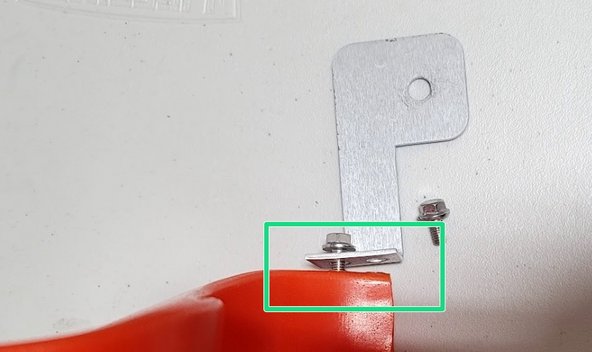
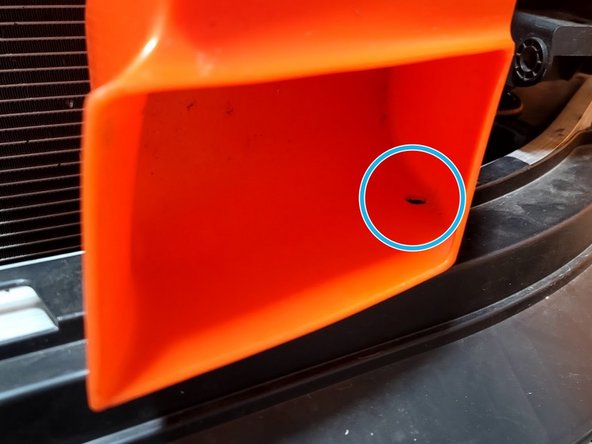
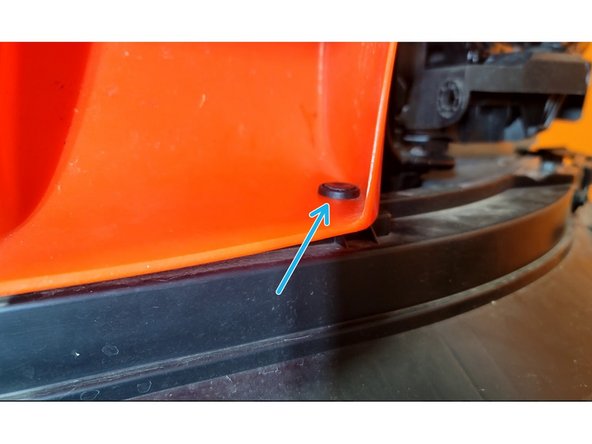
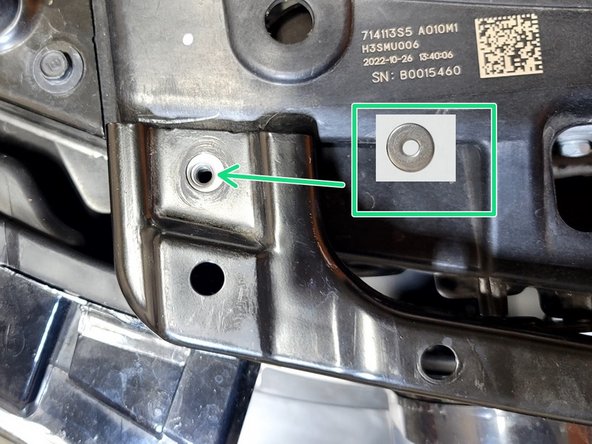
Insert provided plastic clip into bumper as shown
-
-
-
If you have a Honda Civic, skip to the next step
-
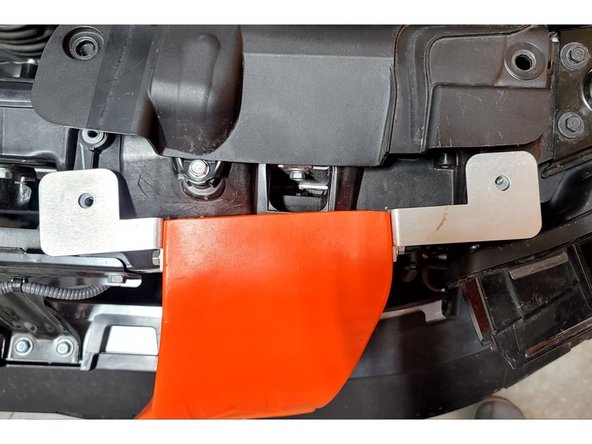
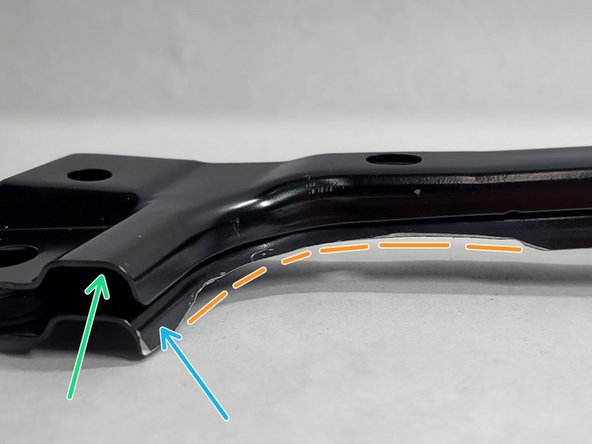
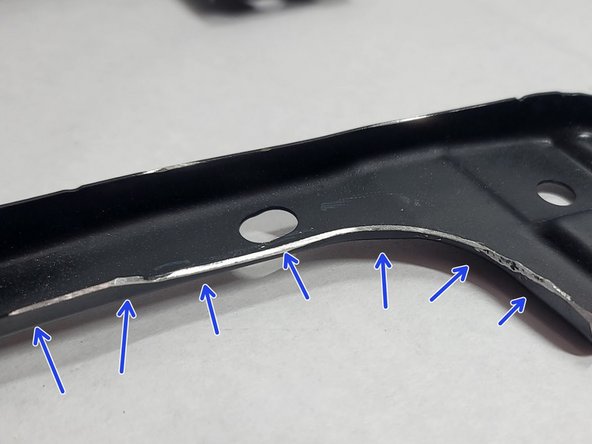
The bumper support bracket removed in Step 17 needs to be trimmed a bit
-
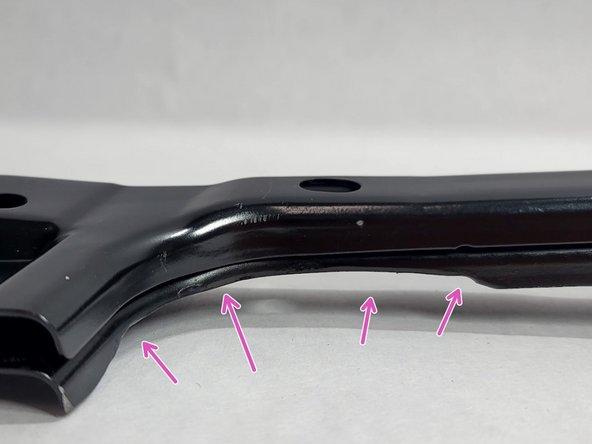
OE Bracket. Not modified
-
OE Bracket. Modified
-
Roughly shows removed material
-
Set Bumper Support Bracket in place. Notice the interference in the location of the Snorkel
-
Trim the metal bumper support bracket with a Dremel or similar tool to achieve desired clearance
-
Use black spray paint to cover exposed metal. Let paint dry
-
-
-
Place the two (2) provided spacers as shown between bumper bracket and radiator support on the left two mount points
-
Using previous wear marks, align bracket to line up with mounting hole
-
Carefully place bumper bracket in place
-
Secure bumper bracket in the left two spots with OE hardware using 10mm socket and ratchet
-
Install but leave the two bolts at Snorkel loose
-
Pop proximity sensor plug back in bumper bracket if applicable
-
-
-
FL5 Type R skip to next step
-
Inlet and Snorkel should not interfere but they can touch
-
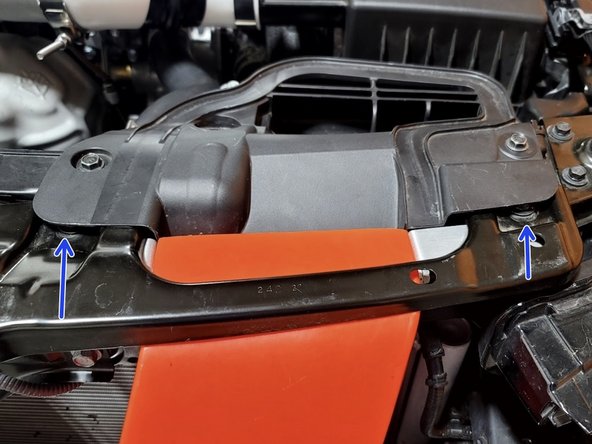
Secure intake inlet with OE M6 bolts using 10mm socket and ratchet
-
Reinstall OE Inlet Clip
-
Adjust Snorkel Brackets for optimal space between inlet and snorkel
-
Snorkel will move up/down and in/out if hardware is still loose
-
Snorkel should sit as low as possible
-
Secure Snorkel Bracket Hardware hand tight with 10mm wrench or socket. Tighten all three (3) bolts on each bracket. This will secure the snorkel and the bumper bracket
-
-
-
Civic and Integra skip to next step
-
Secure Snorkel Bracket Hardware hand tight with 10mm wrench or socket. Tighten all three (3) bolts on each bracket. This will secure the snorkel and the bumper bracket
-
-
-
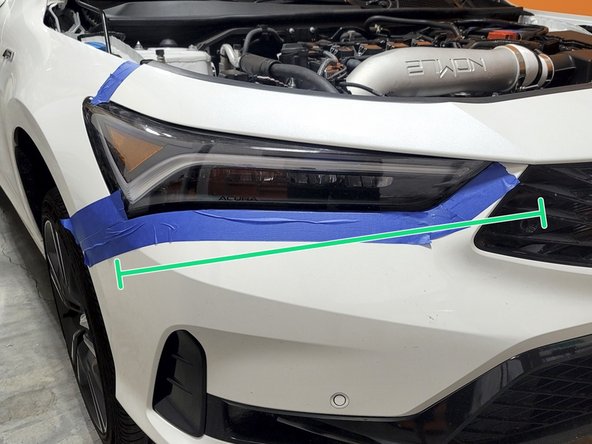
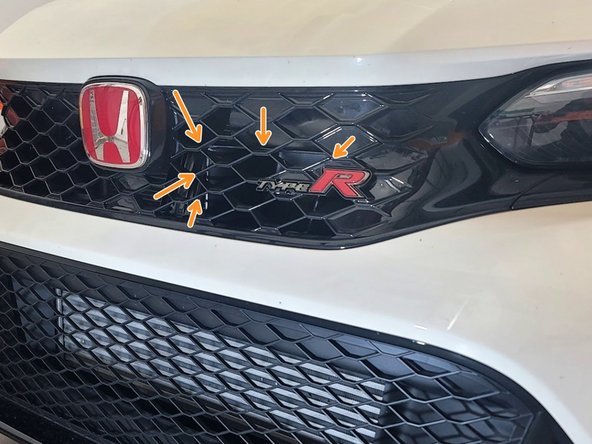
You are about to install the front bumper. During this process it's a good idea to make sure there is proper clearance between the grille and the Snorkel
-
Civic Si shown. FL5 Type R shown. Other models typically have more clearance between grille and Snorkel
-
Snorkel can be touching the grille but should not be deforming it. If it seems like there is a lot of pressure on the grille then revisit Step 24 and 25 and make sure the Snorkel sits as close to the intake as possible
-
Alternatively, you can mark the Snorkel at the interference location and easily remove a little material from the Snorkel with a Dremel or similar to improve fitment
-
-
-
Integra process shown. Other cars similar. Refer to removal instructions as installation is the reverse of removal
-
Make sure fog light plugs are not hanging below skid plate
-
Move bumper almost in place and connect proximity sensor
-
Continue carefully moving bumper into position until it's nearly lined up with fender on each side
-
Bumper can get caught on headlights
-
Install one push clip to help secure bumper while plugging in fog lights and parking sensors on each side
-
Reach between bumper and car to plugs. You may need to lightly pull bumper at corners to create space
-
-
-
Note locking tabs at upper fenders. Slide each end of bumper into upper fender tabs
-
Push four clips under each headlight into place
-
Push three clips at each fender into place
-
-
-
Integra
-
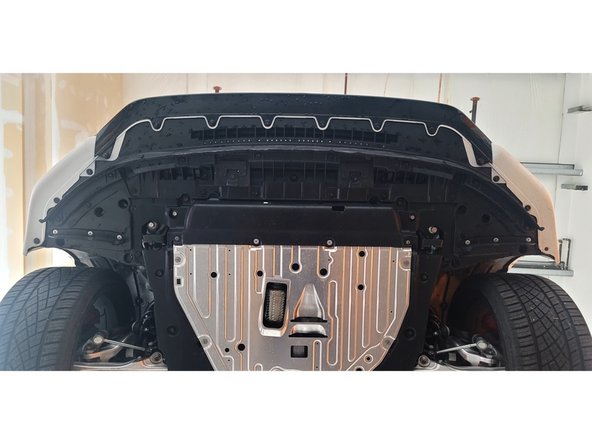
Reinstall the ten (10) push-clips on the bottom of the bumper
-
Use 10mm socket and ratchet to reinstall two (2) M6 bolts
-
Civic except Type R
-
Reinstall the eight(8) push-clips on the bottom of the bumper
-
Use 10mm socket and ratchet to reinstall two (2) M6 bolts
-
Use Phillips head screwdriver to reinstall two (2) screws
-
FL5 Type R see step 8
-
-
-
The passenger side wheel and tire were removed for clarity but not required for bumper removal
-
Reinstall the dome head screw with Philips screwdriver
-
Reinstall the flat head screw with Philips screwdriver
-
Reinstall two (2) push clips with flat head screw driver
-
Civic except Type R
-
Reinstall two (2) flat head screws with Philips screwdriver
-
Reinstall one push clip with flat head screw driver
-
FL5 Type R see step 7
-
-
-
Civic shown, refer to Step 4 for Integra and FL5 Type R
-
Reinstall the ten (10) push-clips on the top of the bumper
-
The 2nd and 3rd images give you a better view of the clips
-
Other Civic trims not shown but process will be similar
-
-
-
This completes the installation of your 27WON Intake Snorkel
-
We hope you were impressed with your 27WON experience and love your new Snorkel for years to come. Email us at sales@27won.com or call us at 571-271-0271 with any questions or concerns
-
Please Leave a review here: https://store.27won.com/honda-civic-acur...
-
Share your experience using #27WON on Instagram and Facebook
-