Introduction
In this installation guide, we have provided step-by-step instructions to install the 27WON Performance Coolant Tank.
Advisory:
- Coolant is very hot after vehicle operation. Allow the engine to fully cool down before beginning work
- Coolant tank designed to fit both 2.0L naturally aspirated engines on the 10th generation Honda Civic. Instructions for other applications are separate
- Fitment on RHD vehicles not yet confirmed
Tools
-
-
First and foremost; THANK YOU for becoming a part of the 27WON Family. We hope to REDEFINE your experience of the aftermarket with the highest level Parts, Customer Service, Packaging, & Support
-
These instructions were written for a 2016 Honda Civic LX. Other applications will be similar
-
These instructions are for 10th Generation Civics with 2.0L naturally aspirated engines. Instructions for 11th Gen Type R and Type S are separate
-
The 27WON coolant tank does not include a sight glass by design. These discolor and can be prone to leaking. Coolant level must be checked using the dip stick periodically
-
2.0L Naturally Aspirated cars have a loom that rests very close to the coolant tank. This loom has to be relocated as part of this install. See Step 12 for more information
-
-
-
Many steps will show different vehicles. Where detail is important 2.0L specific images are shown
-
Allow engine to cool completely before beginning work
-
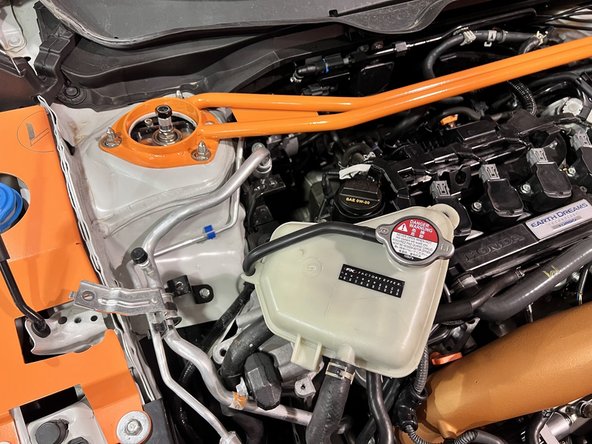
Open the hood to access the OEM coolant tank
-
Remove radiator cap to vent any pressure that might be in the coolant system then reinstall
-
-
-
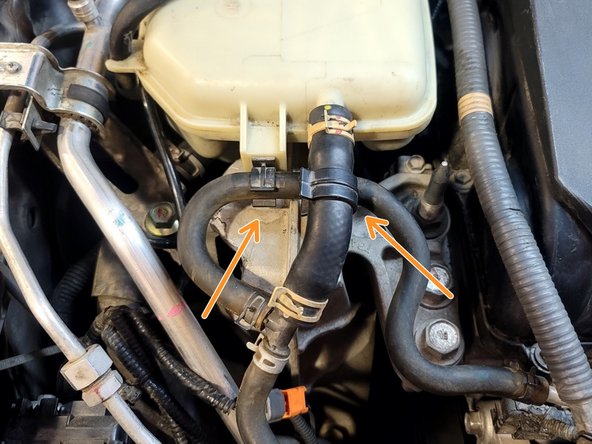
Pop hoses free from clip
-
-
-
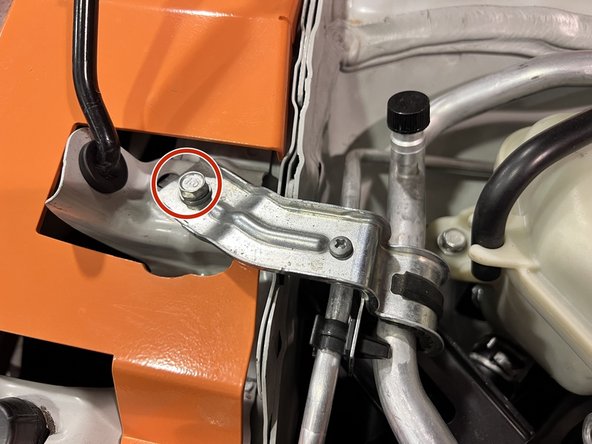
Use a 3/8" ratchet and 10mm socket to remove the 10mm bolt securing the A/C hardline
-
Rotate the bracket up and out of the way to give you some room to work
-
-
-
Use a 14mm socket and ratchet or wrench to remove the (2) 14mm bolts securing the side engine mount auxiliary bracket
-
Socket
-
Wrench
-
You'll probably have to gently move the A/C line for access
-
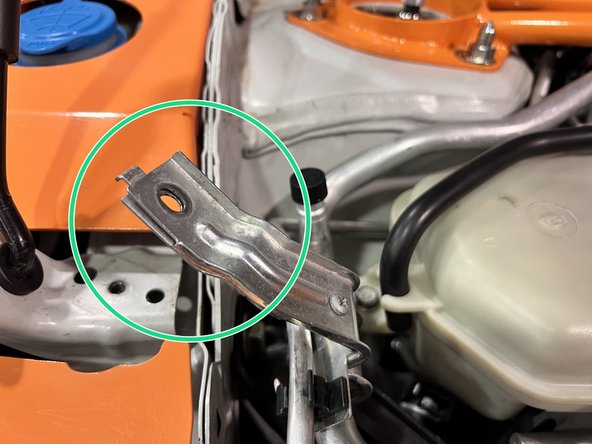
Remove bracket from the vehicle and set aside for reinstallation later
-
-
-
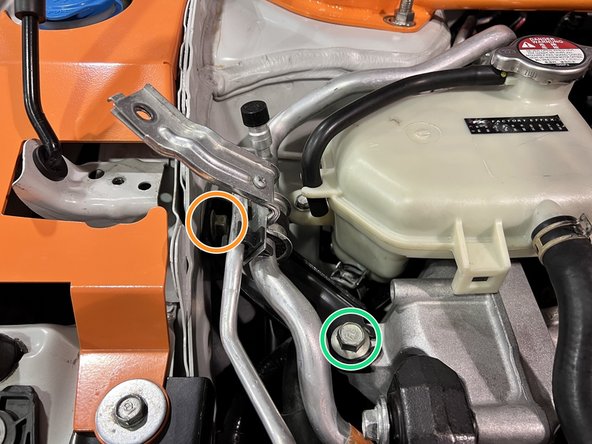
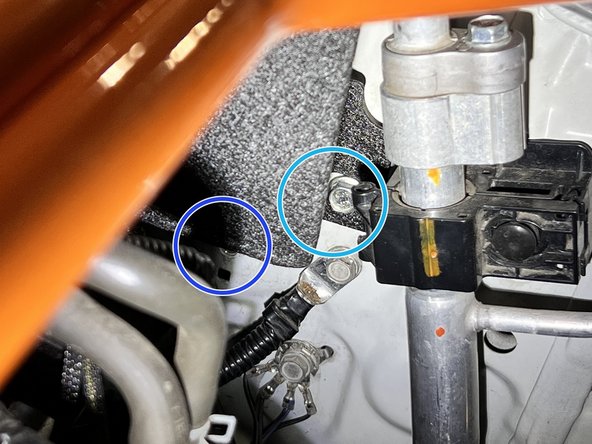
Use 10mm socket, ratchet, and extension to remove (2) 10mm bolts securing the coolant tank to its chassis brackets
-
-
-
Move coolant tank up and out of the chassis brackets as shown
-
Hoses will still be attached at this point
-
-
-
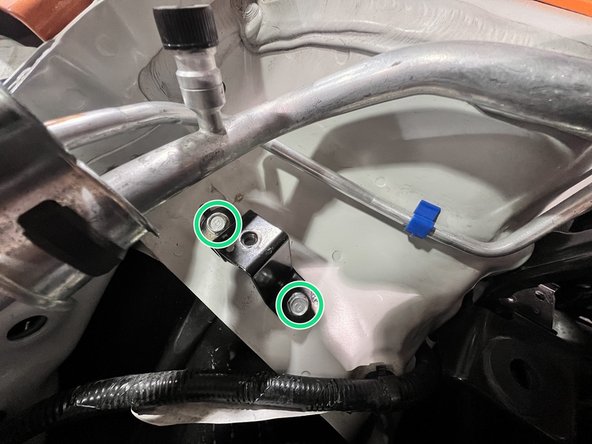
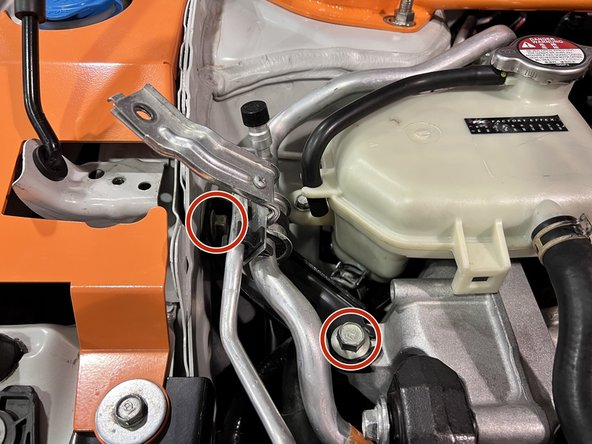
Use a 3/8" ratchet and 10mm socket to remove (2) 10mm bolts securing the upper chassis tank bracket
-
You'll probably have to gently move the A/C line for access
-
You will not reinstall this bracket
-
-
-
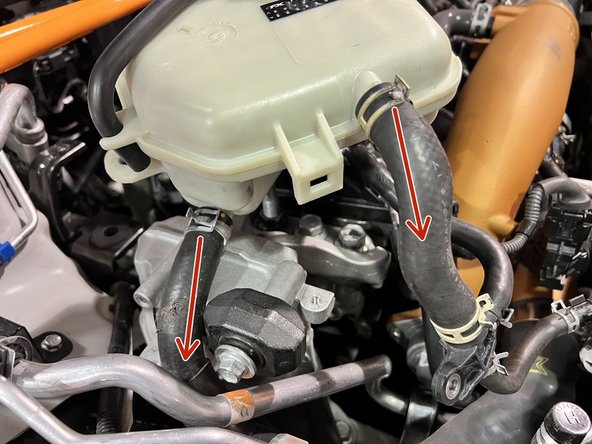
Use needle nose pliers to squeeze and slide back clamps on both upper and lower coolant hoses
-
-
-
Pinching off the hoses helps keep coolant in the system and minimizes the mess and loss
-
You can get a silicone plug and cap set at Harbor Freight for Cheap. SKU: 70792
-
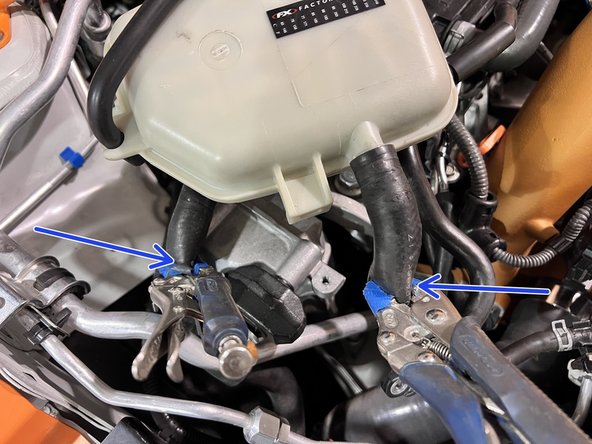
Use plugs, caps, or vice grips to keep coolant from leaking
-
Use two vice grips with blue tape on the jaw ends to pinch off the coolant hoses. Put one on each hose about 3-6" away from the barb
-
The blue tape helps to make sure the jaw does not cut into the hose
-
-
-
Put a rag under the coolant tank to catch coolant leaks
-
Using a slight twist and pulling motion at the same time pull the hoses off the coolant tank until each one pops off
-
Use caution not to break coolant tank. Hose pliers are useful here
-
Remove coolant tank from car
-
Keep the tank barbs as vertical as possible to avoid spilling coolant
-
Remove the loosened pinch style hose clamps from OE coolant lines
-
-
-
If you have a 27WON or aftermarket FSTB installed we suggest removing it at this time to create more space to get access to the back lower bracket. Use our install guide to remove your 27WON FSTB. This is not required but makes things easier
-
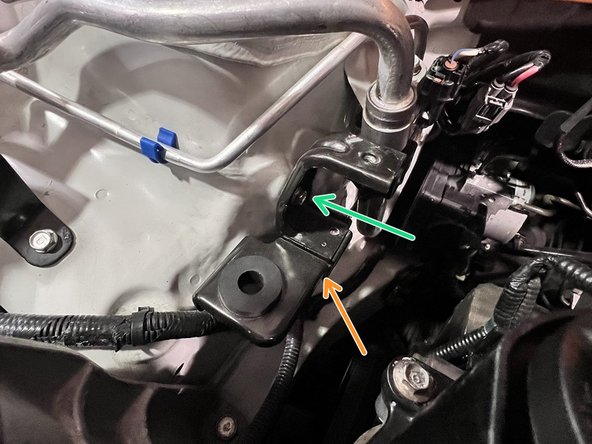
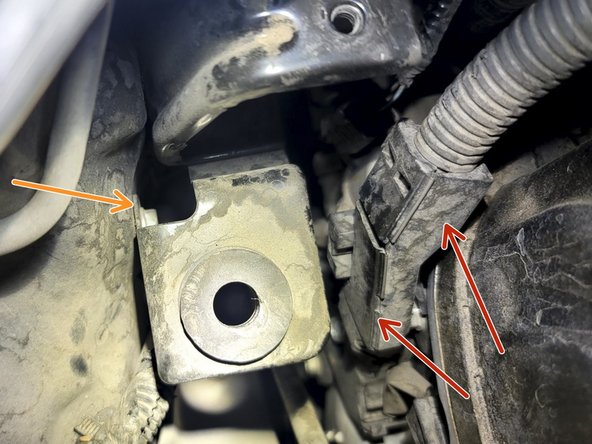
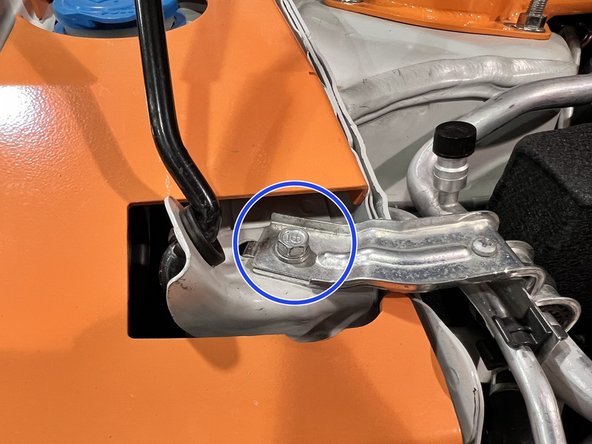
Use a 3/8" ratchet and 10mm socket to remove (2) 10mm bolts securing the lower chassis tank bracket
-
For the lower bolt use a wrench or socket
-
You will not reinstall this bracket later
-
Note the wiring loom in in the way. This will be relocated next as it interferes with coolant tank installation
-
-
-
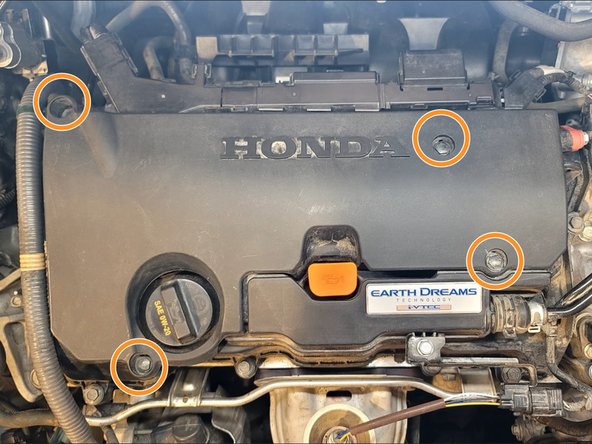
2.0L Naturally Aspirated cars have a loom that rests very close to the coolant tank. This loom has to be relocated as part of this install
-
Use 10mm socket and ratchet to remove four (4) bolts securing engine cover
-
Remove engine cover from car
-
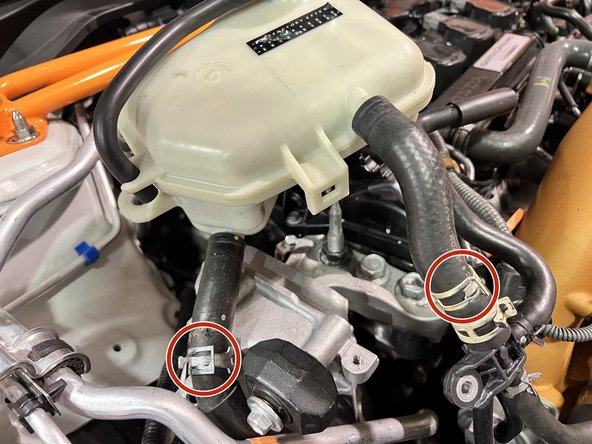
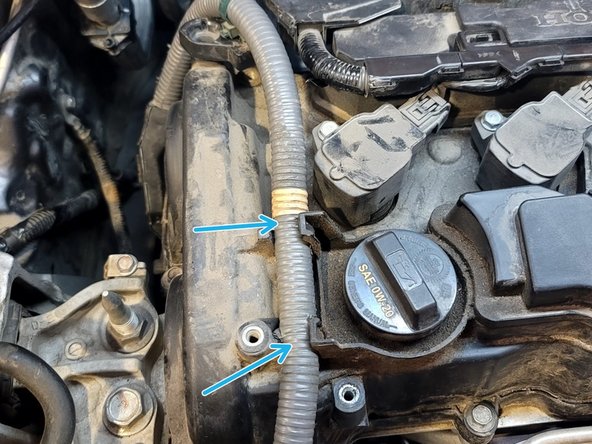
Pop loom out of both clamps near oil fill cap
-
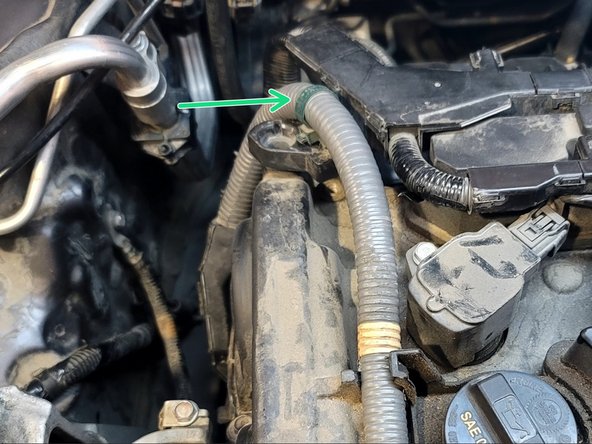
Remove green loom clamp from bracket by pinching it on the bottom side
-
You may find it easier to remove more of the loom from the clips on top of the engine so that you can rotate the bracket
-
-
-
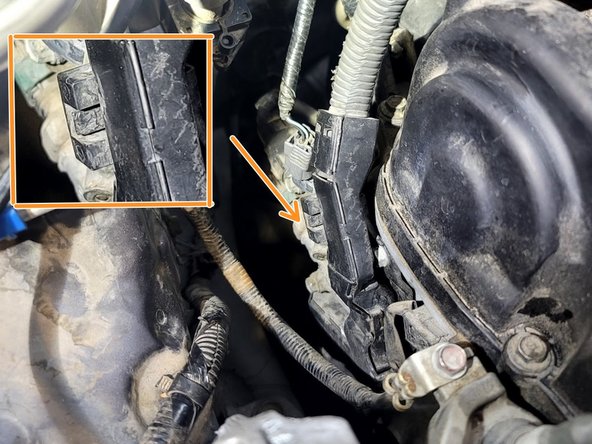
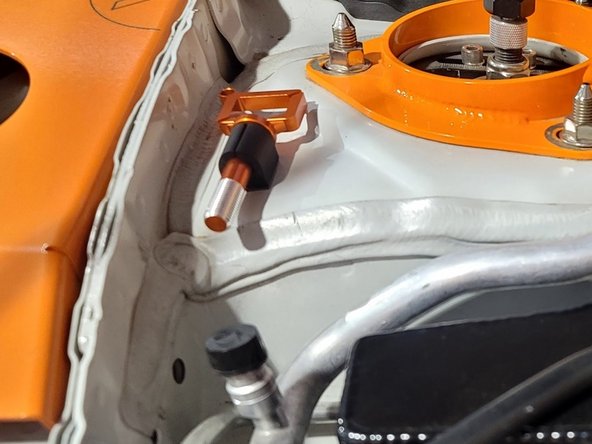
Pop the loom off the bracket on the side of the engine by pushing in the tab and pulling the clip towards you
-
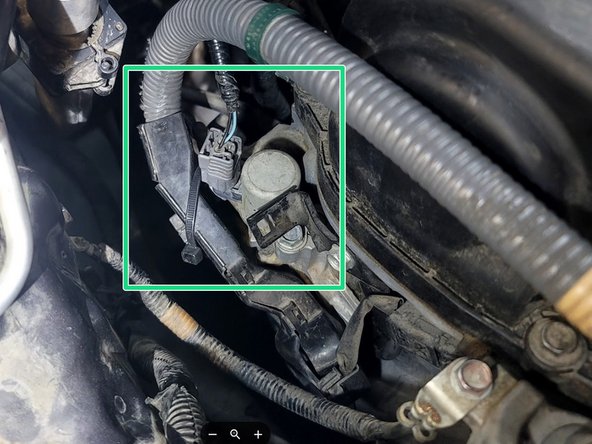
Using supplied 12" ZIP Tie secure the loom as shown
-
Avoid securing loom or tie against plug
-
Reinstall wiring loom into clips then engine cover using 10mm socket and ratchet and OE hardware
-
-
-
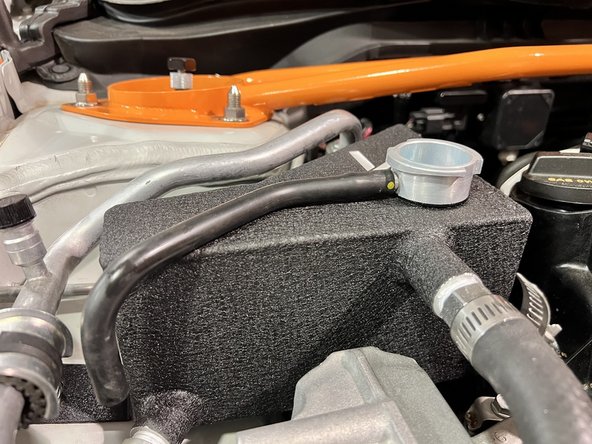
Special thread sealant is used with the NPT style fittings equipped on the 27WON tank. It may seem 'wet' during install. This is normal
-
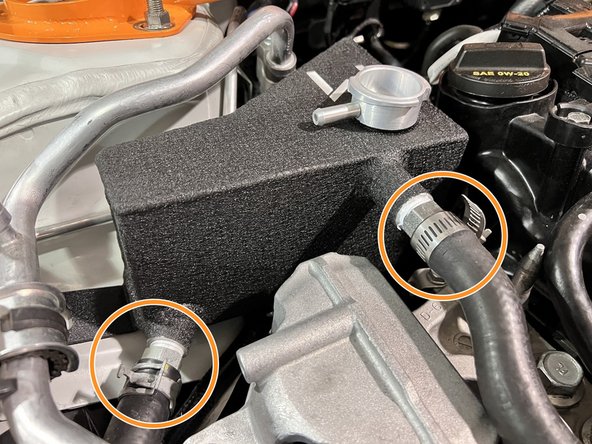
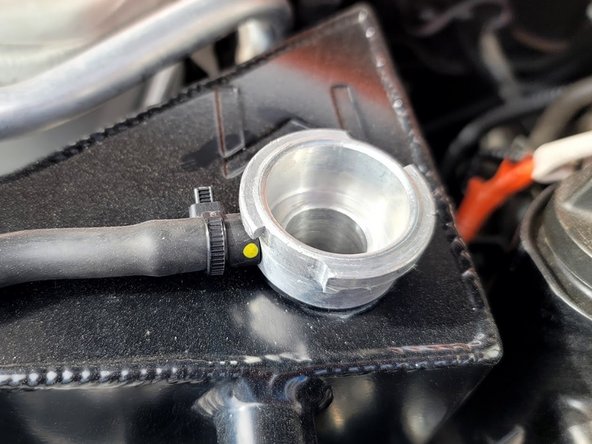
Put the 27WON coolant tank in place and reinstall the coolant hoses over the two barbs and secure with provided clamps or OE clamps where possible
-
The lower barb is different than shown for this application
-
Remove Vice-grips preventing coolant lines from leaking
-
-
-
Two deep breaths. This part can be frustrating. The K20 engine is very close to the chassis in this location
-
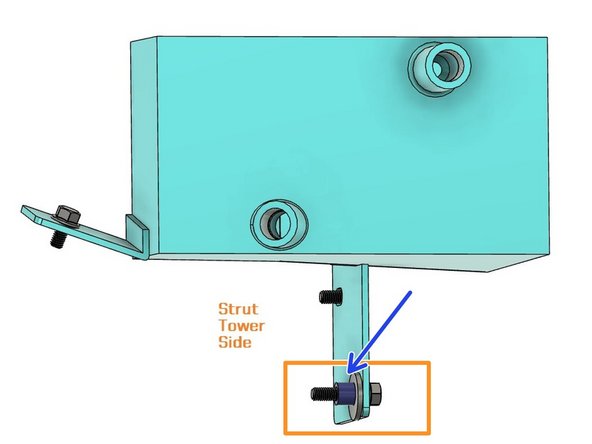
Setup lower mount hardware using spacer, washer, and 25mm long M6 bolt as shown
-
Spacer bushing threads on to hold the hardware stack in place
-
Spacer Bushing
-
Lower Coolant tank into position
-
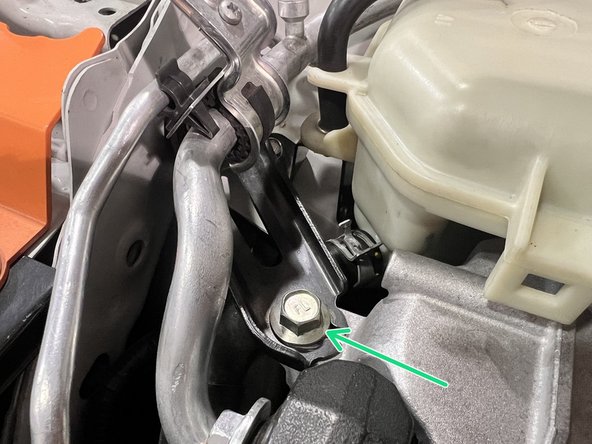
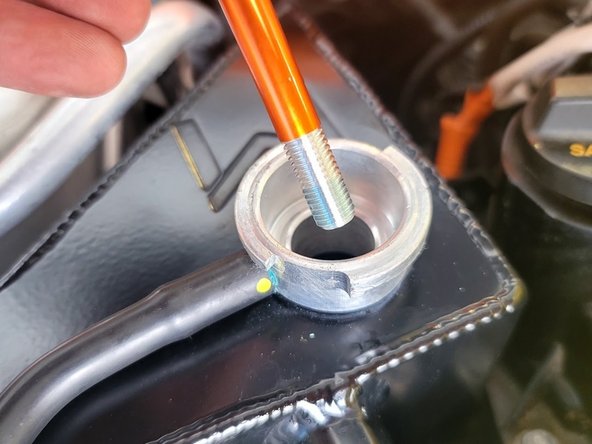
Use a short 10mm socket and ratchet to start threading the lowest mount bolt. Switch to a longer socket as the bolt goes in. Move the loom out from between the coolant tank and engine as needed for extra space
-
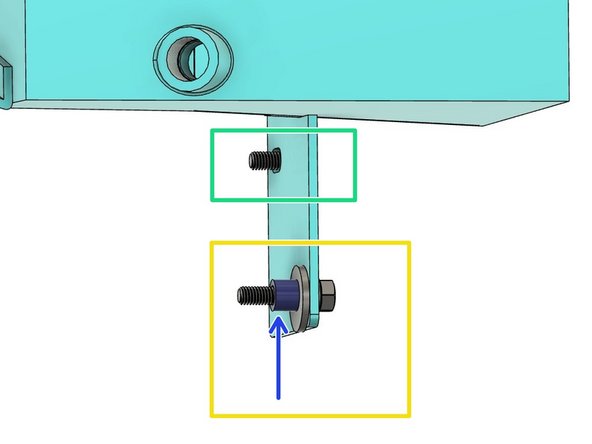
Use fingers to start threading the higher lower mount bolt using provided 12mm long bolt and washer. Use long 10mm socket to get it in further
-
Use your fingers or sockets to turn both bolts to finger tight. Socket will only move about 1/4 turn at a time
-
-
-
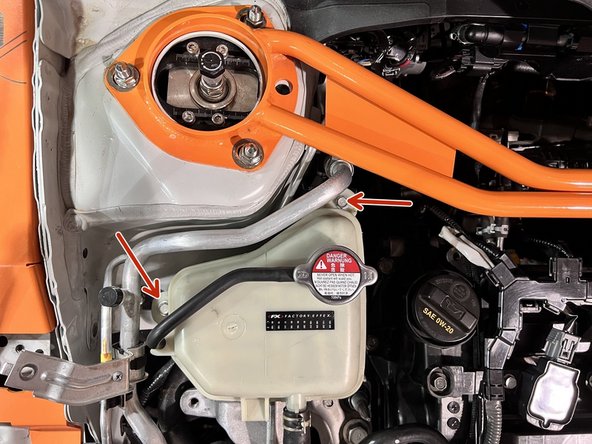
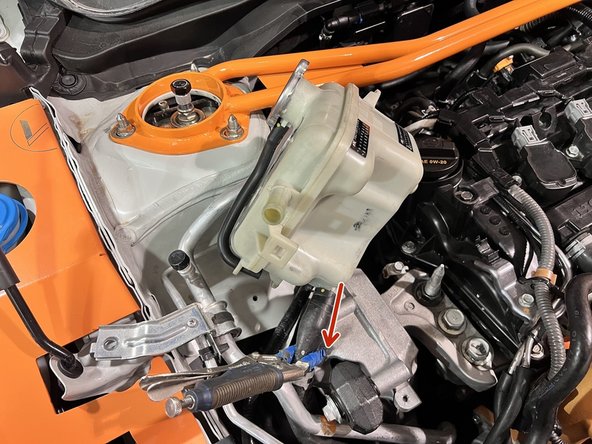
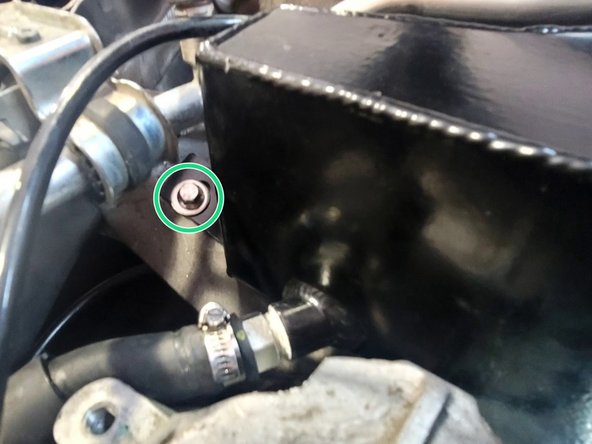
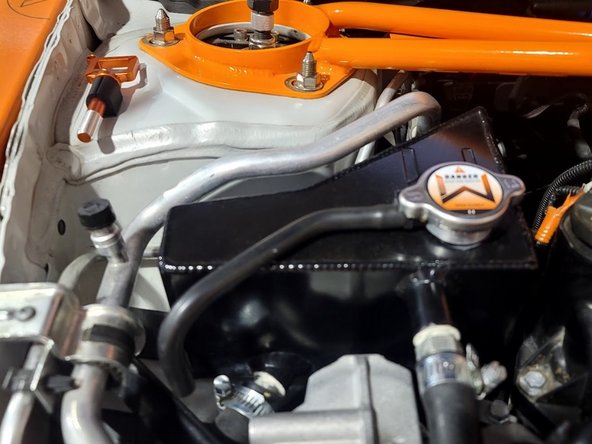
Using a provided M6 washer and a 12mm long M6 flanged bolt, torque to snug down the upper mount bolt for the coolant tank
-
The plane of this mount is at an odd angle. Use extra caution not to cross thread
-
"torque to snug" is defined as 1/4 to 1/2 more rotation after setting resistance is felt
-
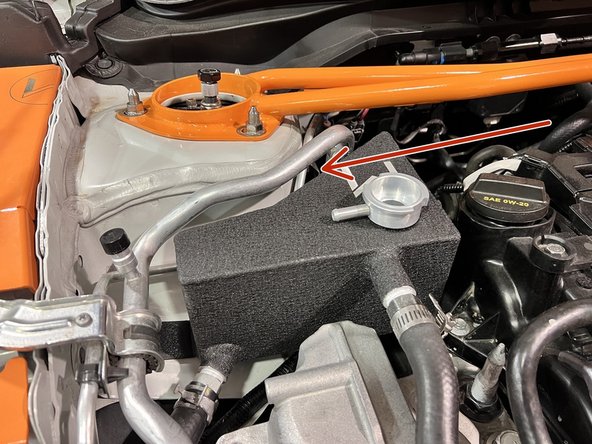
Red arrow shows the location of the back mounting points
-
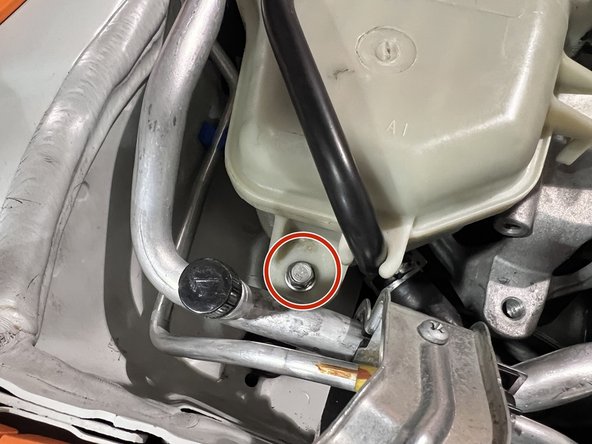
Torque to snug the top lower mount bolt for the coolant tank
-
Washer not shown
-
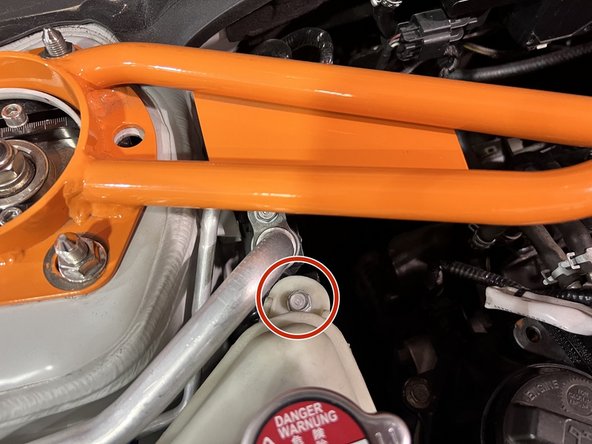
Now torque to snug the lowest mount point for the coolant tank from the previous step
-
Prototype Shown
-
-
-
"torque to snug" is defined as 1/4 to 1/2 more rotation after setting resistance is felt
-
Reinstall the side engine mount bracket with (2) 14mm bolts removed earlier. Torque to snug
-
Reinstall the A/C line bracket with the 10mm bolt. Torque to snug
-
-
-
Drain whatever coolant remains in OE tank into 27WON tank
-
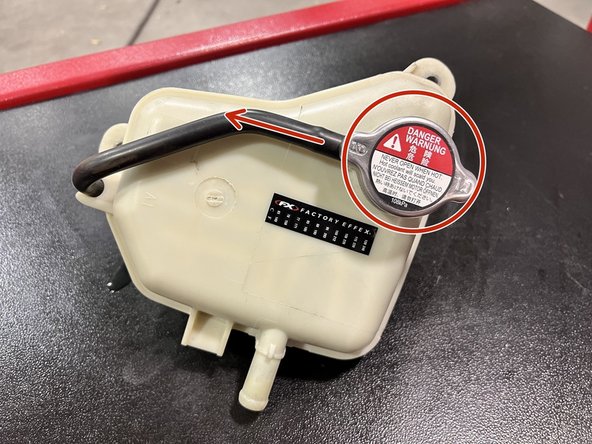
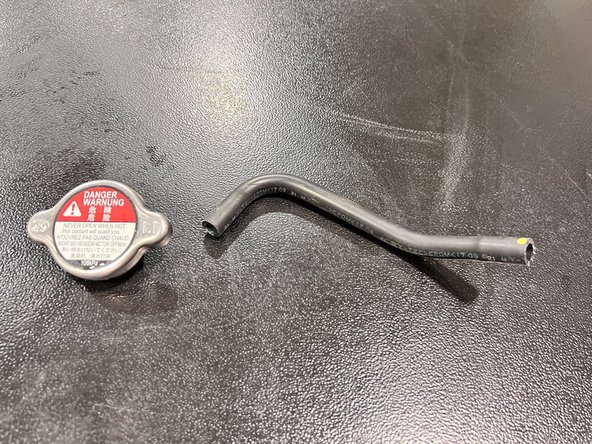
Using a slight twist and pulling motion to remove OEM overflow hose by pulling hose to the side
-
Use caution not to break coolant tank. Hose pliers are useful here
-
Remove radiator cap from OEM tank by twisting the cap off
-
-
-
Install OEM overflow hose onto 27WON tank by pushing it on barb as shown
-
Use a Zip-tie to secure the hose to the barb and prevent leaks
-
Make sure Zip-tie will not interfere with radiator cap
-
Zip-tie should slightly deform hose if it's tight enough
-
Clip Zip-tie
-
-
-
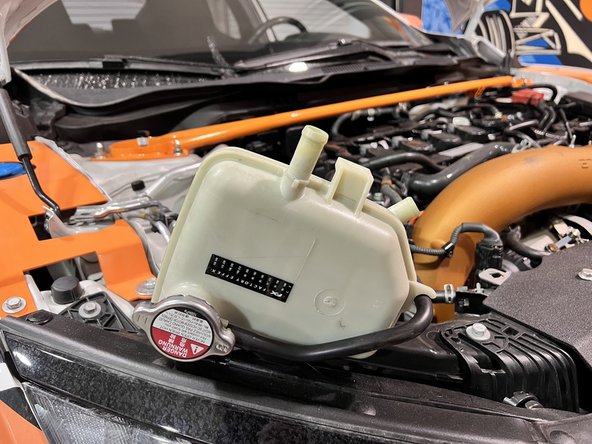
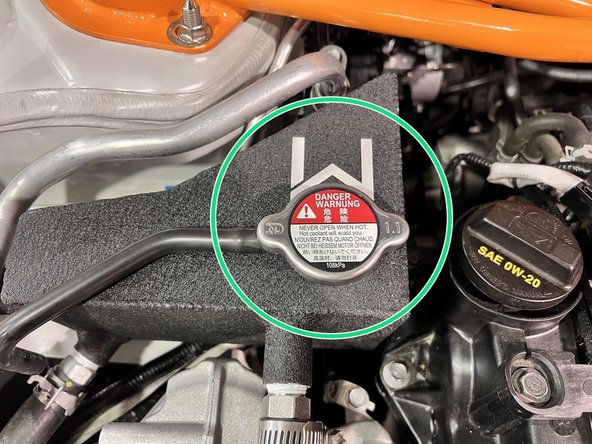
Fully install OEM radiator cap on 27WON Coolant Tank
-
Wipe clean OEM radiator cap and dry
-
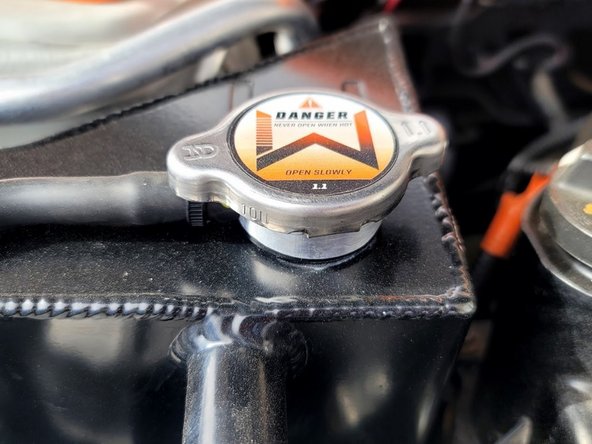
Apply provided sticker to radiator cap in desired orientation
-
-
-
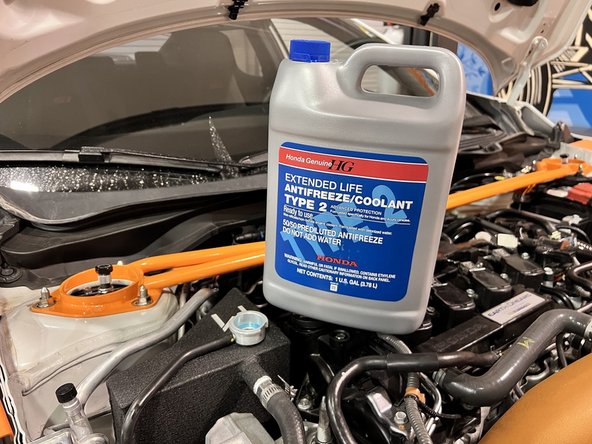
Add coolant to the appropriate level using the 27WON dipstick as a measuring guide. We suggest the use of Honda OEM coolant for your car
-
The next step will show how to check coolant level with Dip Stick
-
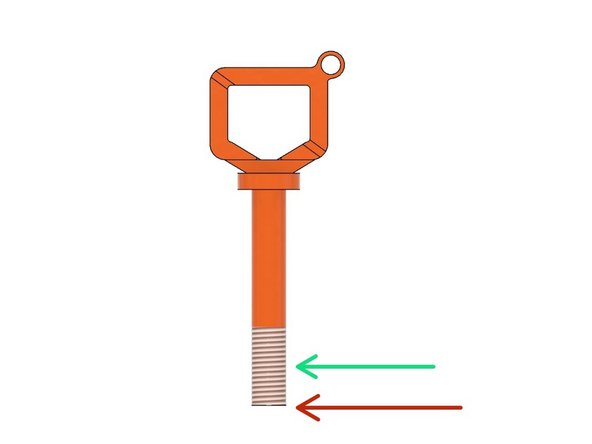
Coolant on at least seven (7) threads is full. If there is no coolant on the Dip Stick then it is low
-
Add Coolant
-
Full Coolant
-
Don't fill coolant past threaded portion of dip stick
-
-
-
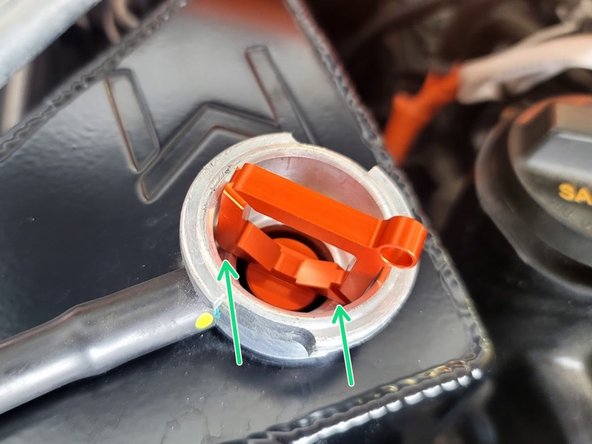
Remove cap to add coolant
-
Fully insert dip stick in the cap bung until it stops on bung
-
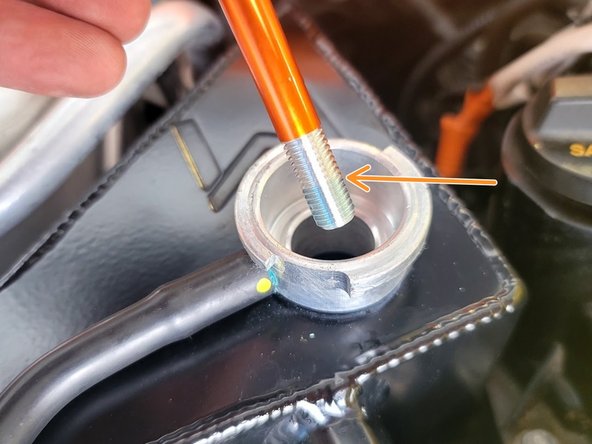
Remove dip stick and check coolant level
-
Add coolant to the appropriate level using the 27WON dipstick as a measuring guide
-
At least 7 threads is considered full, half of threaded section
-
Don't fill coolant past threaded portion of dip stick
-
If you don't have the Dip Stick then just make sure coolant depth is close to 55mm or 2 3/16 in. This is the length of the Dip Stick rod
-
Wipe Dip Stick clean of coolant
-
-
-
With the cap off the tank start up the car and bleed the system by allowing the car to get to an operating temperature of 170 degF before putting the cap back on
-
170 degF is nearly warmed up
-
Monitor for leaks from your tank while warming up the car
-
If any leaks are discovered, recheck hose connections. Reach out to our customer service team for install assistance if needed
-
-
-
Your Dip Stick is designed as a key chain. You can store it there or holster it someplace else
-
Anodized finish may get damaged by keys. This won't impact it's function
-
Place dip stick where it will not be lost or cause any damage if it comes free
-
An automotive clip with 3M VHB adhesive is included
-
Wipe clean and dry area to stick
-
Press down gently to open the slit
-
Peel off tape liner and stick on a clean and flat surface then press clip firmly for 30 seconds
-
Wait 15 minutes before inserting Dip Stick for best result
-
-
-
The 27WON coolant tank does not include a sight glass by design. These discolor and can be prone to leaking. Coolant level must be checked using the dip stick periodically. 27WON recommends checking coolant level during oil changes
-
When possible, make sure car is cool before checking coolant level. Follow owners manual for removal of cap
-
Contents can be under pressure and extremely hot
-
Use provided keychain Dip Stick to check coolant levels as shown in step 22 & 23
-
No coolant on threads means coolant is low
-
Coolant on at least 7 threads is full
-
Don't fill coolant past threaded portion of dip stick
-
If you can't find your Dip Stick you can check coolant level without it. Make sure coolant is to a depth of 2" give or take 1/4"
-
-
-
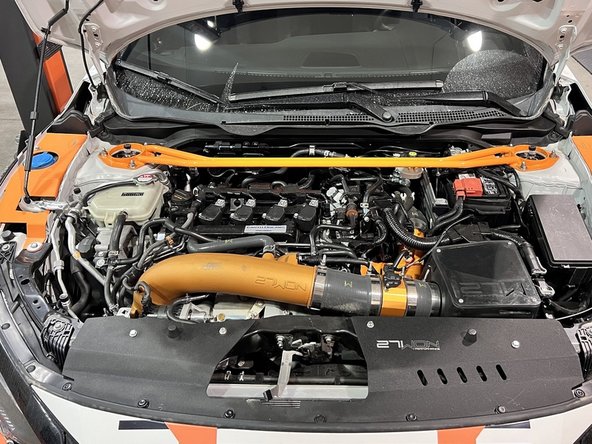
This completes the installation of your 27WON Performance Coolant Tank
-
We hope you were impressed with your 27WON experience and love your new Coolant Tank for years to come. Email us at sales@27won.com or call us at 571-271-0271 with any questions or concerns
-
Please Leave a review here: https://store.27won.com/upgraded-coolant...
-
Share your experience using #27WON on Instagram and Facebook
-