Introduction
In this installation guide we have provided step by step instructions to install the 27WON Performance Front Strut Tower Bar.
Advisory:
- The engine bay will be hot after recent vehicle operation. Allow the vehicle to cool or use a fan to cool the engine bay before working on the vehicle.
- When disconnecting a battery, always disconnect the negative battery terminal first and be careful with the use of metal tools.
-
-
First and foremost; THANK YOU for becoming a part of the 27WON Family. We hope to REDEFINE your experience of the aftermarket with the highest level Parts, Customer Service, Packaging, & Support
-
These instructions were written with a 2018 Civic Type R and 2018 Honda Civic SI. Other models will be similar
-
-
-
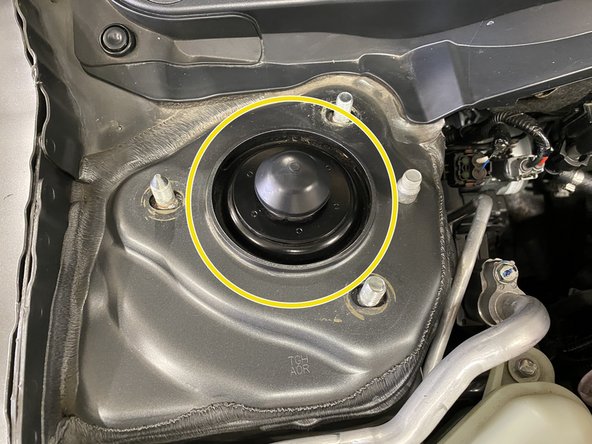
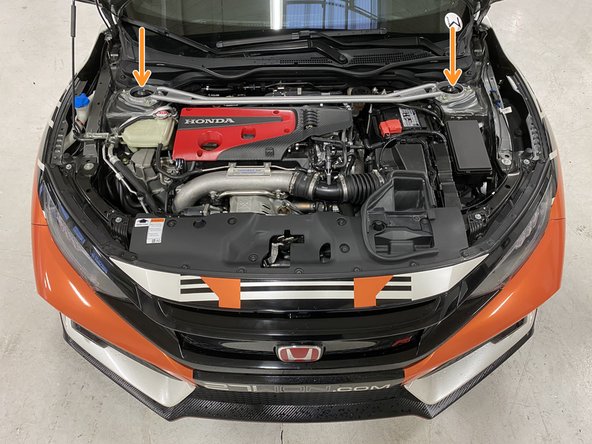
Locate the strut tower tops in the engine bay
-
Shown are the passenger and driver side strut tower tops. Some vehicle models and varying years have a black metal plate on the strut top and some do not. This black metal plate is not retained
-
-
-
This step is only necessary for Non-Type R vehicles. If you have a Type R then you can skip this step. Example was performed on a 2018 Honda Civic SI
-
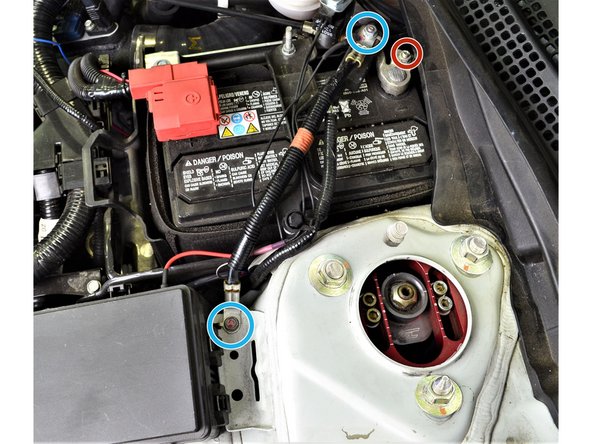
Disconnect the negative battery cable by loosening the 10mm nut (red circle), with a wrench or a 10mm socket and ratchet, and remove it from the terminal
-
Remove the OEM ground battery cable (blue circles) by unbolting the 10mm bolt and nut (blue circles) with a wrench or 10mm socket and ratchet
-
Attach the provided ground battery cable
-
Both brackets have tabs that fixes them in the correct orientations
-
Start threading the 10mm bolt and nut (orange circles) by hand, tighten down with a wrench or 10mm socket and ratchet
-
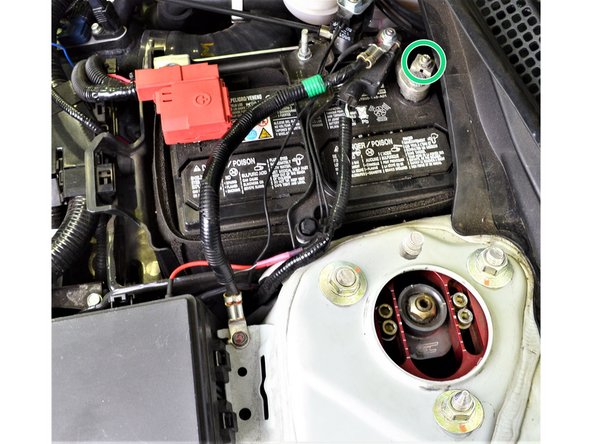
Reattach the negative battery cable to the terminal (green circle) and tighten 10mm nut with wrench or 10mm socket and ratchet
-
-
-
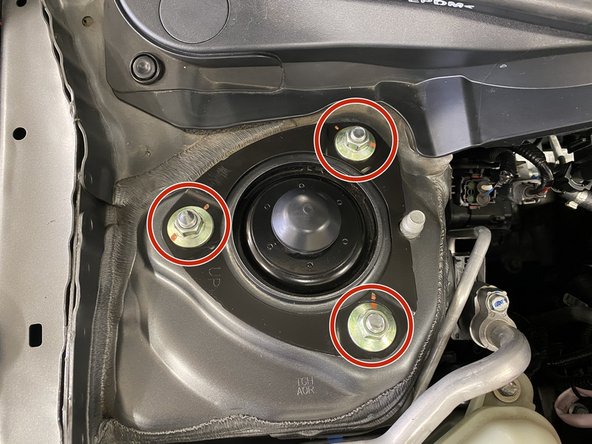
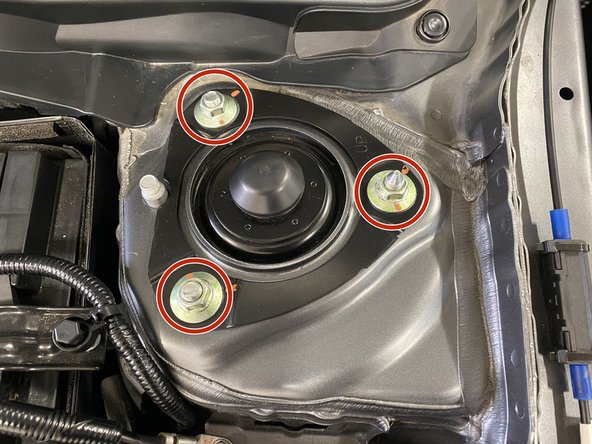
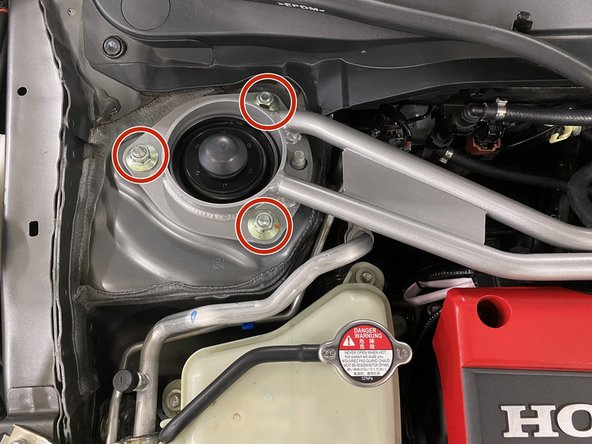
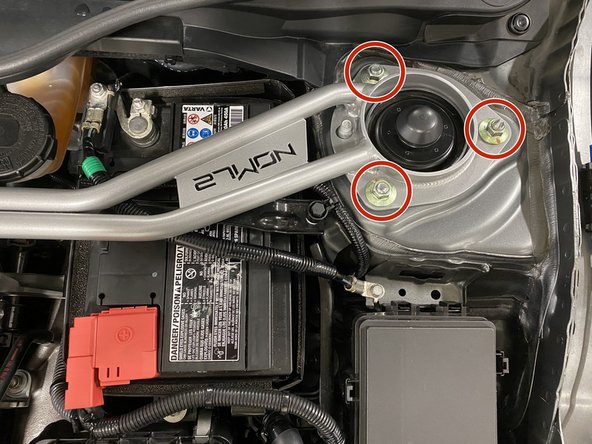
Remove three (3) flange nuts with a 14mm deep socket and ratchet wrench
-
If equipped, remove the black metal plate
-
This black metal plate is not reused with the 27WON Strut Bar
-
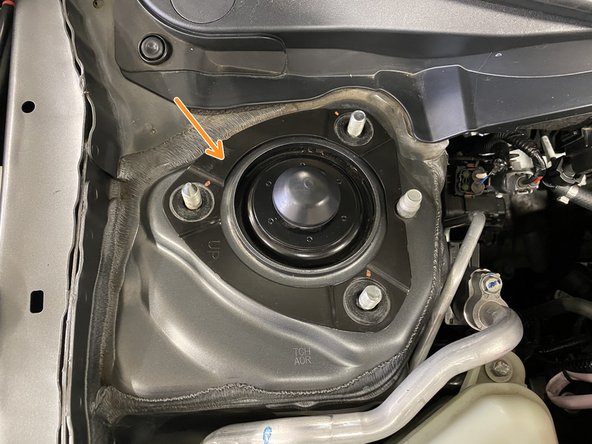
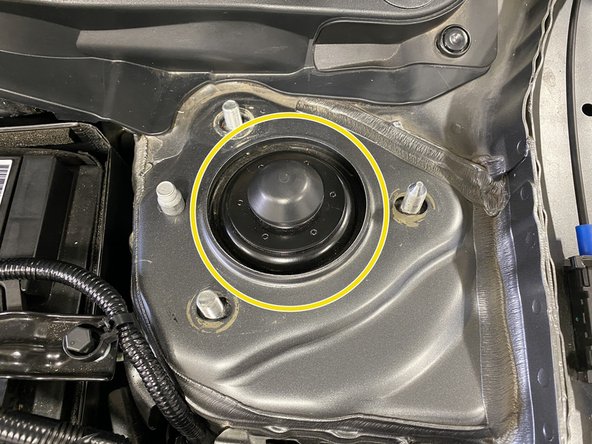
Clean any debris from the strut top surface
-
-
-
Remove three (3) flange nuts with a 14mm deep socket and ratchet wrench
-
If equipped, remove the black metal plate
-
This black metal plate is not reused with the 27WON Strut Bar
-
Clean any debris from the strut top surface
-
-
-
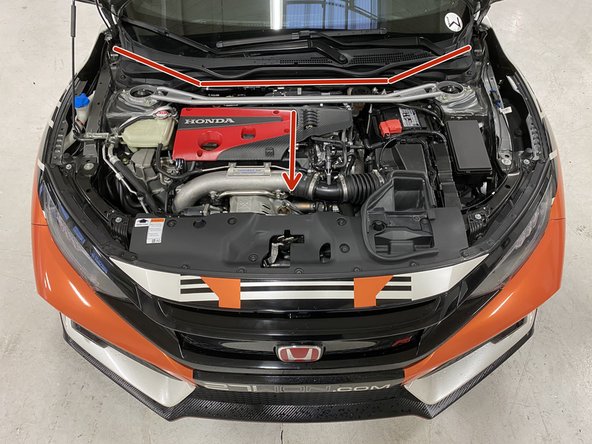
Orientate the strut bar so the center section is forward as shown
-
Place each end of the strut bar down on the strut tops over the studs
-
Raw color is used only for install instruction, actual color may vary
-
-
-
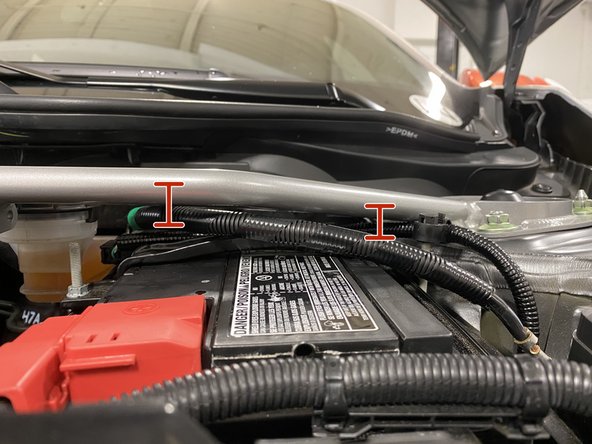
The strut bar sits very close to the battery cable, please verify the cables are not pushing up into the strut bar
-
If the cables are pushing into the strut bar, adjust the cables by flexing them downward a bit to create clearance
-
The battery cables are insulated and protected by a plastic jacket but minimizing contact with the bar is preferred
-
-
-
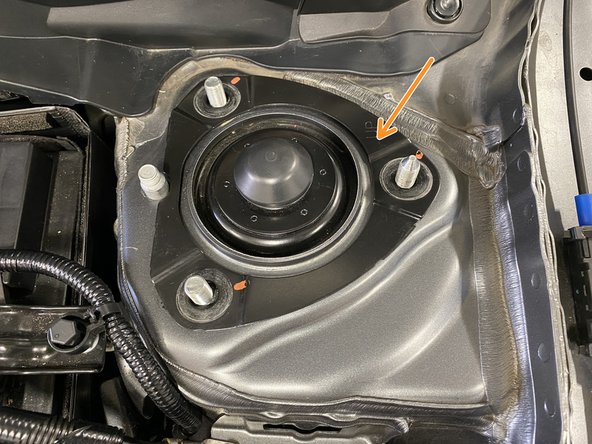
Install the three (3) OEM flange nuts
-
Using a torque wrench and 14mm socket, torque each to 45-47 lb-ft
-
-
-
Install the three (3) OEM flange nuts
-
Using a torque wrench and 14mm socket, torque each to 45-47 lb-ft
-
-
-
If you purchased one of our Brake Brace as well then now is the time to start that install, below is the link to those instructions: https://www.performanceinstalls.com/Guid...
-
If you haven't purchased a Brake Brace but would like too, then you can do that here: https://store.27won.com/fstb-master-cyli...
-
-
-
This completes the installation of your 27WON Performance Front Strut Tower Bar
-
We hope you were impressed with your 27WON experience and love your new Front Strut Tower Bar for years to come. Email us at sales@27won.com or call us at 571-271-0271 with any questions or concerns
-
Please Leave a review here: https://store.27won.com/civic10thgenfron...
-
Stay Connected with the latest developments with the 27WON Monthly Newsletter: https://store.27won.com/27won-newsletter...
-
See the latest Products and Tech Videos from 27WON with a quick Subscribe: https://www.youtube.com/channel/UCF7uI0N...
-
Share your experience using #27WON on Instagram and Facebook
-